PRINT LABEL
PRINT LABEL ( { aTable : Table }{; > : >}{; * } )
PRINT LABEL ({ aTable : Table }{; document : Text {; > : >}}{; * } )
| Parameter | Type | Description | |
|---|---|---|---|
| aTable | Table | → | Table to print, or Default table, if omitted |
| document | Text | → | Name of disk label document |
| * | Operator | → | Suppress the printing dialog box |
| > | > | → | Do not reinitialize print settings |
History
| Release | Changes |
|---|---|
| 2004 | Modified |
| <6 | Created |
Description
PRINT LABEL enables you to print labels with the data from the selection of aTable.
If do not specify the document parameter, PRINT LABEL prints the current selection of aTable as labels, using the current output form. You cannot use this command to print subforms.
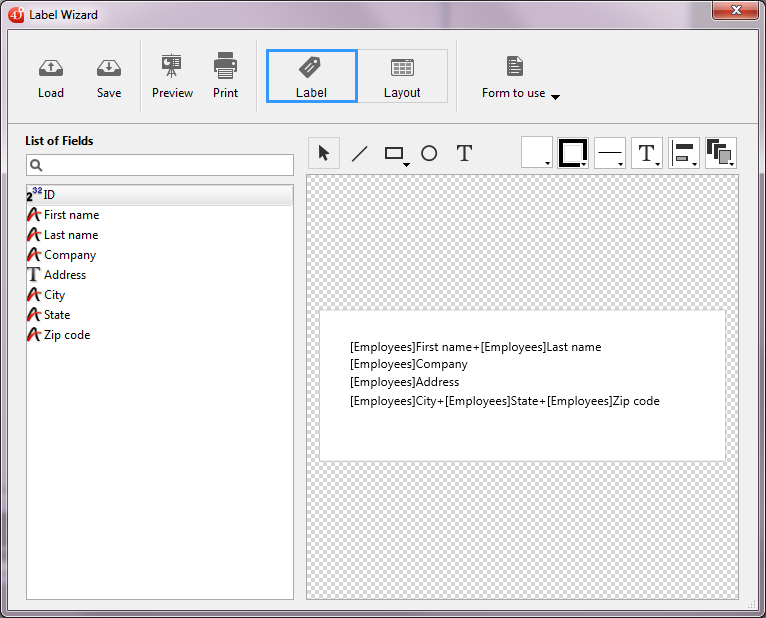
If you specify the document parameter, PRINT LABEL enables you to access the Label Wizard (shown below) or to print an existing Label document stored on disk. See the following discussion.
By default, PRINT LABEL displays the Print job dialog box before printing. If the user cancels the dialog box, the command is canceled and the labels are not printed. You can suppress these dialog box by using either the optional asterisk (*) parameter or the optional “greater than” (>) parameter:
- The * parameter causes a print job using the current print parameters.
- Furthermore, the > parameter causes a print job without reinitializing the current print parameters. This setting is useful for executing several successive calls to PRINT LABEL (ex. inside a loop) while maintaining previously set customized print parameters. For an example of use of this parameter, refer to the PRINT RECORD command description.
Note that this parameter has no effect if the Label Wizard is involved.
If the Label Wizard is not involved, the OK variable is set to 1 if all labels are printed; otherwise, it is set to 0 (zero) (i.e., if user clicked Cancel in the printing dialog box).
If you specify the document parameter, the labels are printed with the label setup defined in document. If document is an empty string (""), PRINT LABEL will present an Open File dialog box so the user can specify the file to use for the label setup. If document is the name of a document that does not exist (for example, pass char(1) in document), the Label Wizard is displayed and the user can define the label setup.
Note: If the table has been declared “invisible” in Design mode, the Label Wizard will not be displayed.
4D Server: This command can be executed on 4D Server in a stored procedure. In this context:
- Make sure that no dialog box appears on the server machine (except for a specific requirement). To do this, it is necessary to call the command with the * or > parameter.
- The syntax which makes the label editor appear does not work with 4D Server; in this case, the system variable OK is set to 0.
- In the case of a problem concerning the printer (out of paper, printer disconnected, etc.), no error message is generated.
Example 1
The following example prints labels using the output form of a table. The example uses two methods. The first is a project method that sets the correct output form and then prints labels:
 ALL RECORDS([Addresses]) // Select all records
 FORM SET OUTPUT([Addresses];"Label Out") // Select the output form
 PRINT LABEL([Addresses]) // Print the labels
 FORM SET OUTPUT([Addresses];"Output") // Restore default output form
The second method is the form method for the form "Label Out". The form contains one variable named vLabel, which is used to hold the concatenated fields. If the second address field (Addr2) is blank, it is removed by the method. Note that this task is performed automatically with the Label Wizard. The form method creates the label for each record:
  // [Addresses]; "Label Out" form method
 Case of
    :(FORM Event.code=On Load)
       vLabel:=[Addresses]Name1+" "+[Addresses]Name2+Char(13)+[Addresses]Addr1+Char(13)
       If([Addresses]Addr2 #"")
          vLabel:=vLabel+[Addresses]Addr2+Char(13)
       End if
       vLabel:=vLabel+[Addresses]City+", "+[Addresses]State+" "+[Addresses]ZipCode
 End case
Example 2
The following example lets the user query the [People] table, and then automatically prints the labels “My Labels”:
 QUERY([People])
 If(OK=1)
    PRINT LABEL([People];"My Labels";*)
 End if
Example 3
The following example lets the user query the [People] table, and then lets the user choose the labels to be printed:
 QUERY([People])
 If(OK=1)
    PRINT LABEL([People];"")
 End if
Example 4
The following example lets the user query the [People] table, and then displays the Label Wizard so the user can design, save, load and print any labels:
 QUERY([People])
 If(OK=1)
    PRINT LABEL([People];Char(1))
 End if
See also
Properties
| Command number | 39 |
| Thread safe | no |
| Modifies variables | OK |