Archive and upload your Project
OBJECTIVES
Archive and upload your project to App Store Connect.
STEP 1. Xcode configuration
- If you have chosen an Apple Developer Account as an individual, your account is immediately available.
- If your have chosen an Apple Developer Account as an organization, you must wait for Apple validation.
- When your account is accessible, add it to Xcode in Preferences > Accounts.
- Xcode will automatically install the necessary provisioning and certificates.
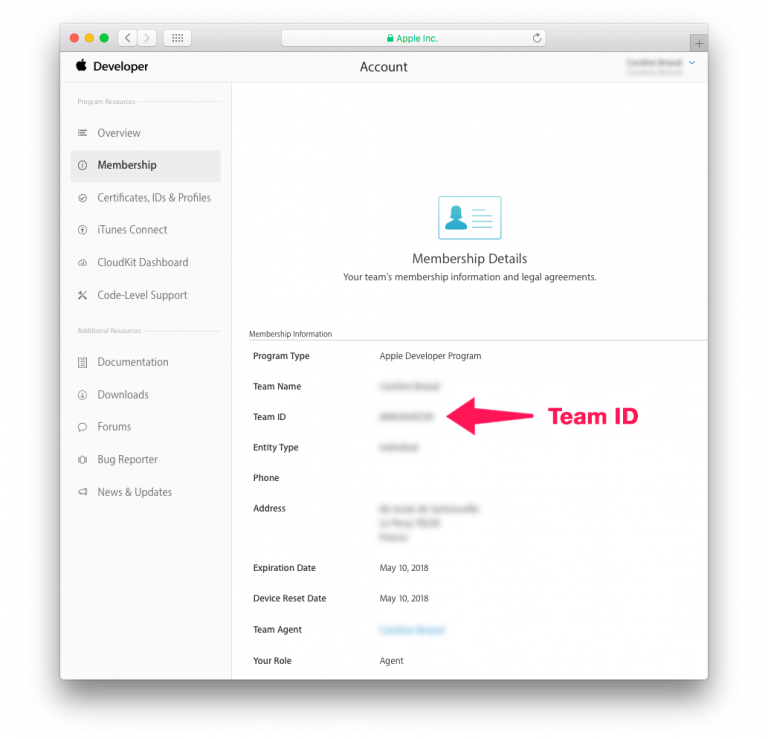
STEP 2. Get your Team ID
- Log into your Apple Developer Account. You can find your Team ID in Membership.
STEP 3. 4D for iOS configuration
- Launch 4D for iOS
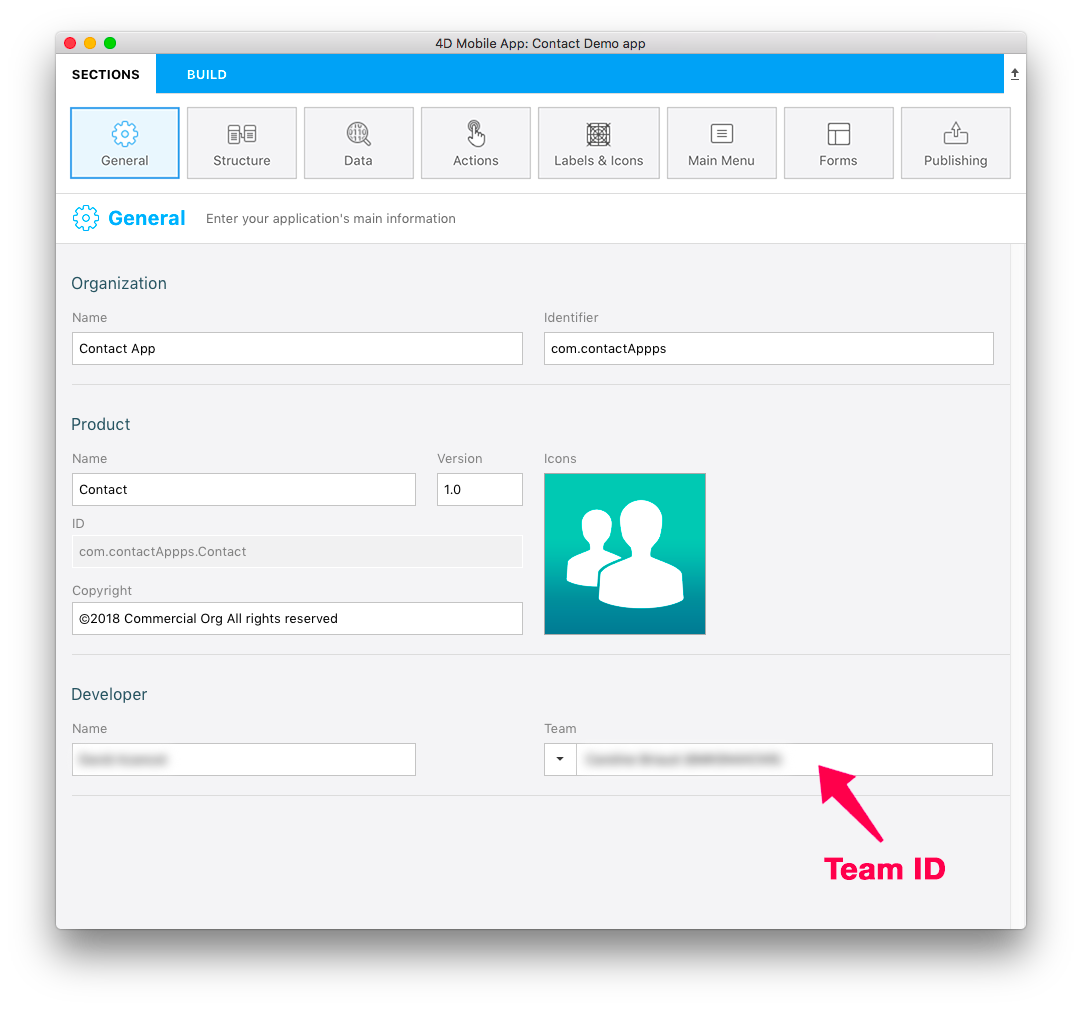
- On the SECTIONS tab:
General: Enter your Team ID
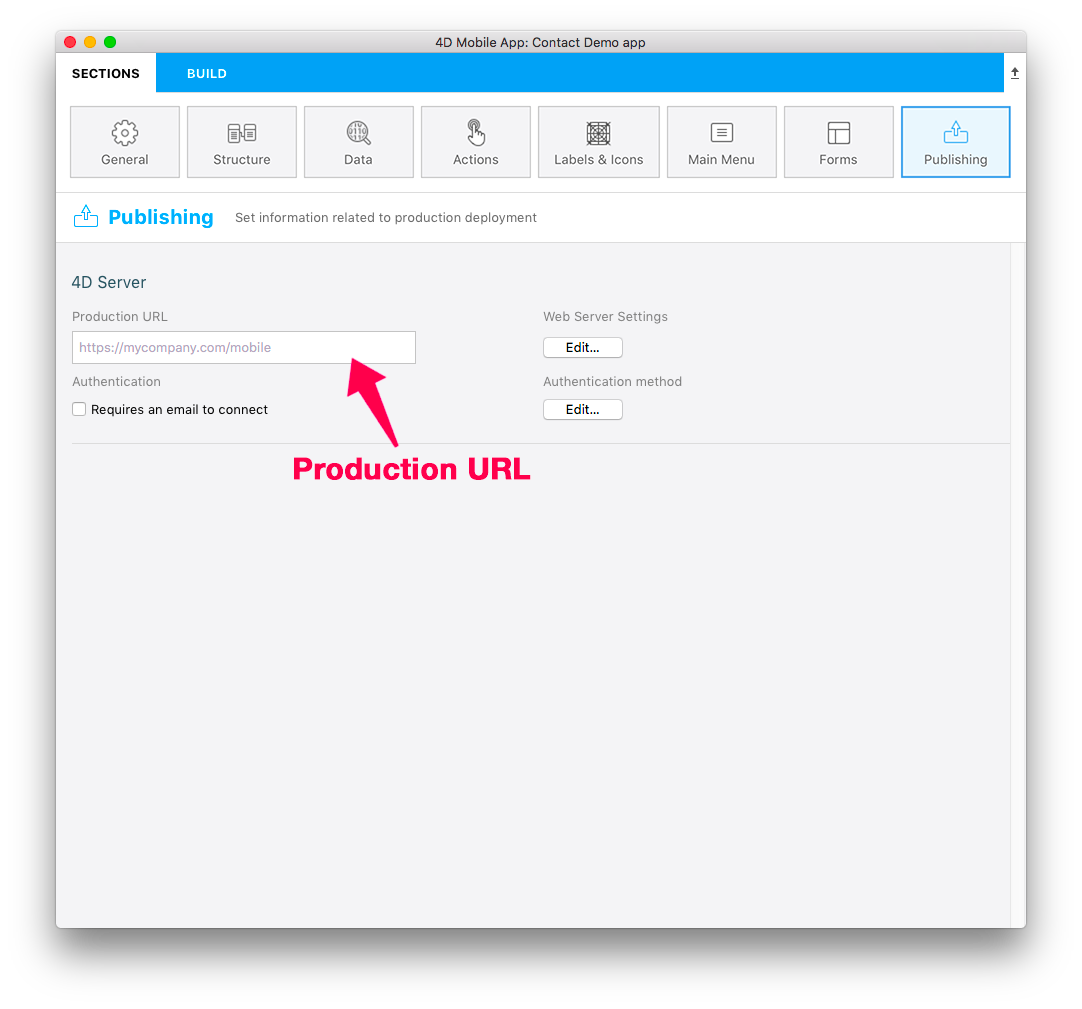
Publishing: Enter your production URL
(HTTPS is mandatory for deployment).
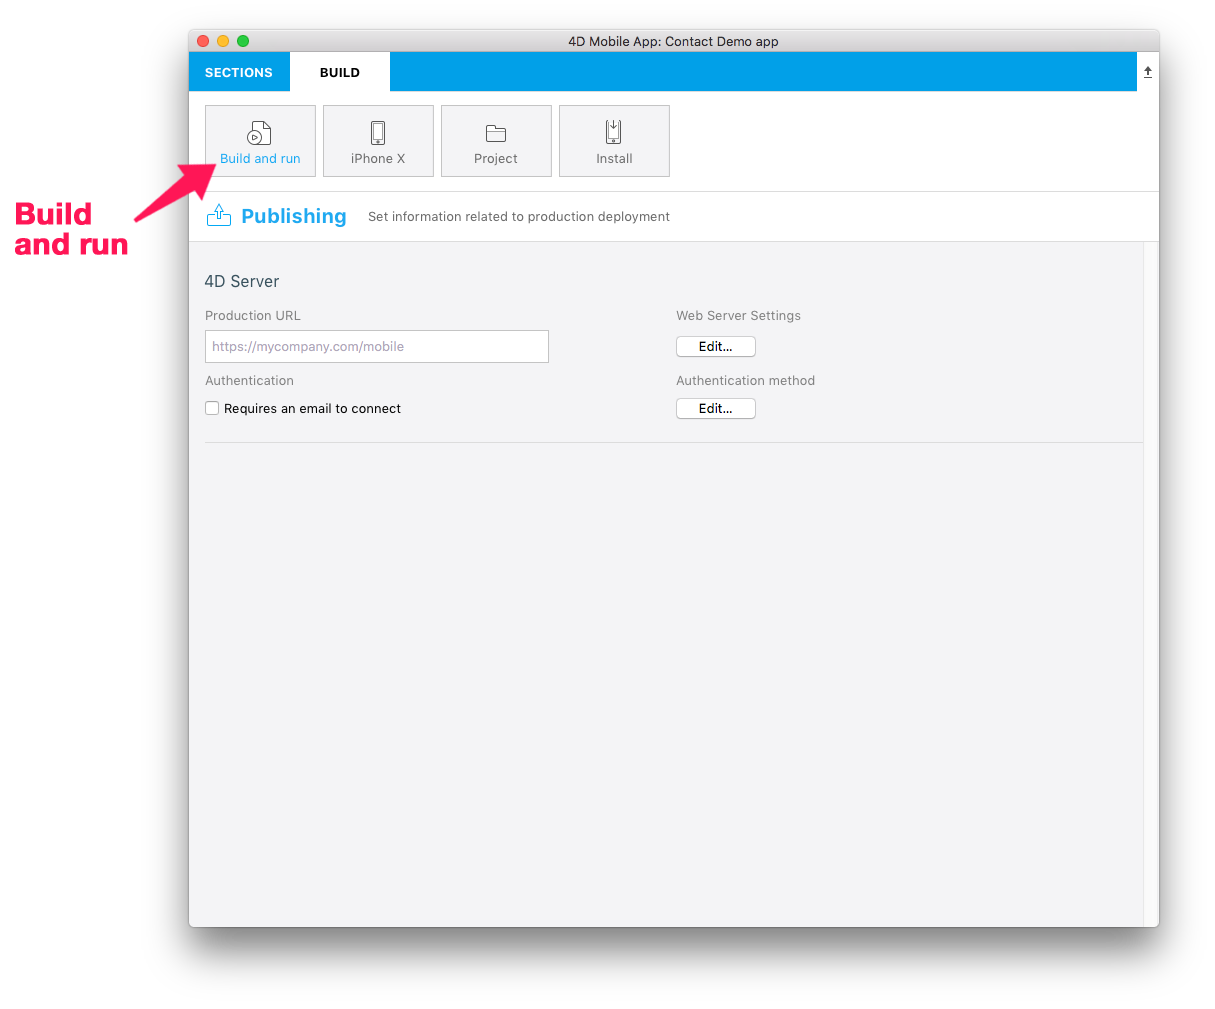
- On the BUILD tab:
Build and Run: Build your Project
STEP 4. Open your project with Xcode
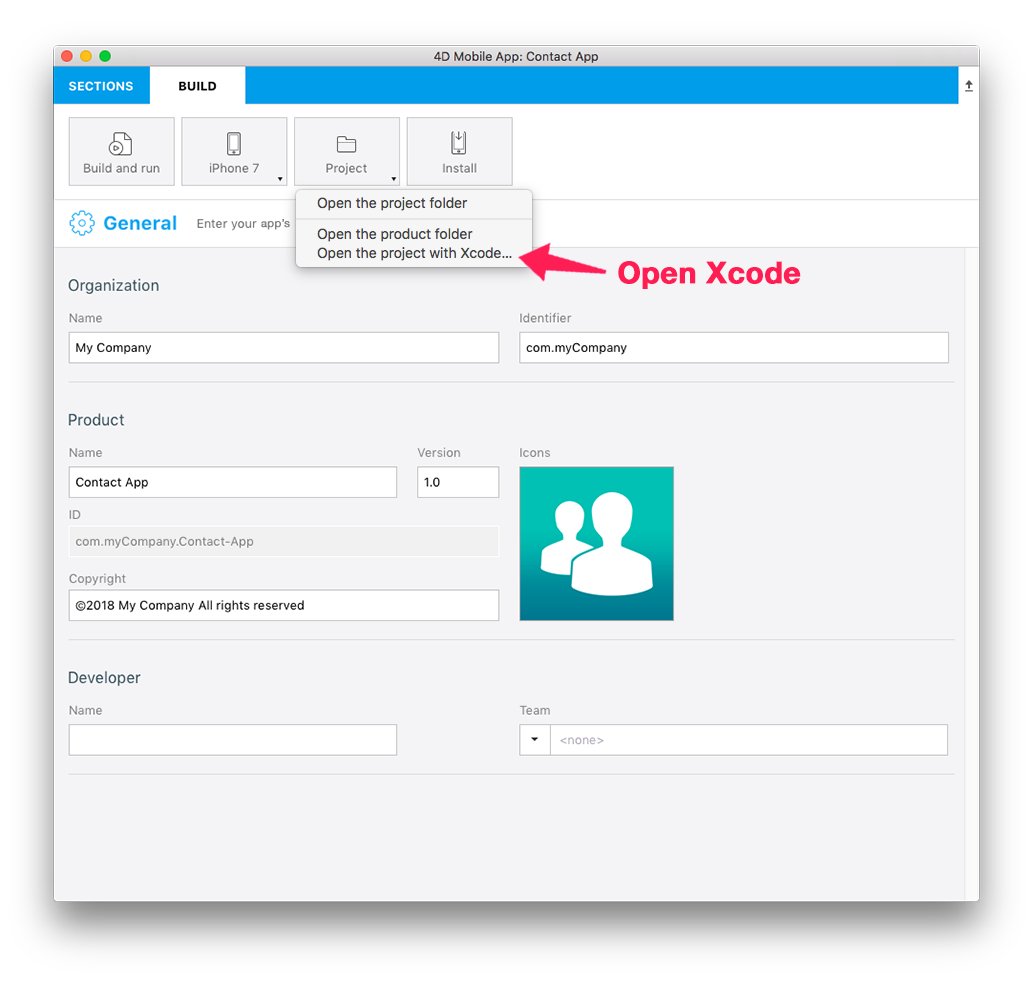
- From the 4D for iOS Project Editor's BUILD tab, click on Project > Open the project with Xcode
STEP 5. Archive your project from Xcode
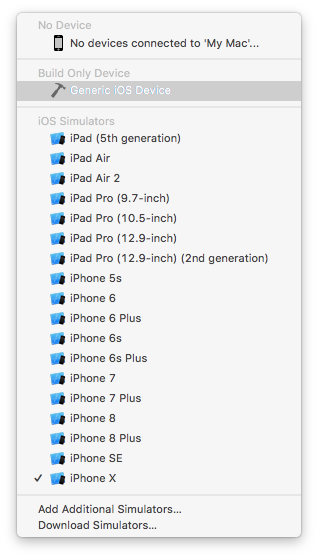
- From Xcode go to the simulator Menu and select Generic iOS Device.
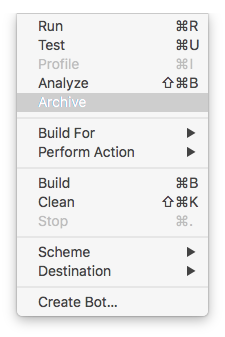
- Then from the menu, click on Product and select Archive
STEP 6. Validate your project
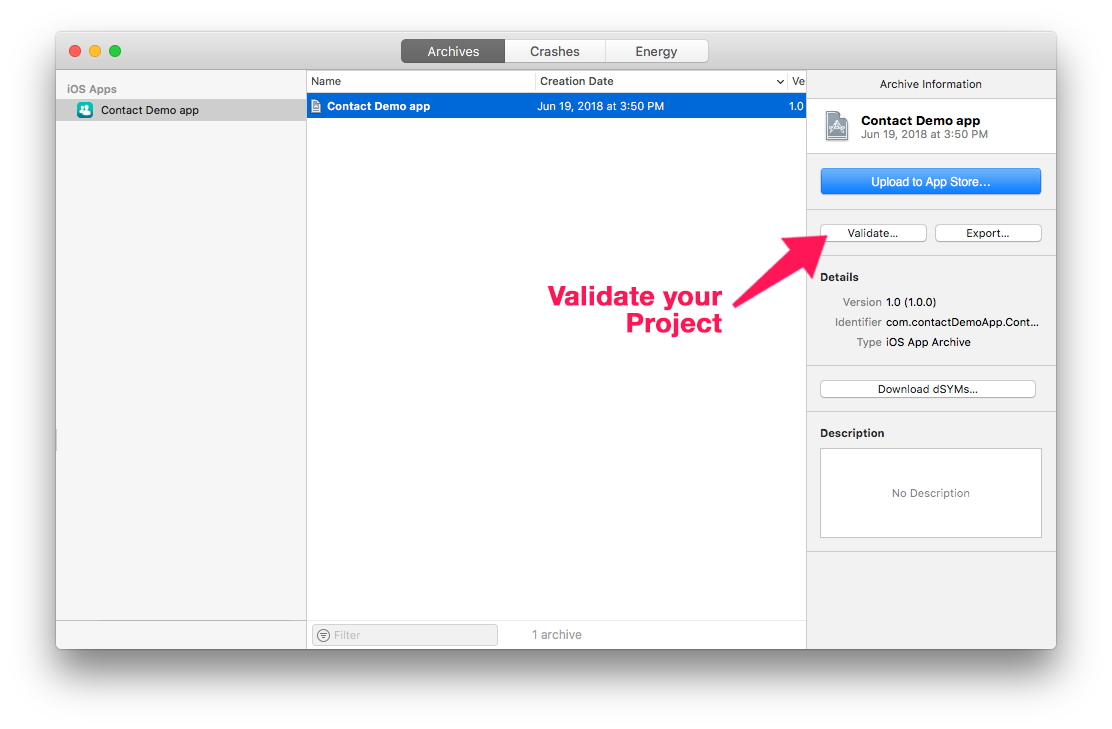
At the end of the archive process, the Organizer window appears with the archive you have just created.
Click on the Validate button to start the validation process.
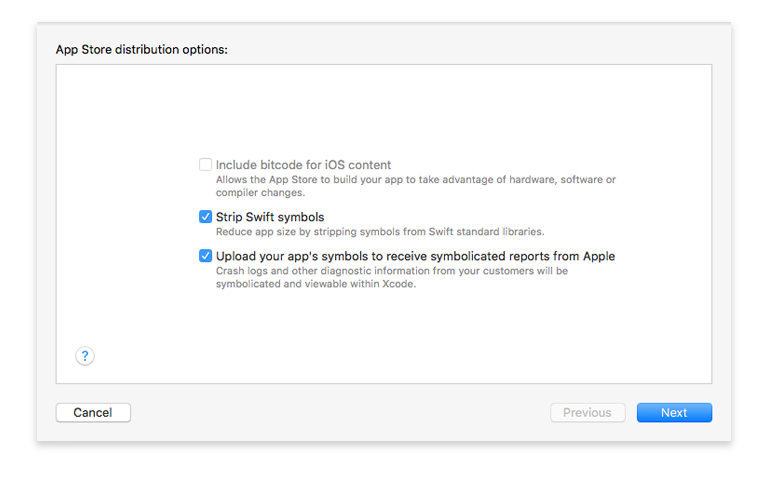
- The first step is selecting the App Store distribution options.
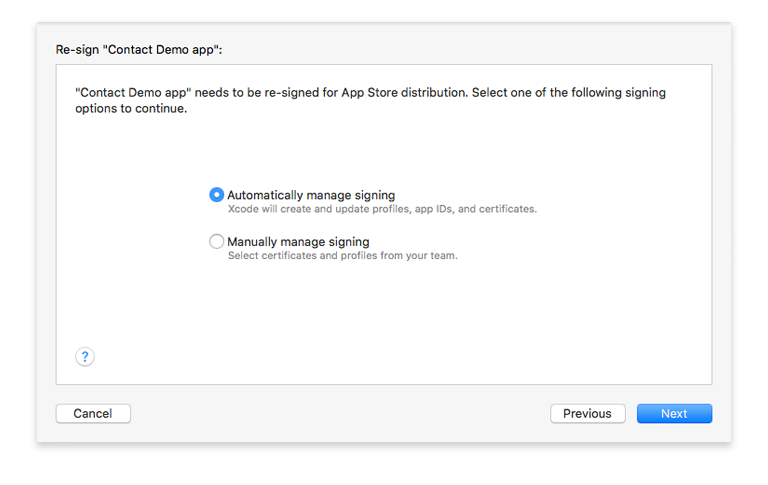
- Then you need to re-sign your app. Let Xcode manage this by checking the Automatically manage signing option.
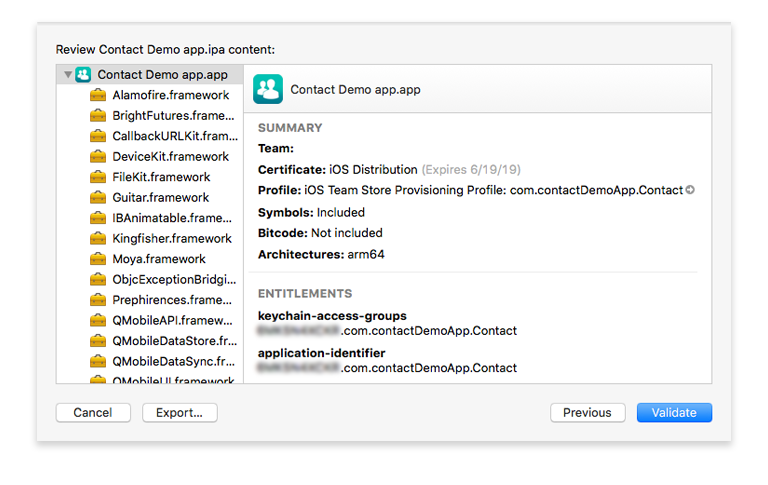
- Review your app's content.
- If your project passes the validation process, you should see this message:
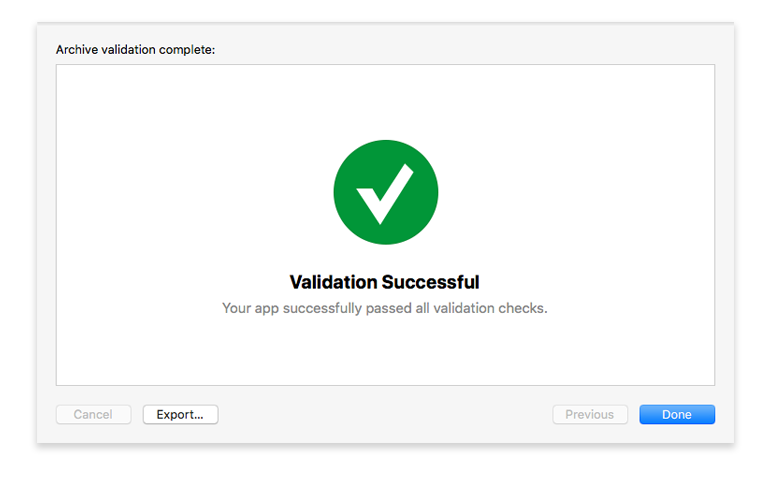
If an error occurs a message will be displayed. These errors must be resolved before attempting the validation process again.
- Click Done. This will return you to the Organizer window.
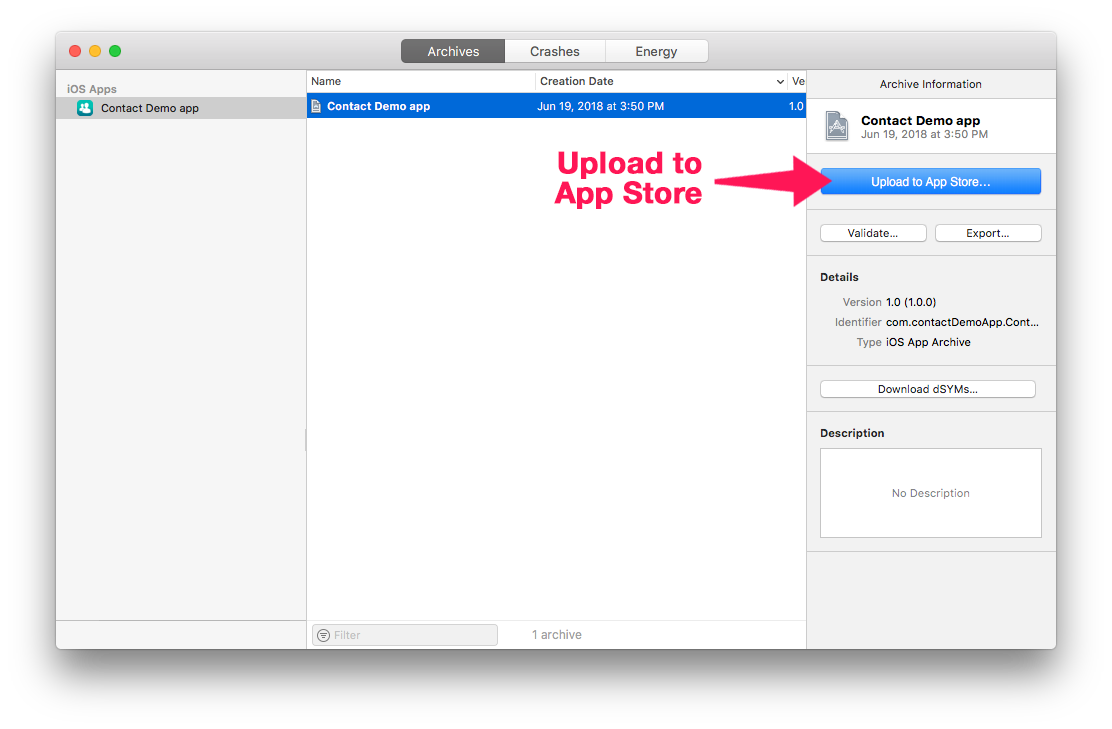
STEP 7. Upload to App Store
Once the validation process has been completed, you're ready to add your app to the App Store.
- Click the Upload to App Store button.
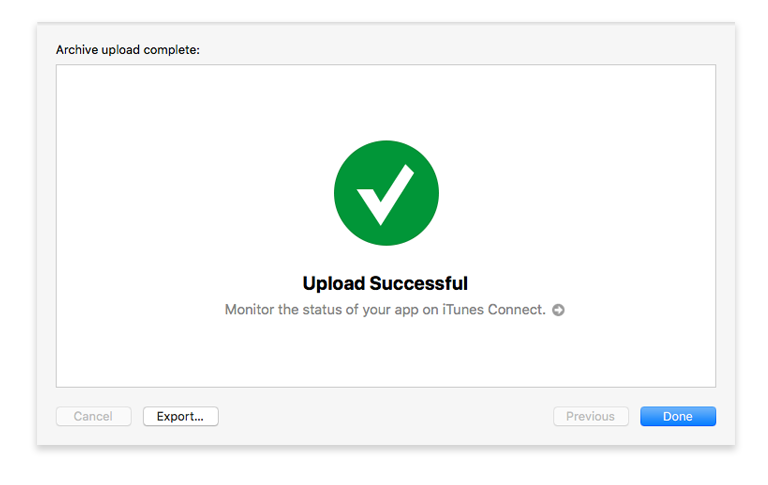
- When your project has been successfully uploaded, you'll see this window:
STEP 8. Select the build for the App Store
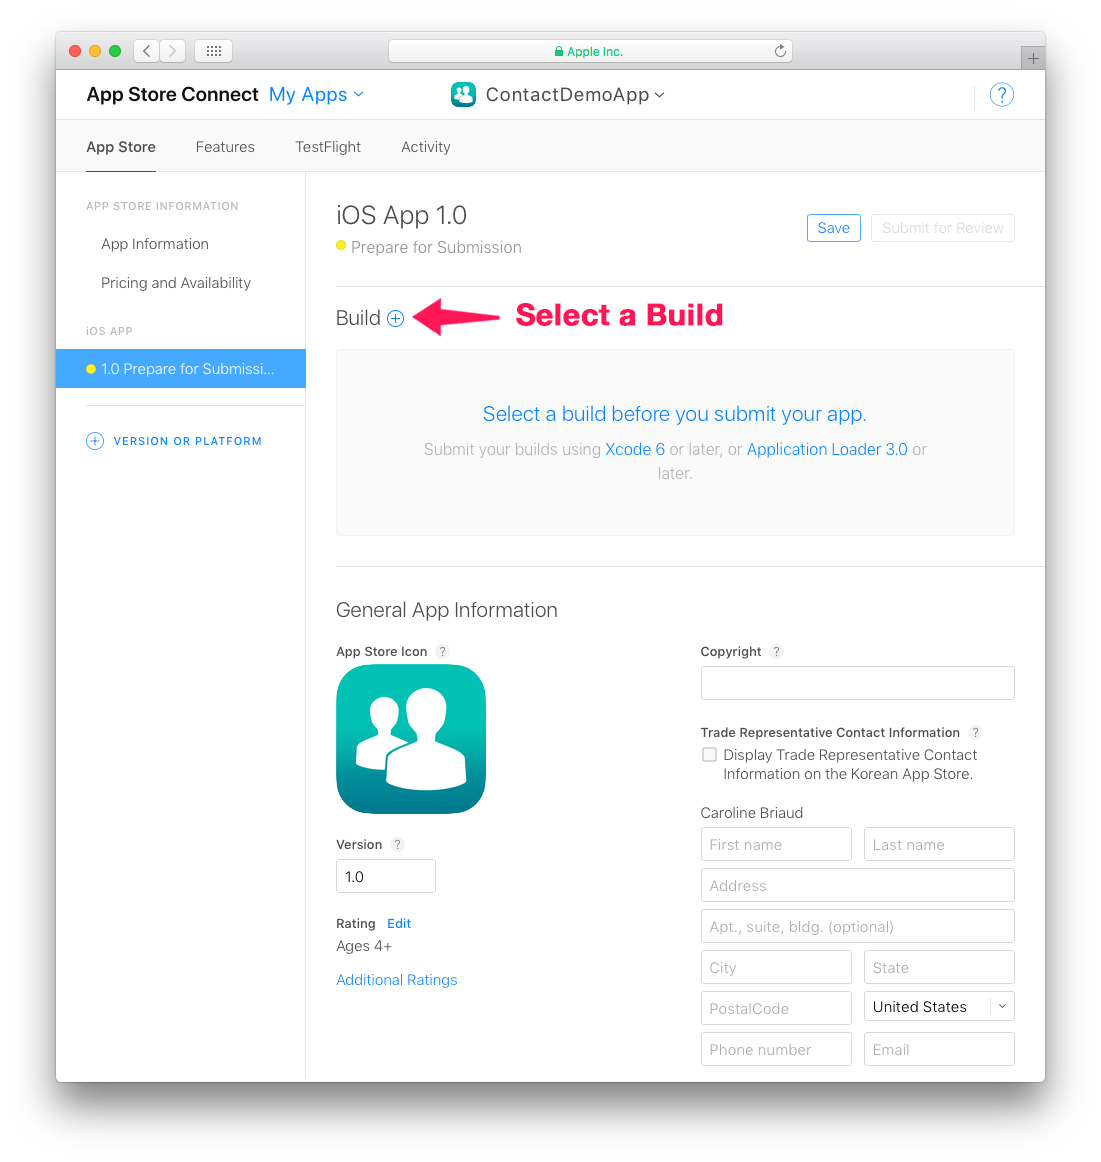
- From App Store Connect > App Store > iOS App, select your app and click the + button that appears in the Build section
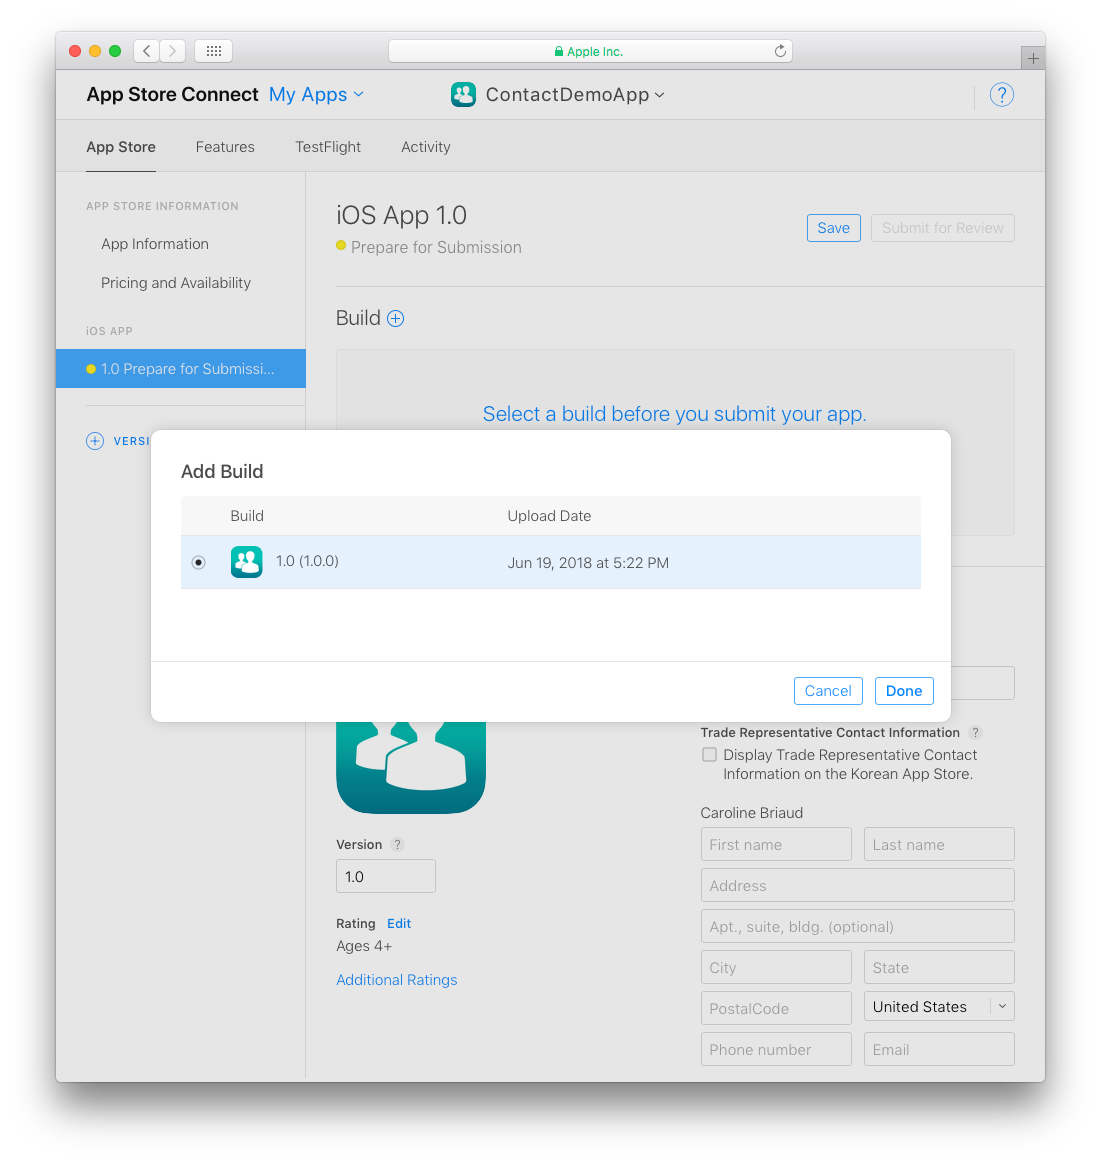
- Select the build you want to submit and click Done.
- Finally, click on the Submit for Review button.
STEP 9. Submit for Review
- The final step to submitting your app for review is answering a few quick questions about your app.
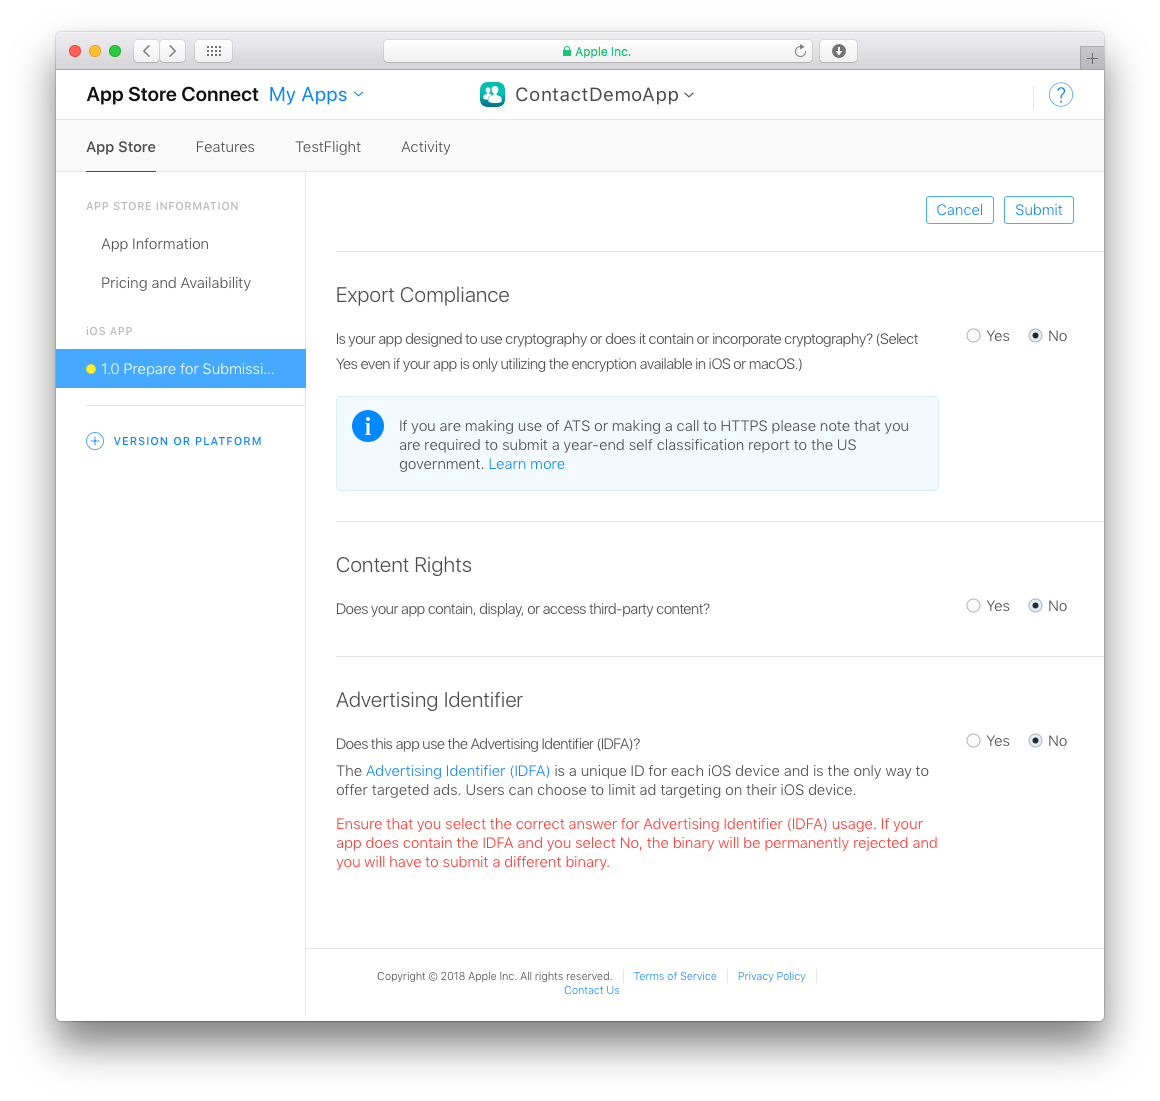
When you've finished with the questions, click Submit.
The average App Store review time is around two days!