One to Many relations
This tutorial will show you how easy it can be to include One to Many relations in your mobile project.
Let's get started by downloading the Starter project:
In this tutorial, we are going to build a colorful Task app using 4D for iOS.

But first, let's have a look at the structure of our database:
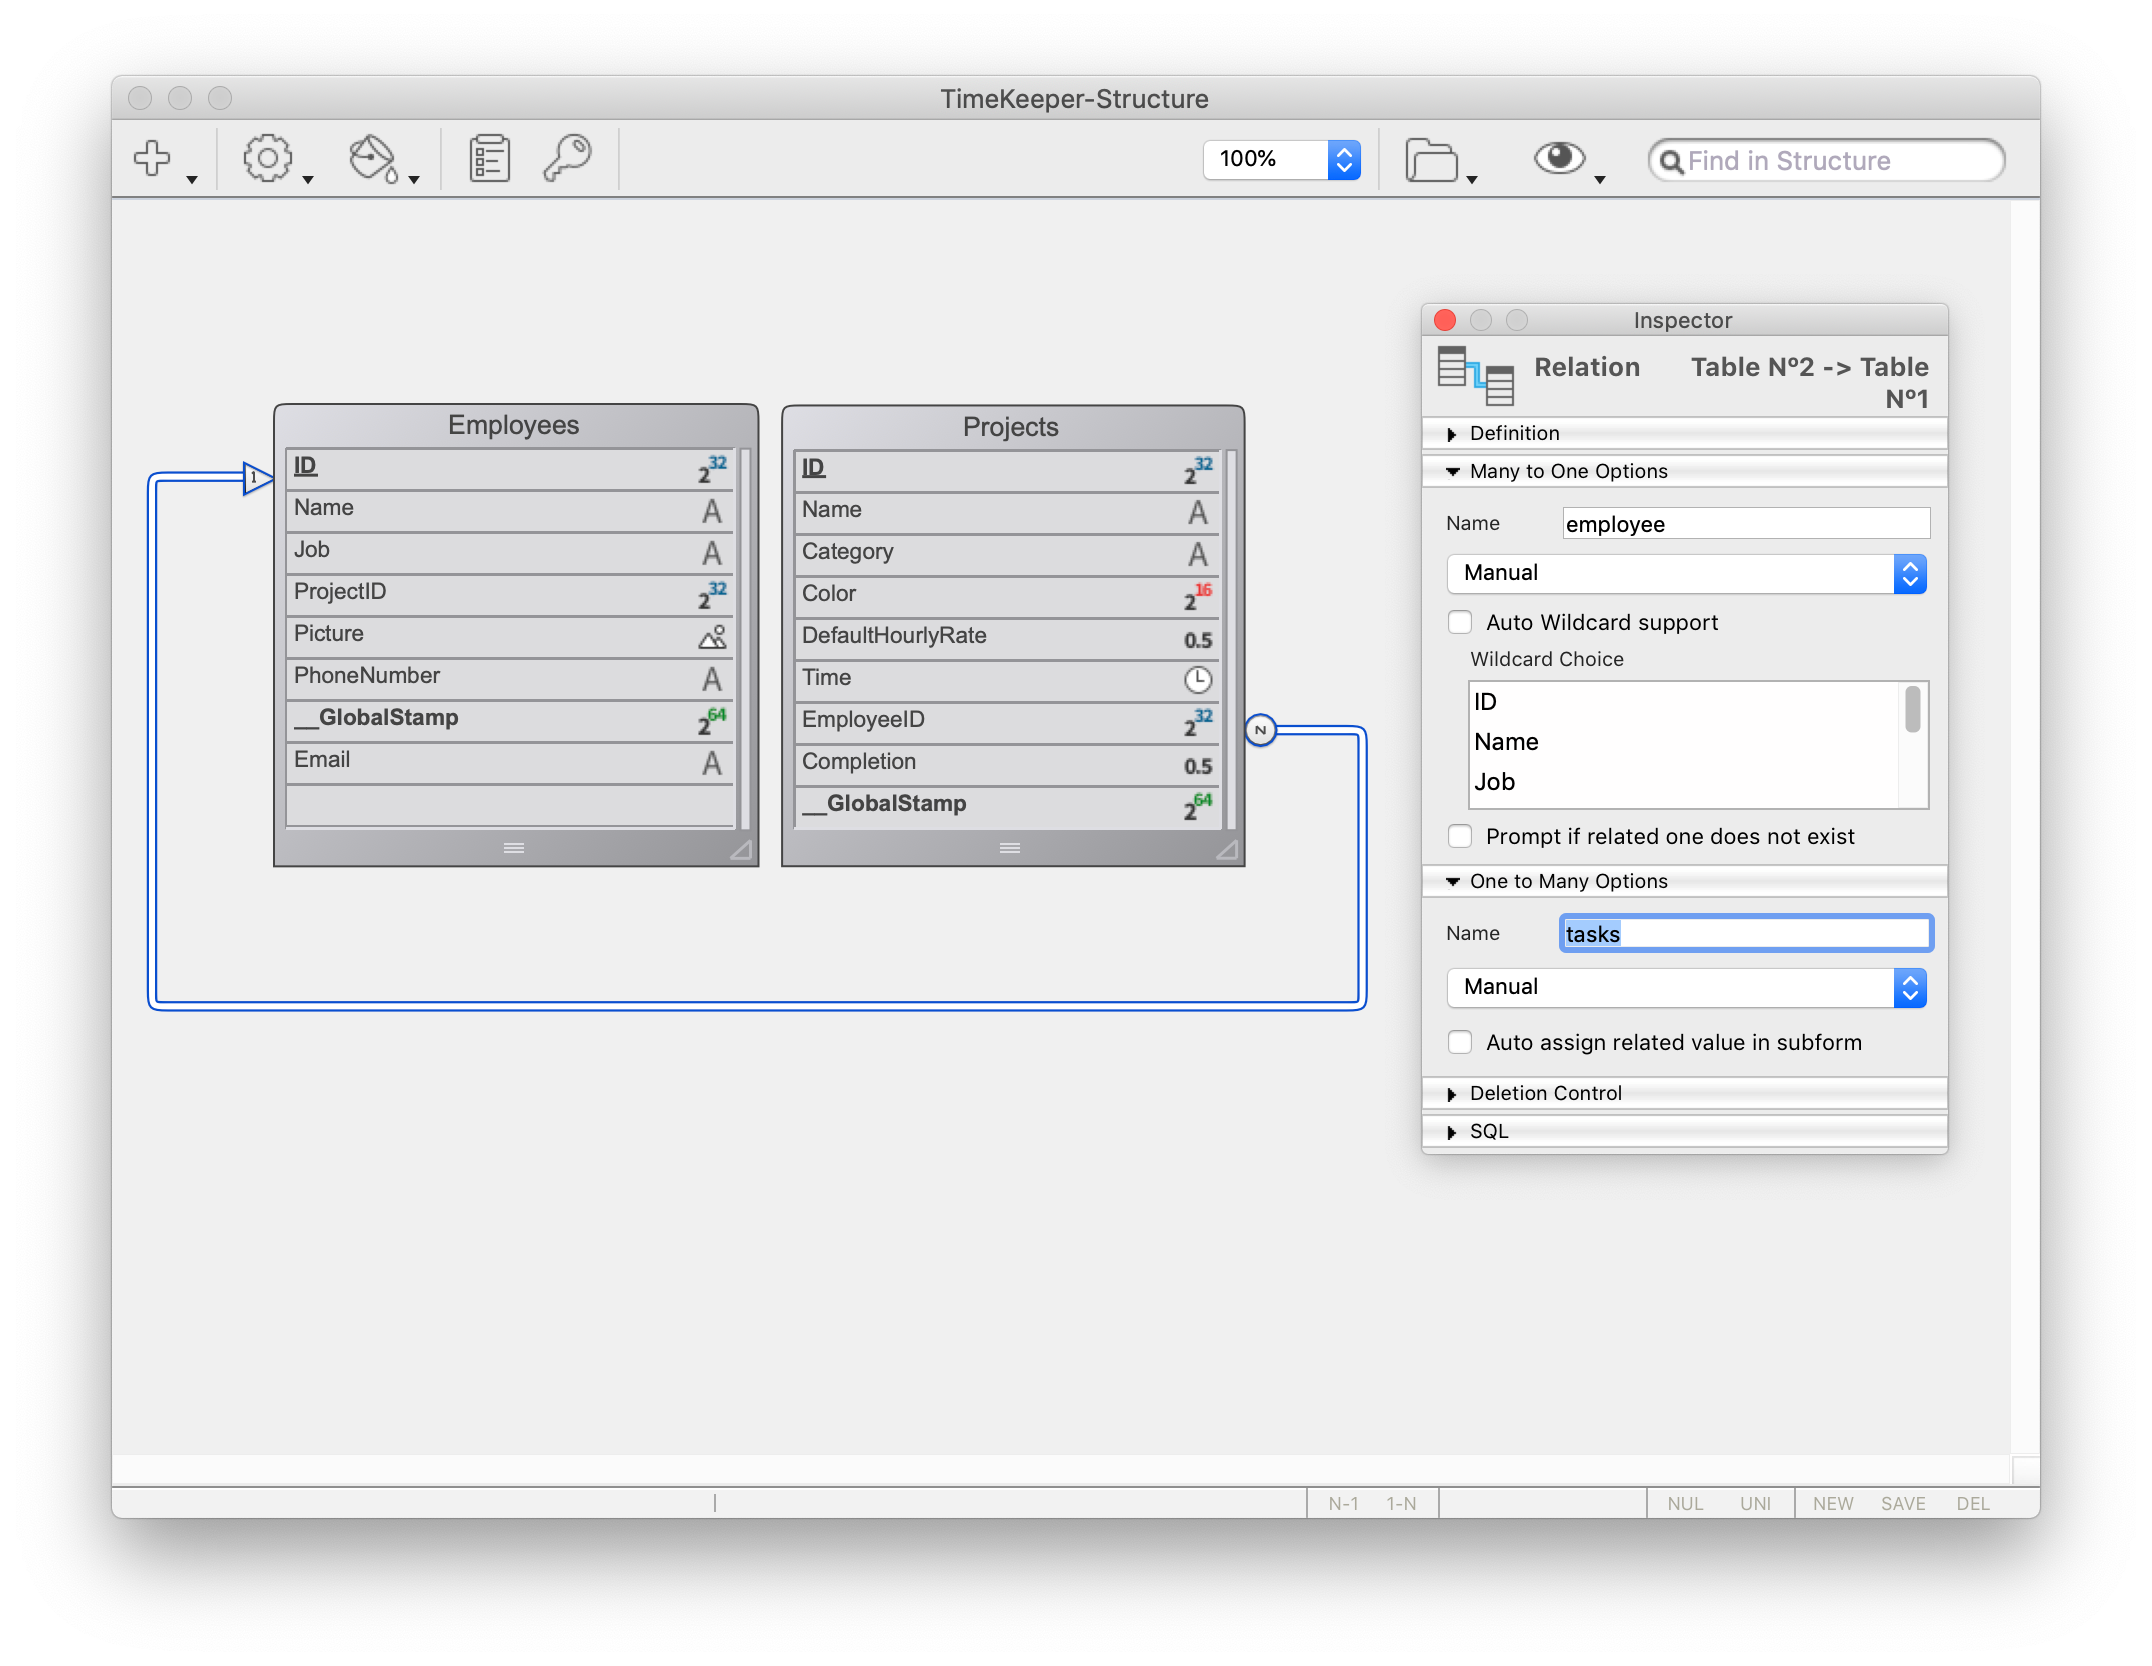
As you can see, there is a One to Many link named tasks that we will use in our iOS app to display the employees'(One) tasks(to Many).
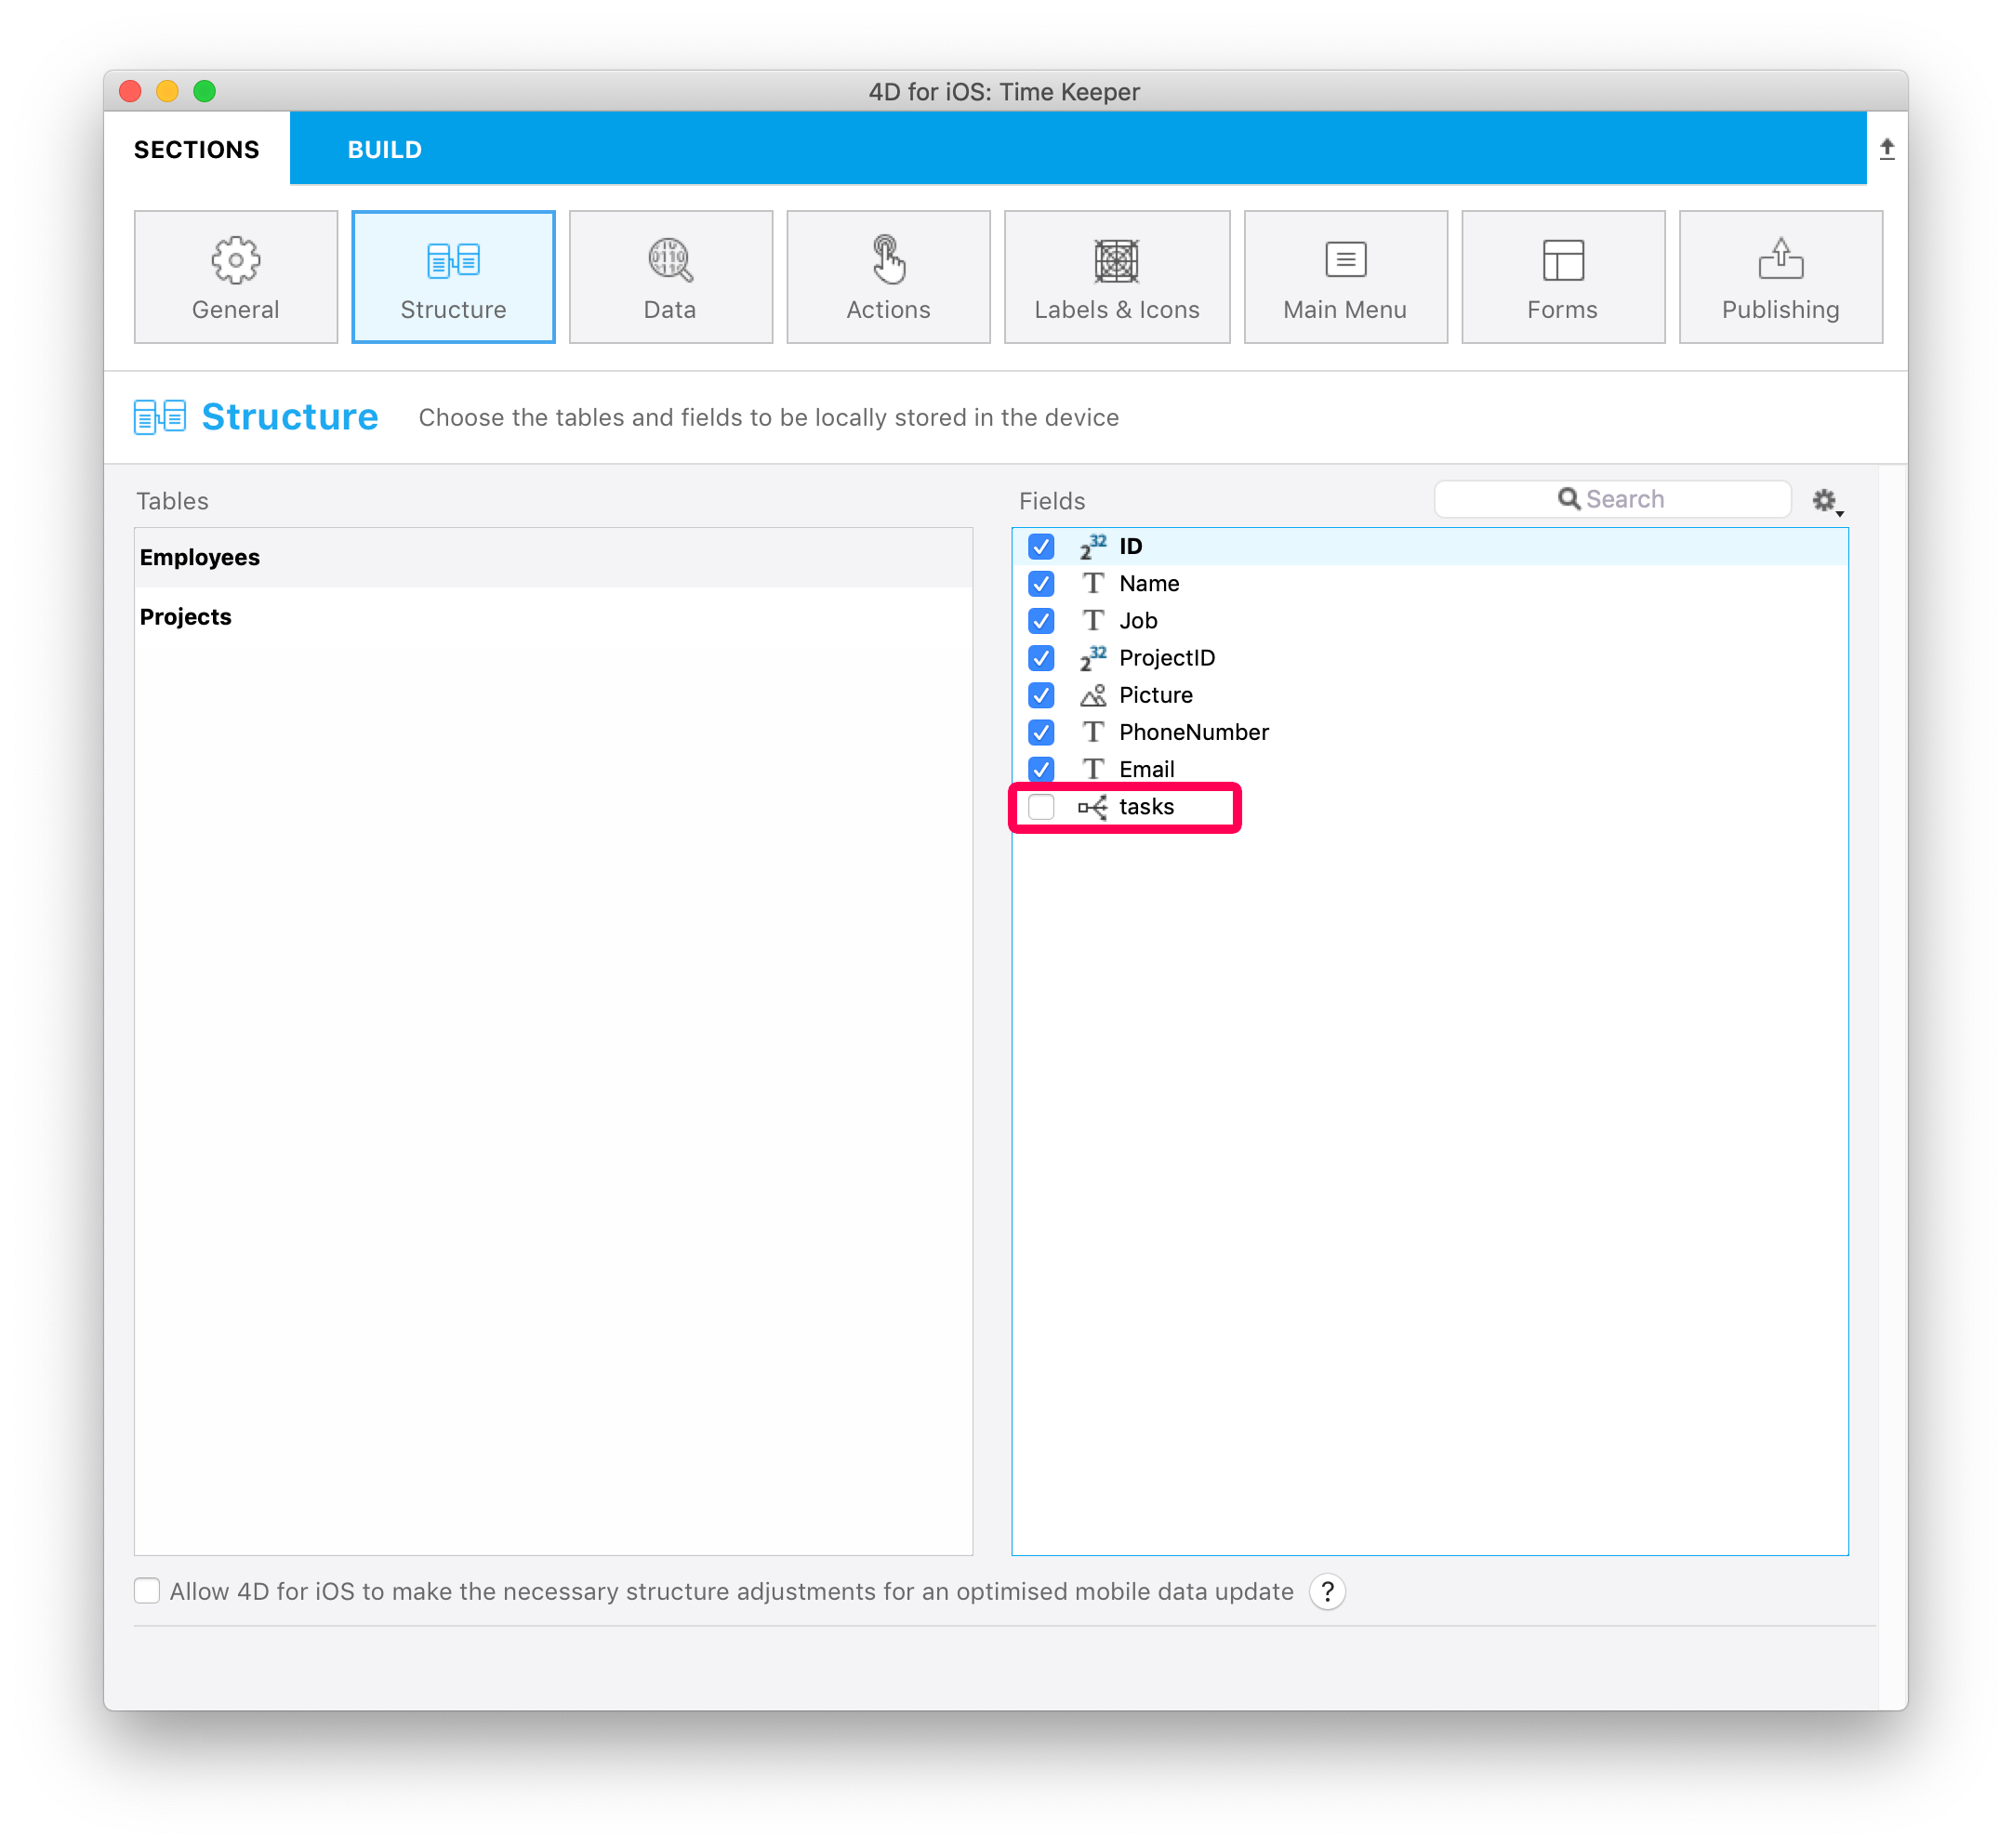
Now, go straight to Open menu > Mobile project... to select Time Keeper and go to the Structure section.
Structure section
You can see the tasks relation we have seen earlier... Publish it !
This will now operate as any other field for the rest of the app creation process.
On mouse over, a tip displays the table name originating the relation.
Labels & Icons section
The One to Many relation is now available in the Labels and Icons section.
It is important to know that including a One to Many relation will create a button into the genrated iOS app.
So, in the Labels & Icons section you will define:
- a button Label
- a button icon
- a title that will be displayed in the destination view (to indicate where you come from for example).
![]()
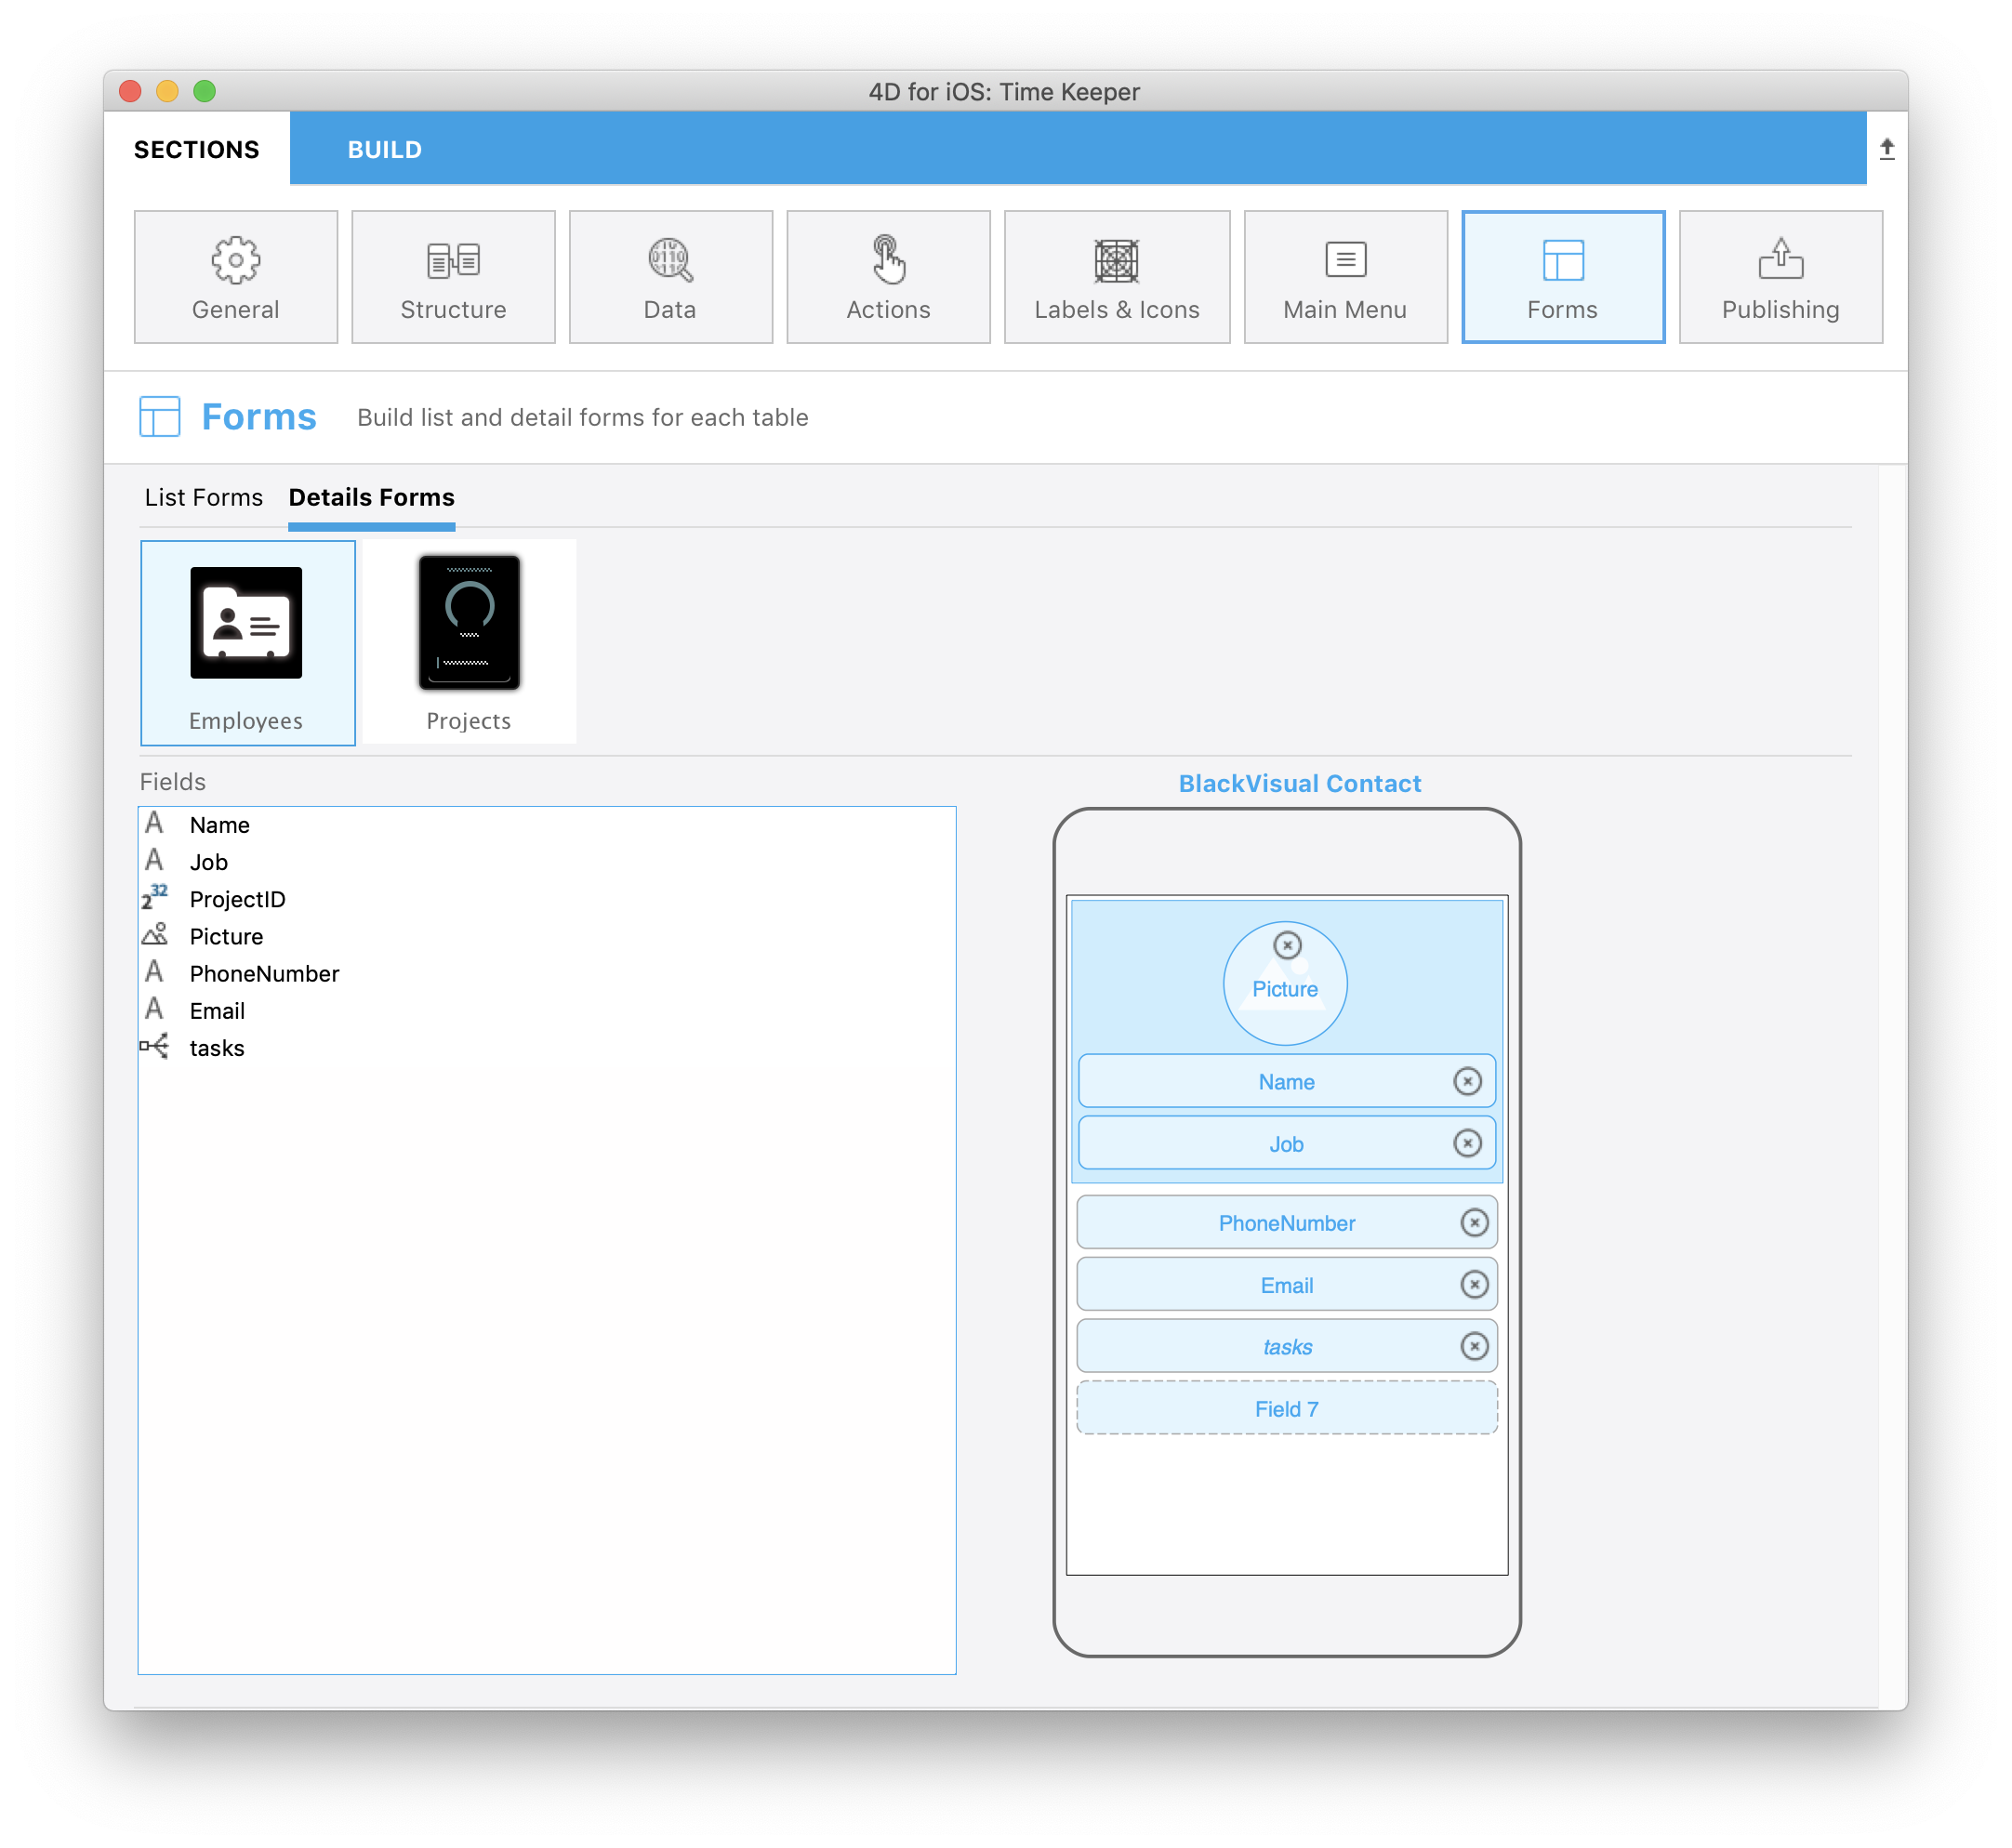
Forms section
- Go to the Forms section and drop the tasks relation on the Employee Task Detail form.
Build and Run
- From the Employee List form, click on one employee
- This will open the employee's detail form, where you should see a new Relation button !
- Click on this Relation button to display the employee's tasks.

Well done! You've successfully included One to Many relations in your mobile project.
Download the completed project: