Using action parameters
OBJECTIVES
Define action parameters to edit the content of your app.
In the tutorial on defining actions, we discovered how to execute 4D code from an iOS app by defining actions from the actions section.
In this tutorial, we're going to go further and create:
- an Add action to create a new task,
- an Edit action that will allow you to edit existing tasks from the iOS app,
- a Delete action to delete an entity, and
- an action that will enable you to email a comment for a specific task.
To begin, let's first download the Starter project based on our existing Tasks iOS app:
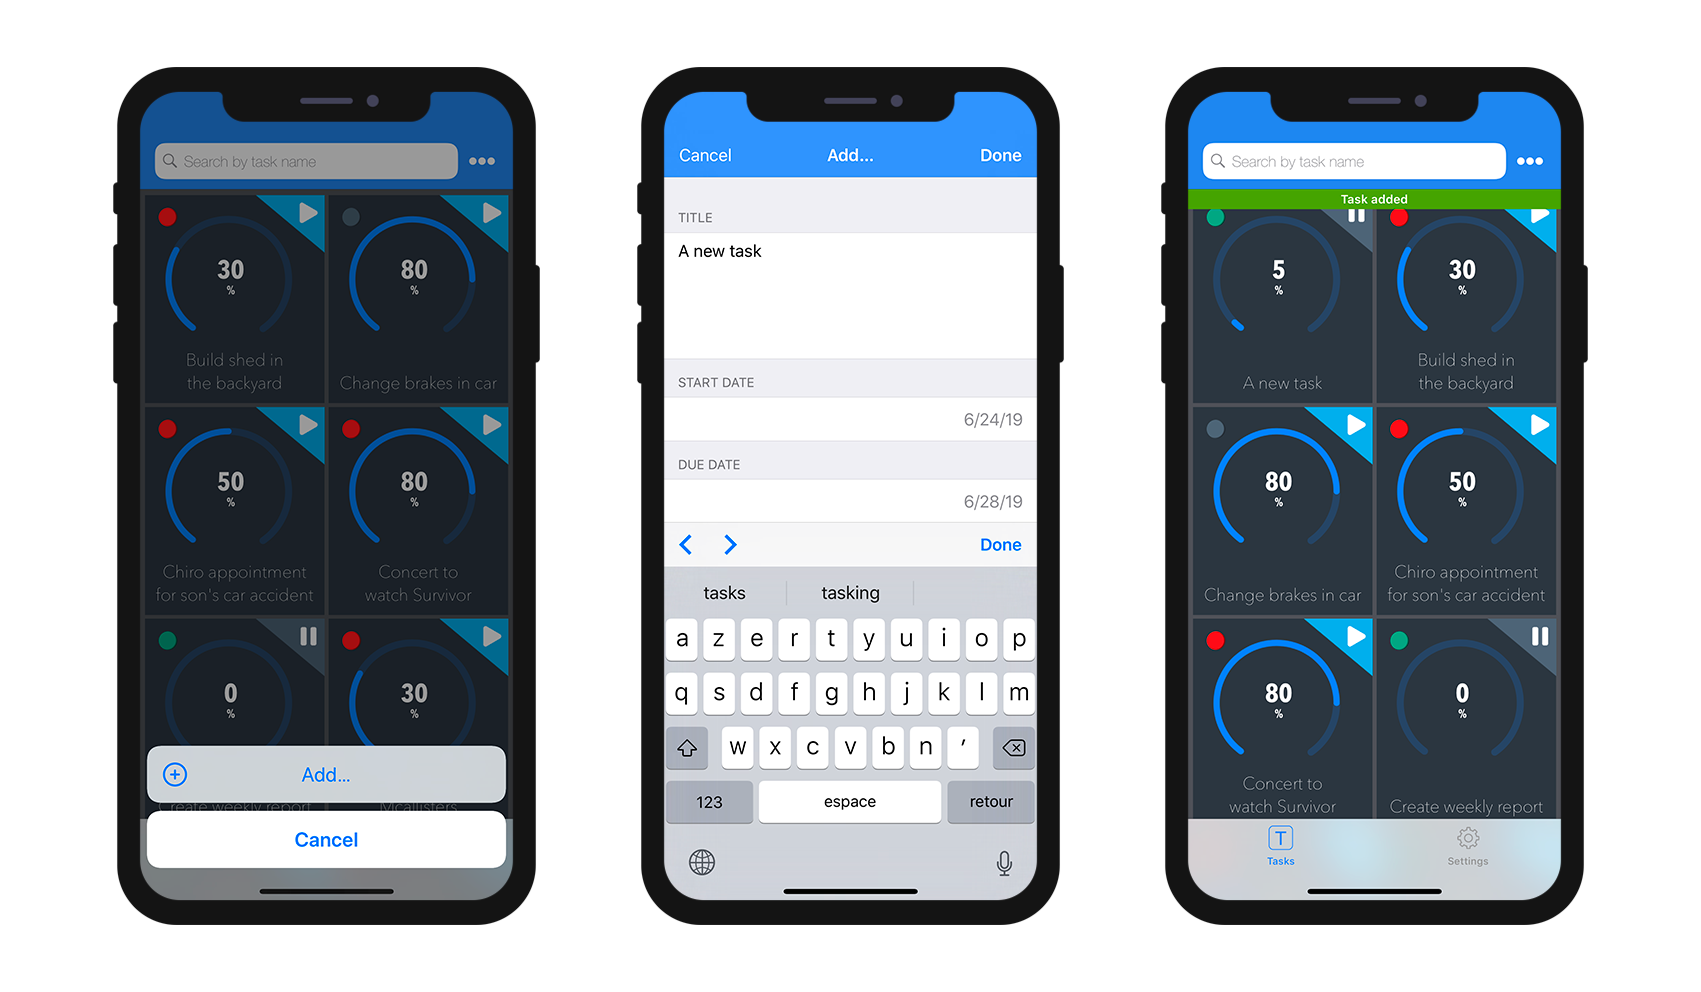
STEP 1. Add action
Let's begin simple. Open the Tasks mobile project and go directly to the Actions section.
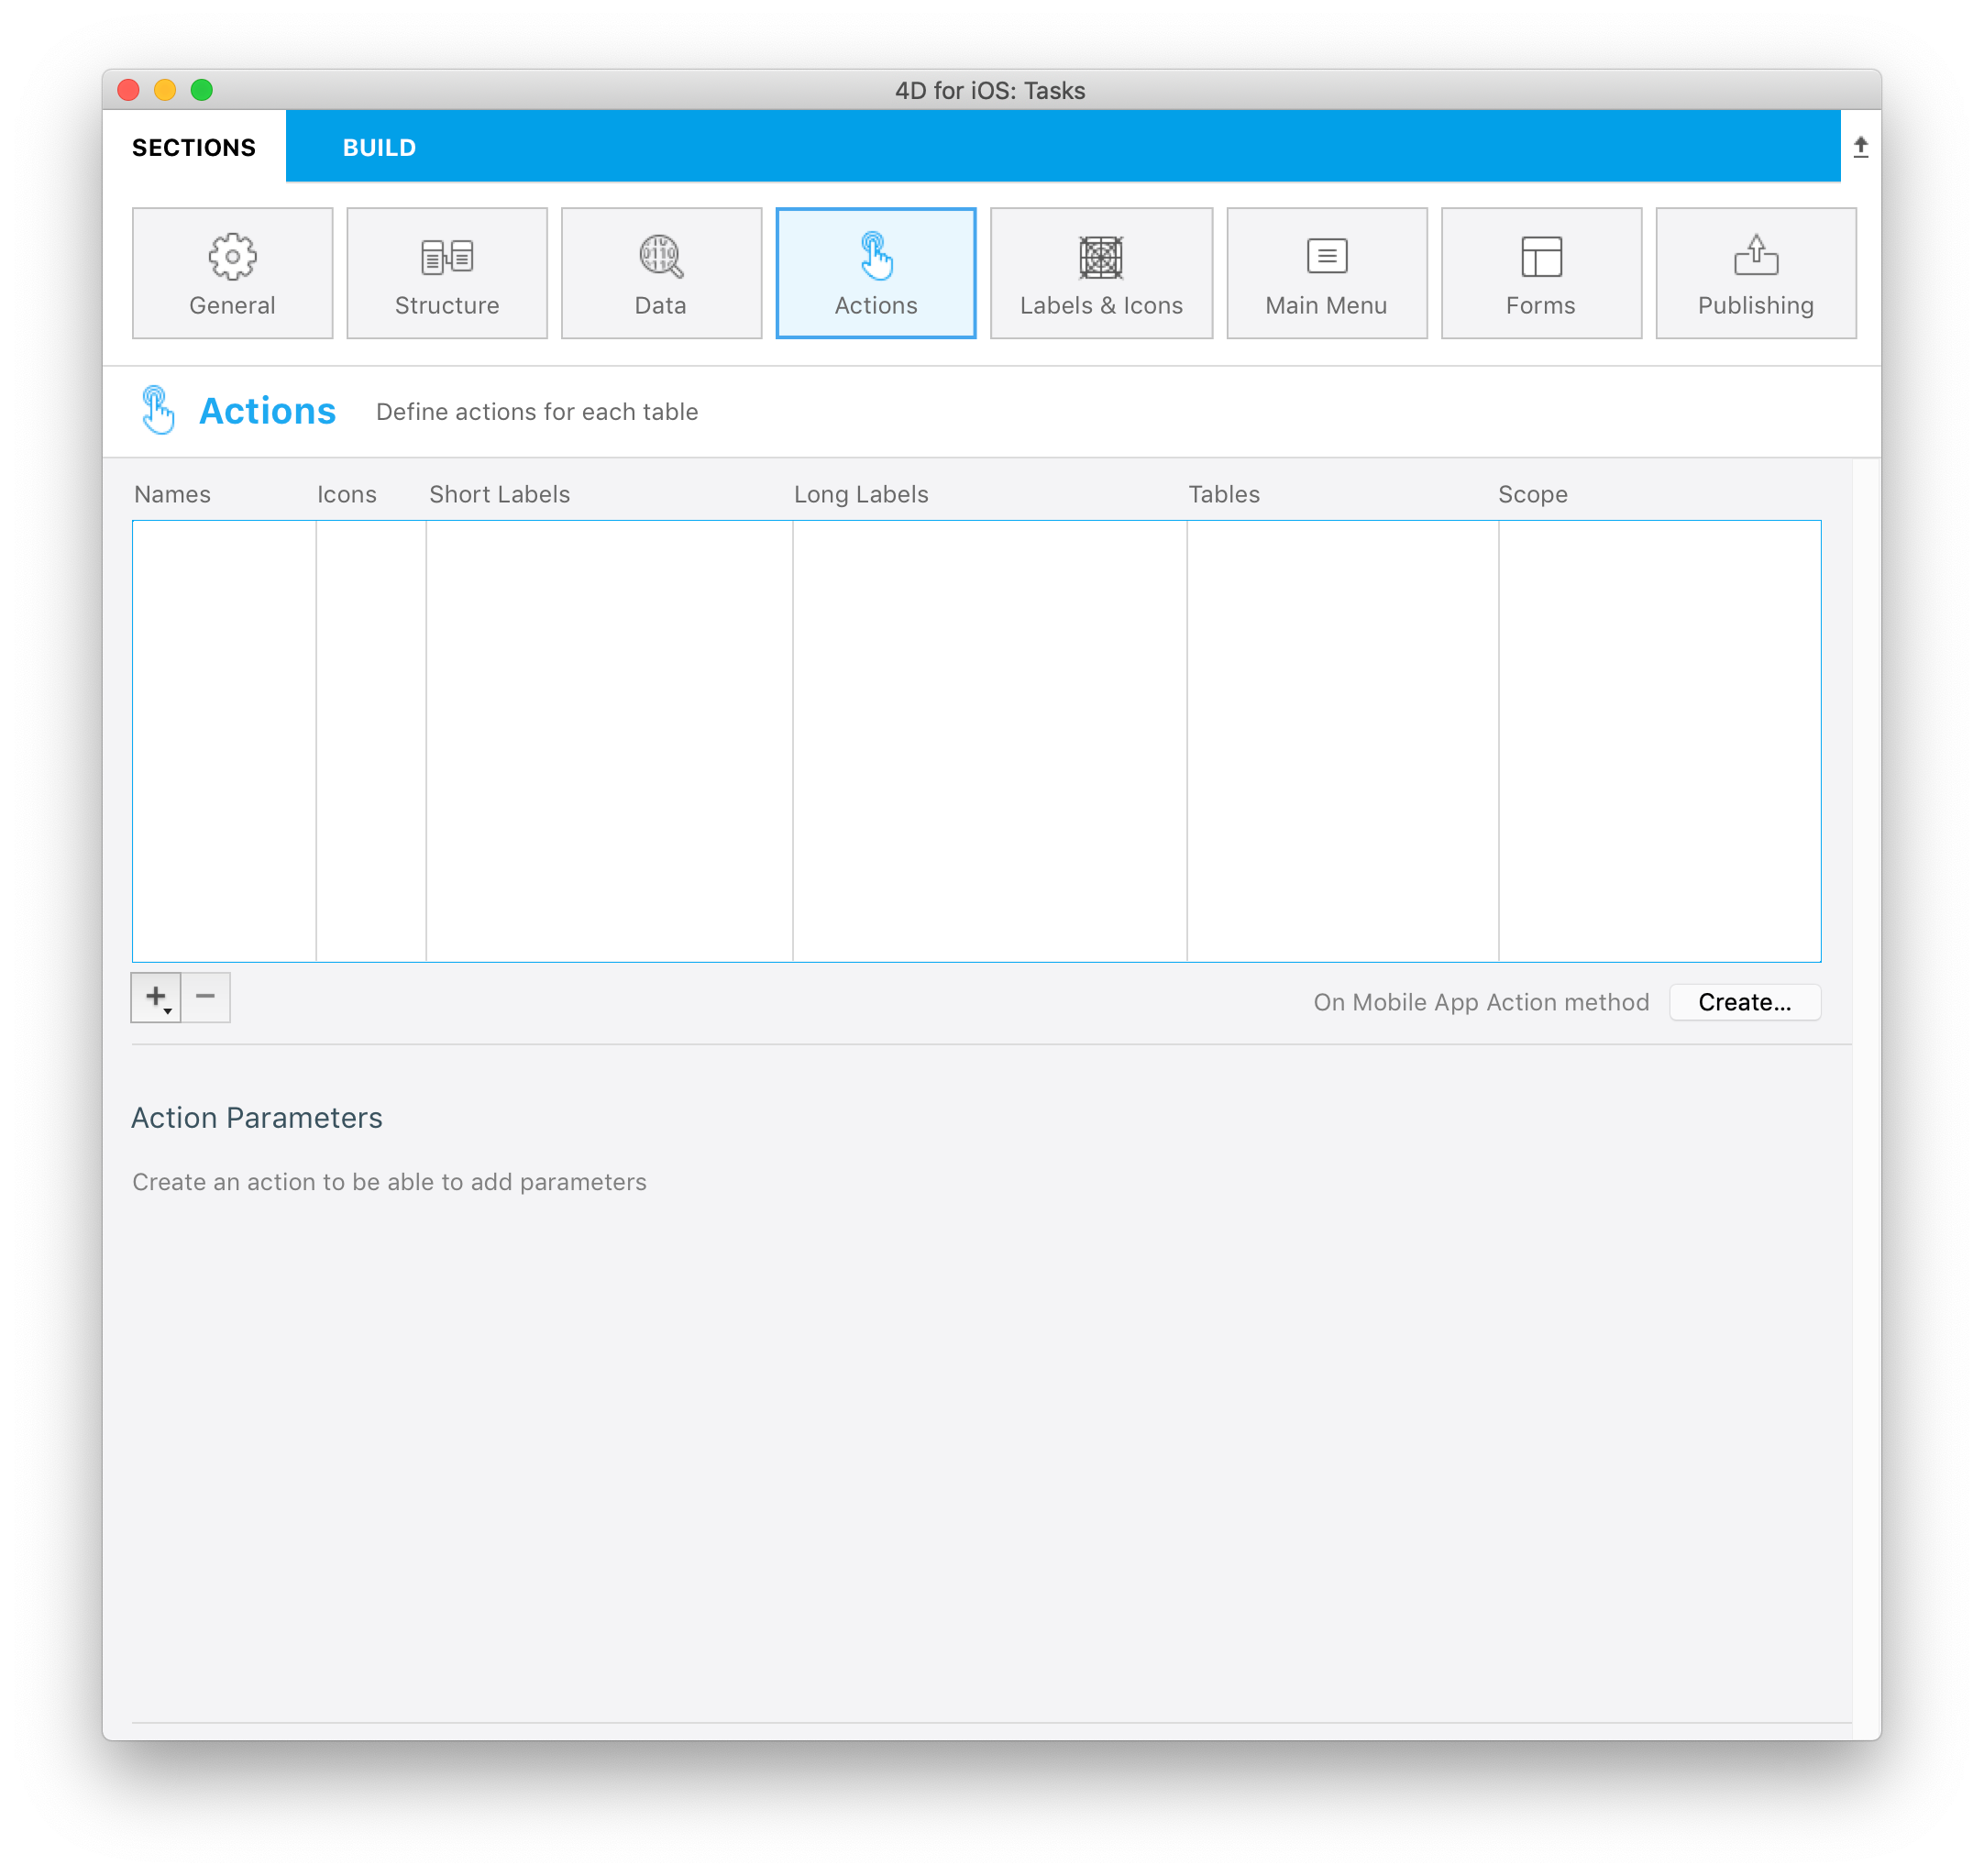
It's quite empty for the moment... Here is what we want: create a new task from the iOS app.
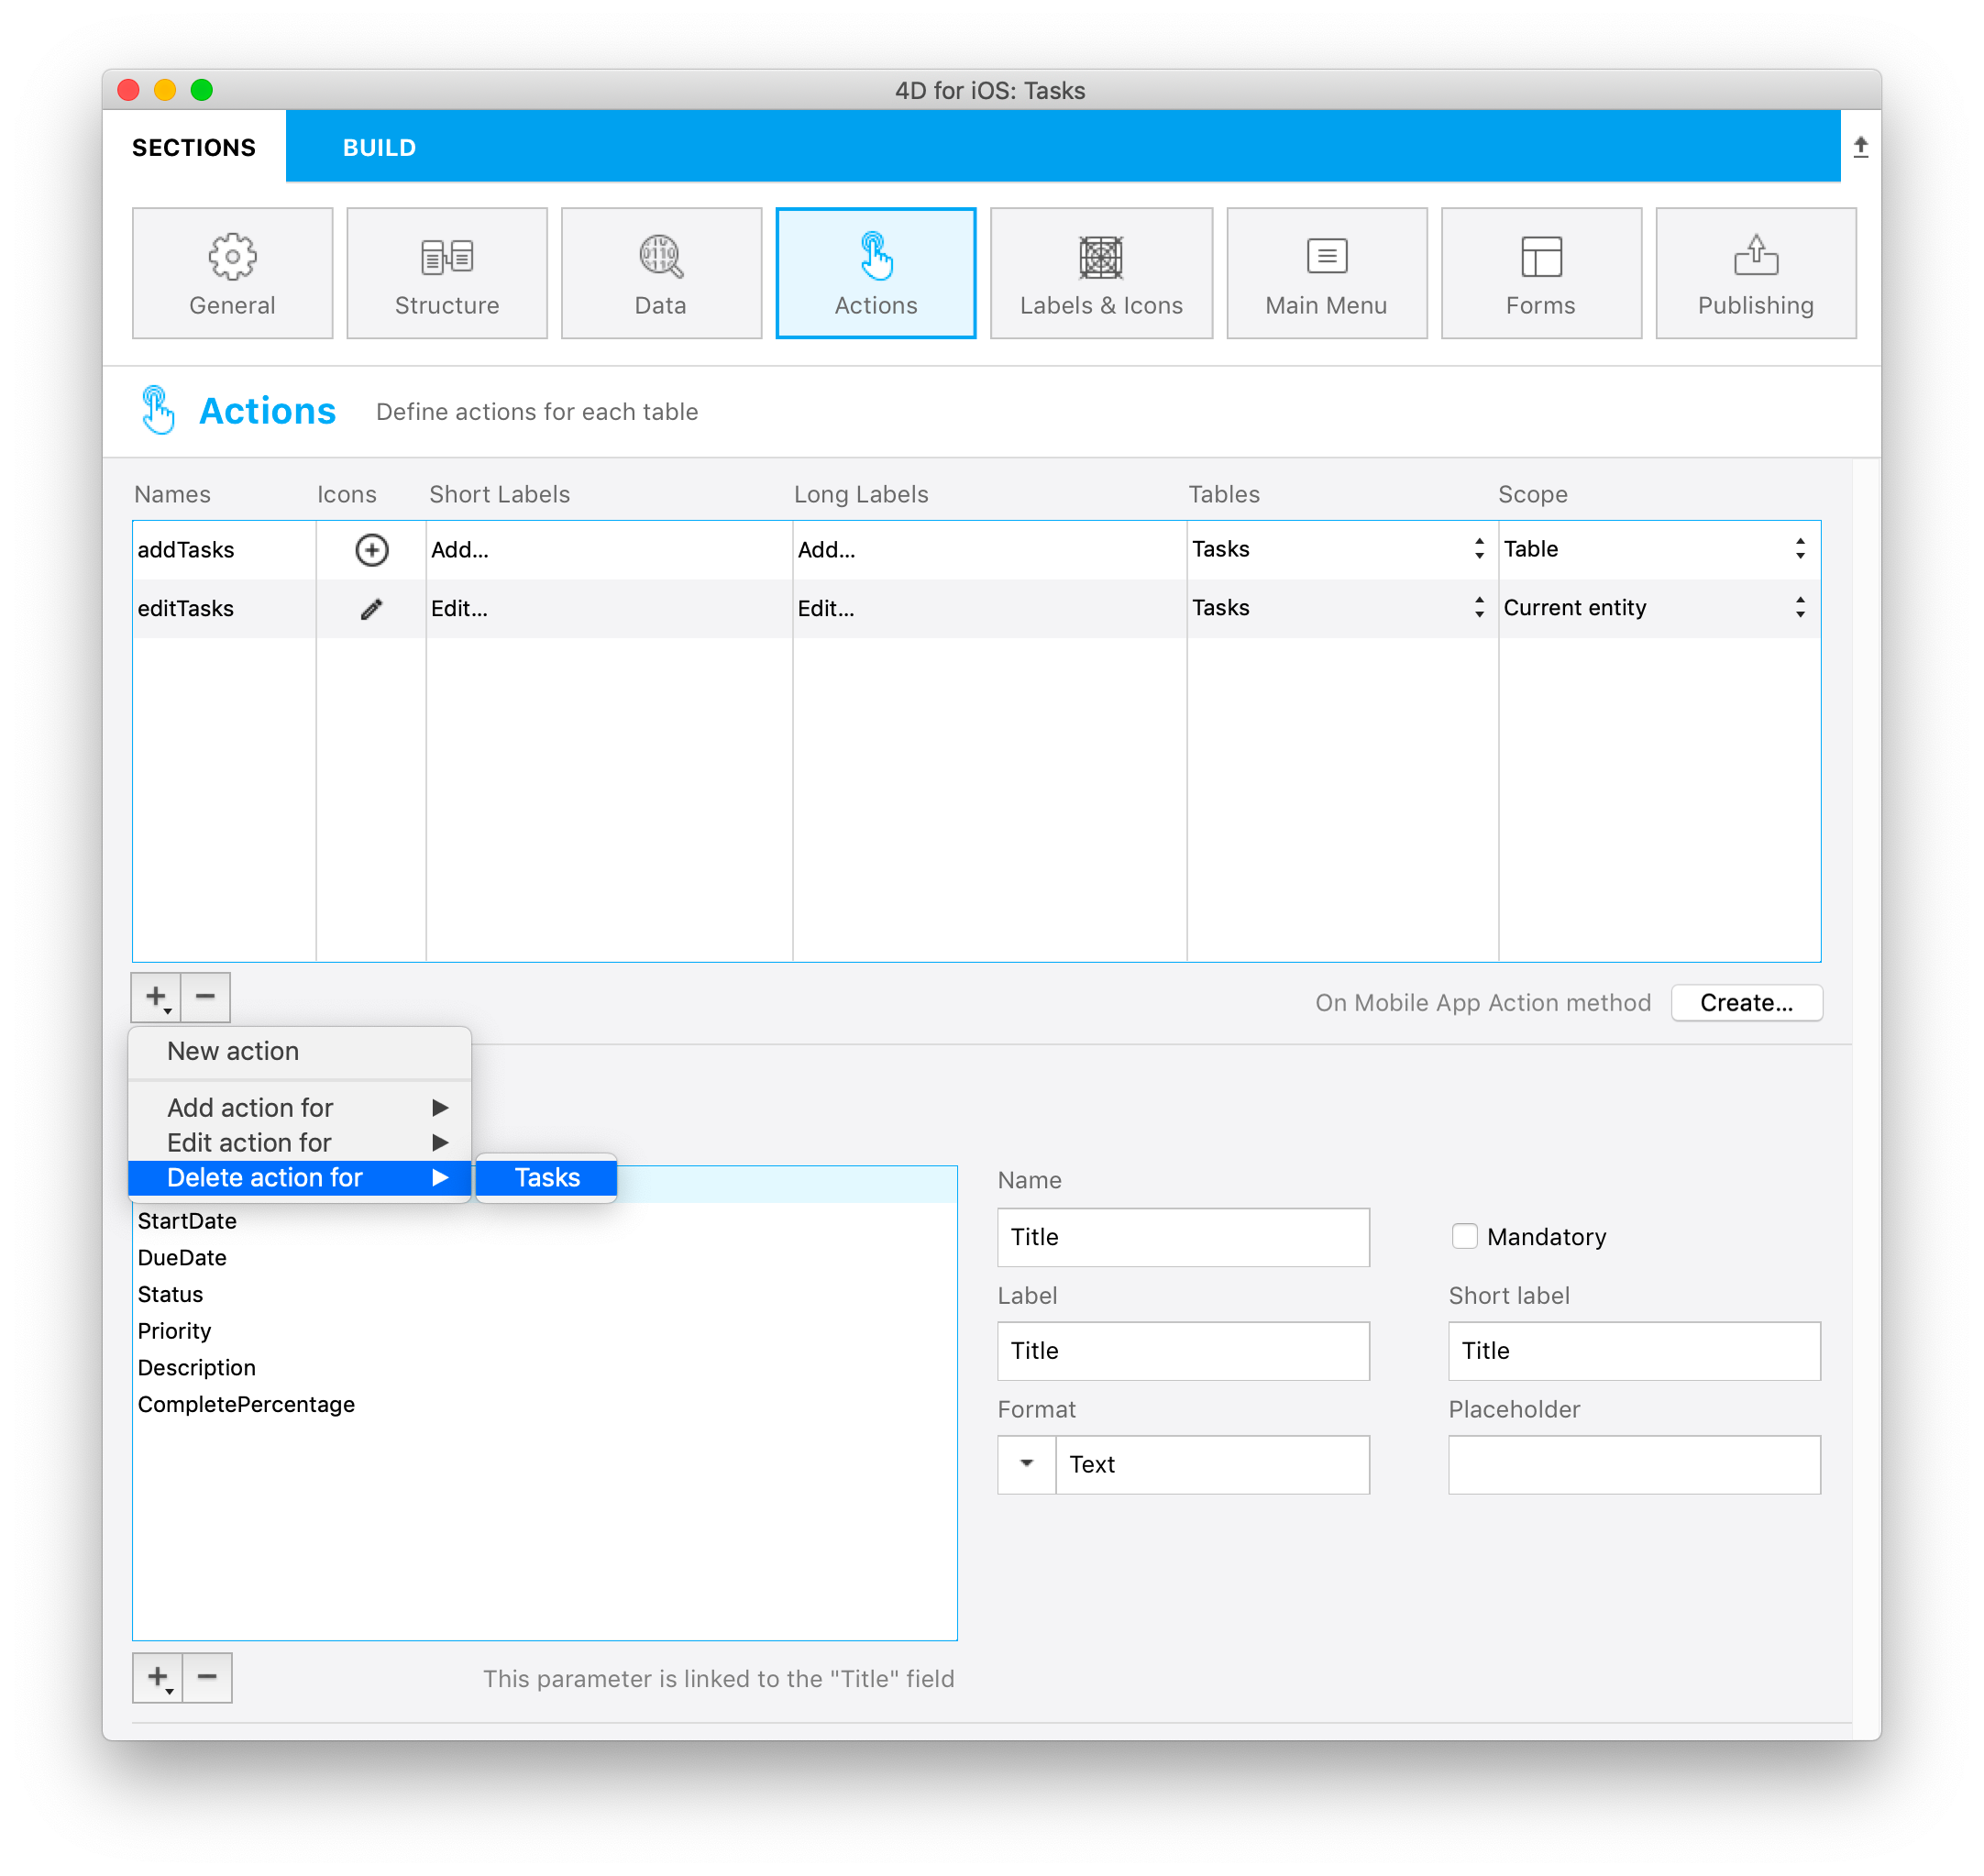
For this, let's create an action using a preset Add action:
- Click on the arrow in the + button at the bottom of the Actions table.
- Select the Add action for option.
- Select the Task table.
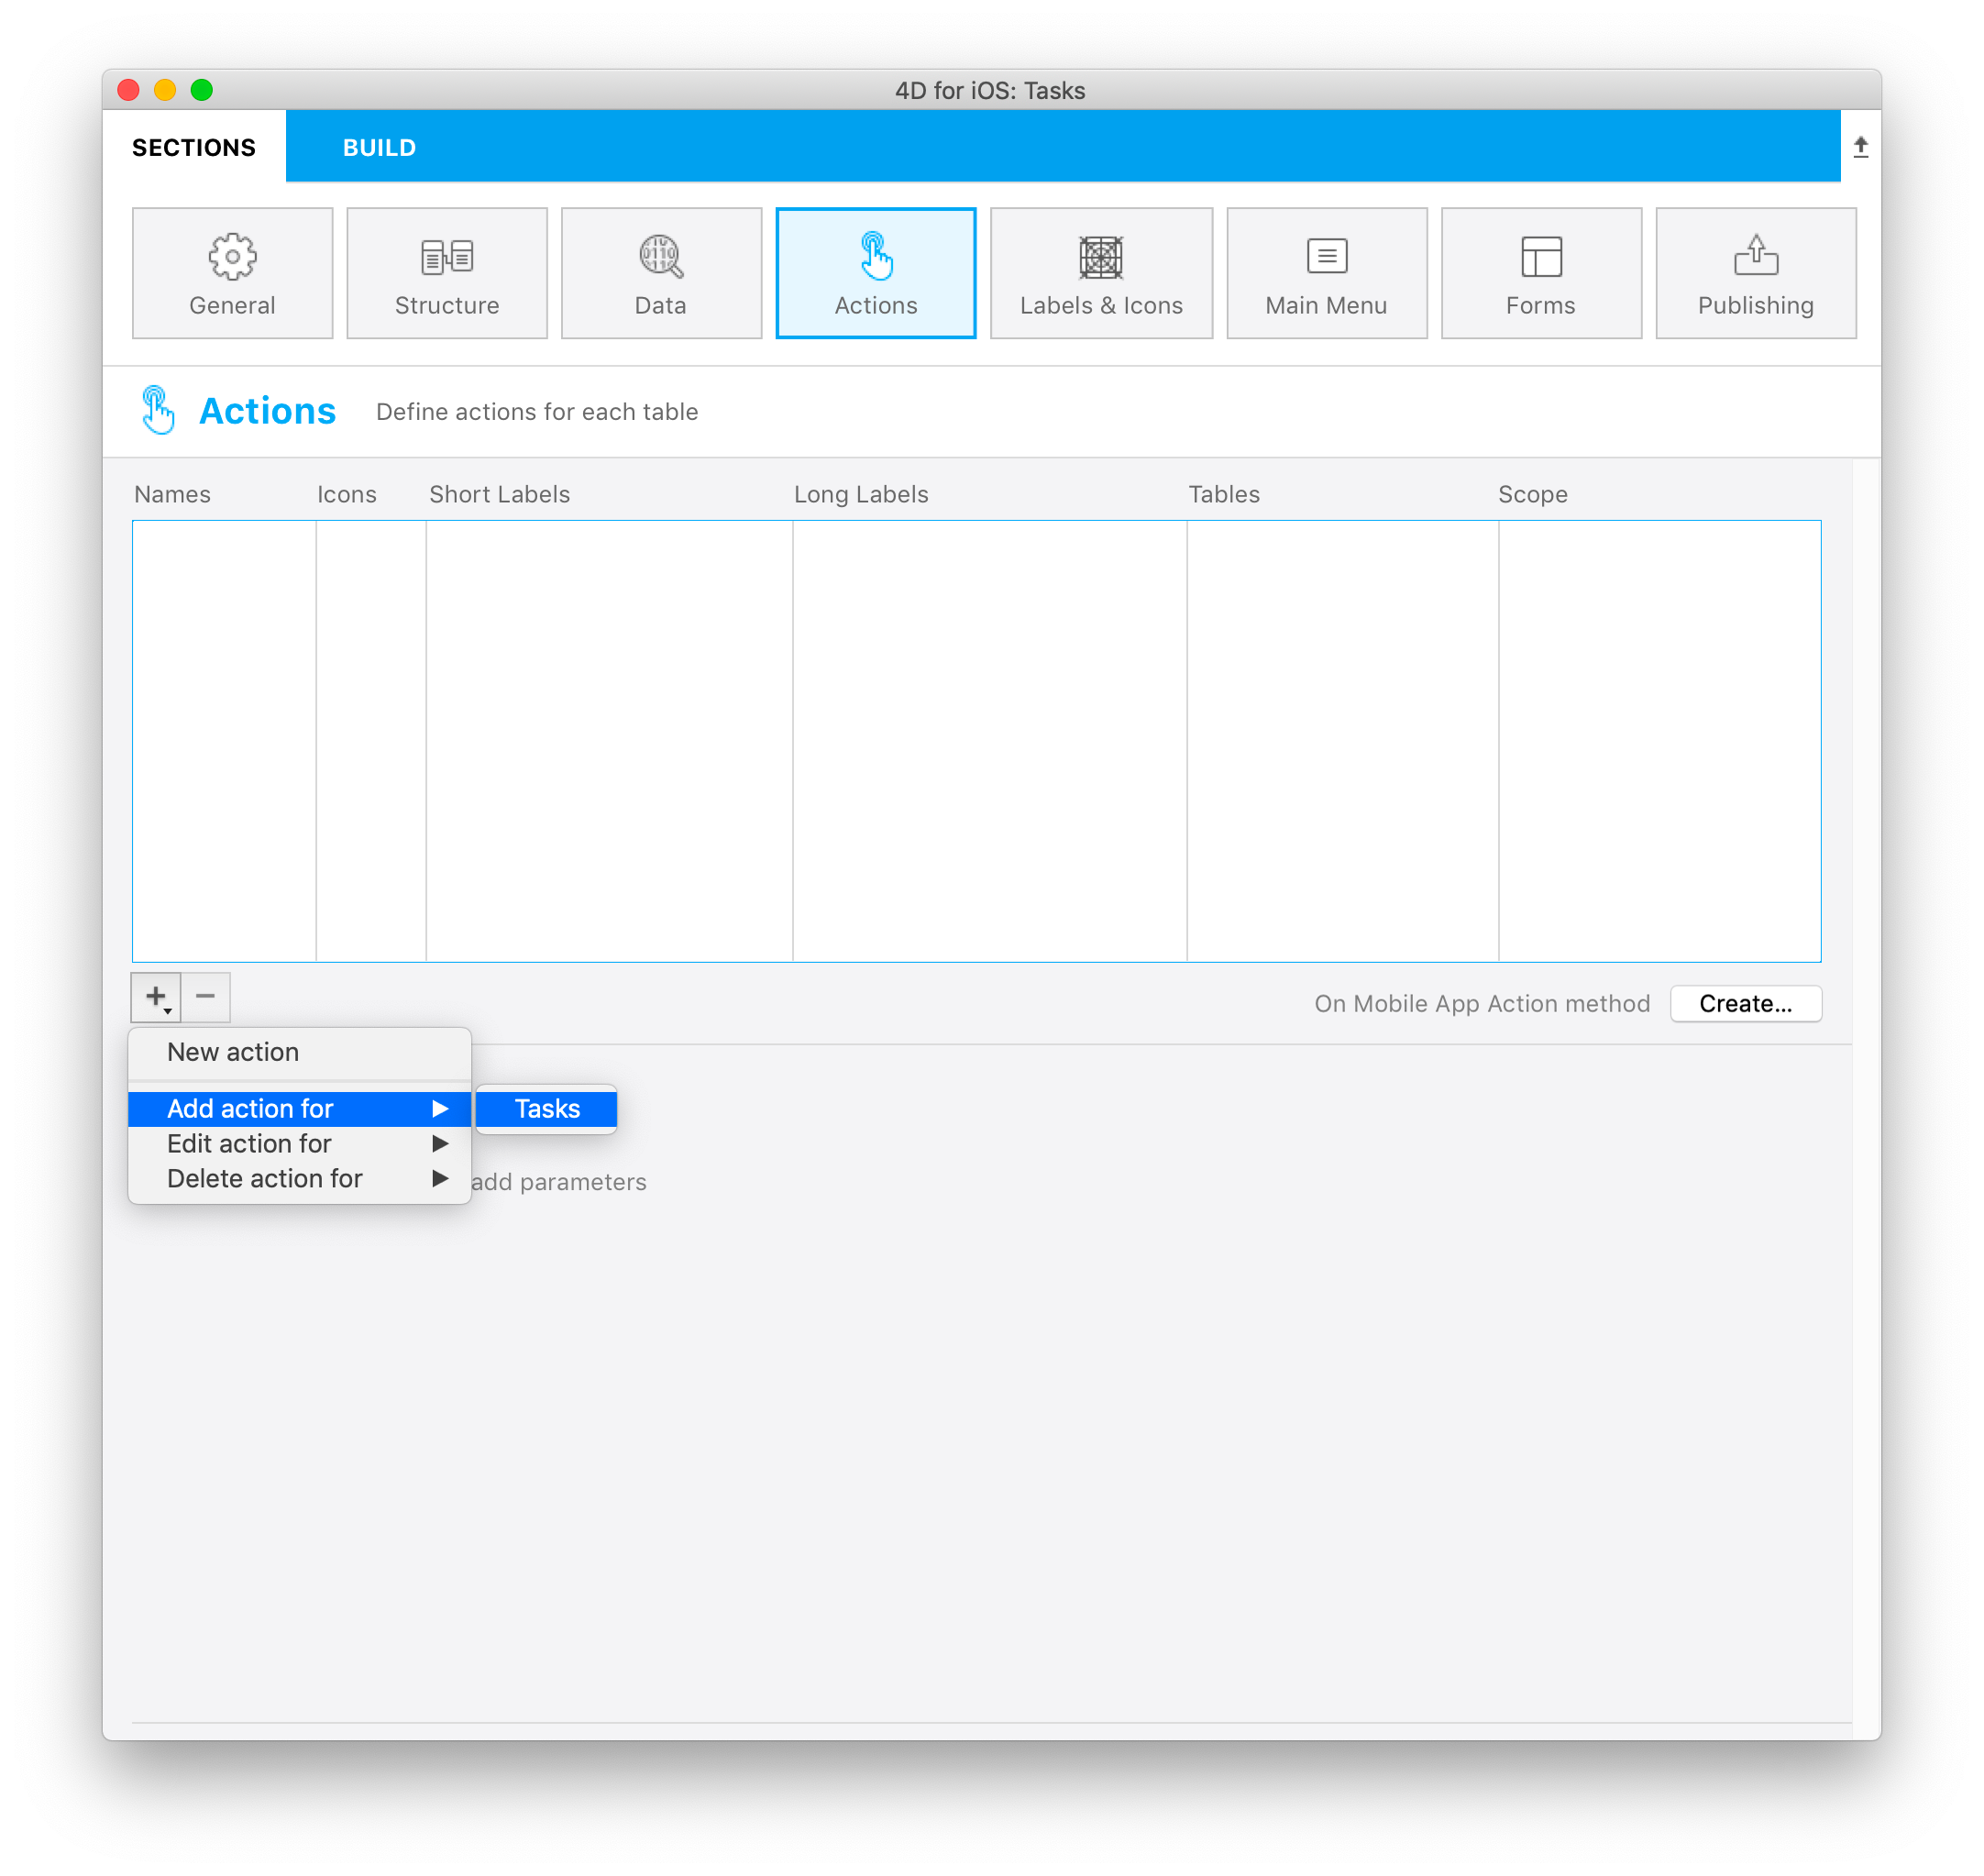
- A new action named "addTasks" with "Add..." as default label is displayed.
- All available parameters and their properties are shown in the Actions Parameters section.

At this point, all Add action parameters are created automatically and ready to use.
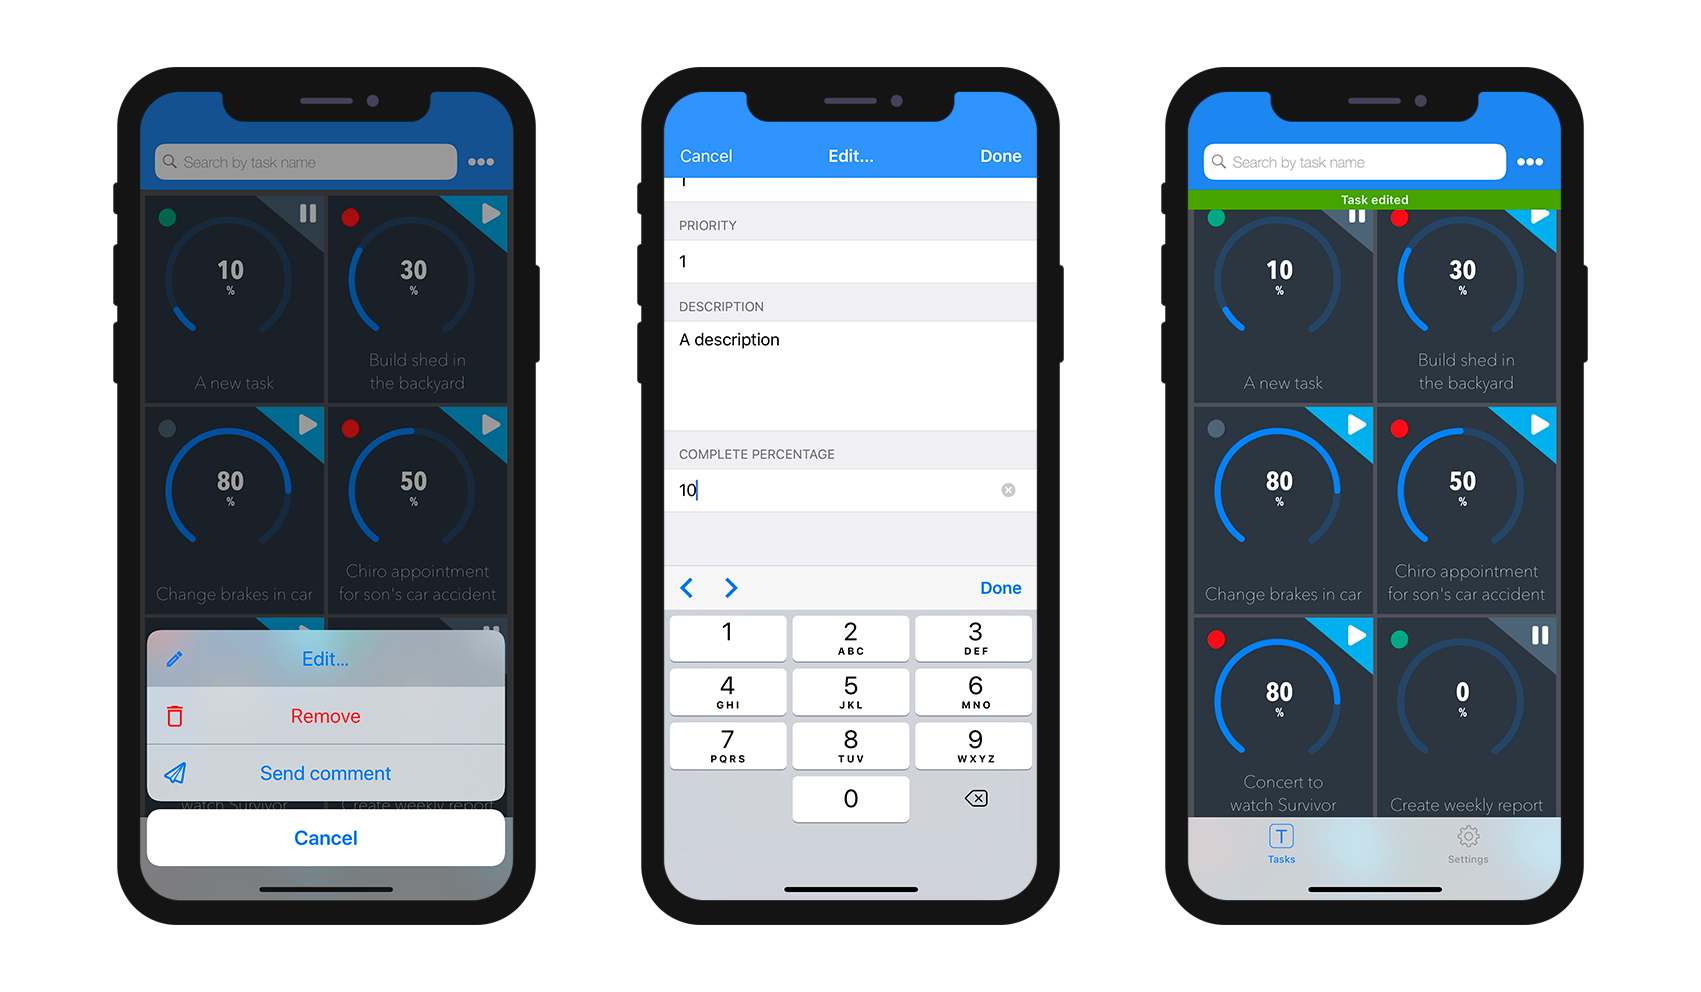
STEP 2. Edit action
Now let's create an action that will allow you to edit your app content.
For this, we'll create an action using a preset Edit action:
- Click on the arrow in the + button at the bottom of the Actions table.
- Select the Edit action for option.
- Select the Tasks table.
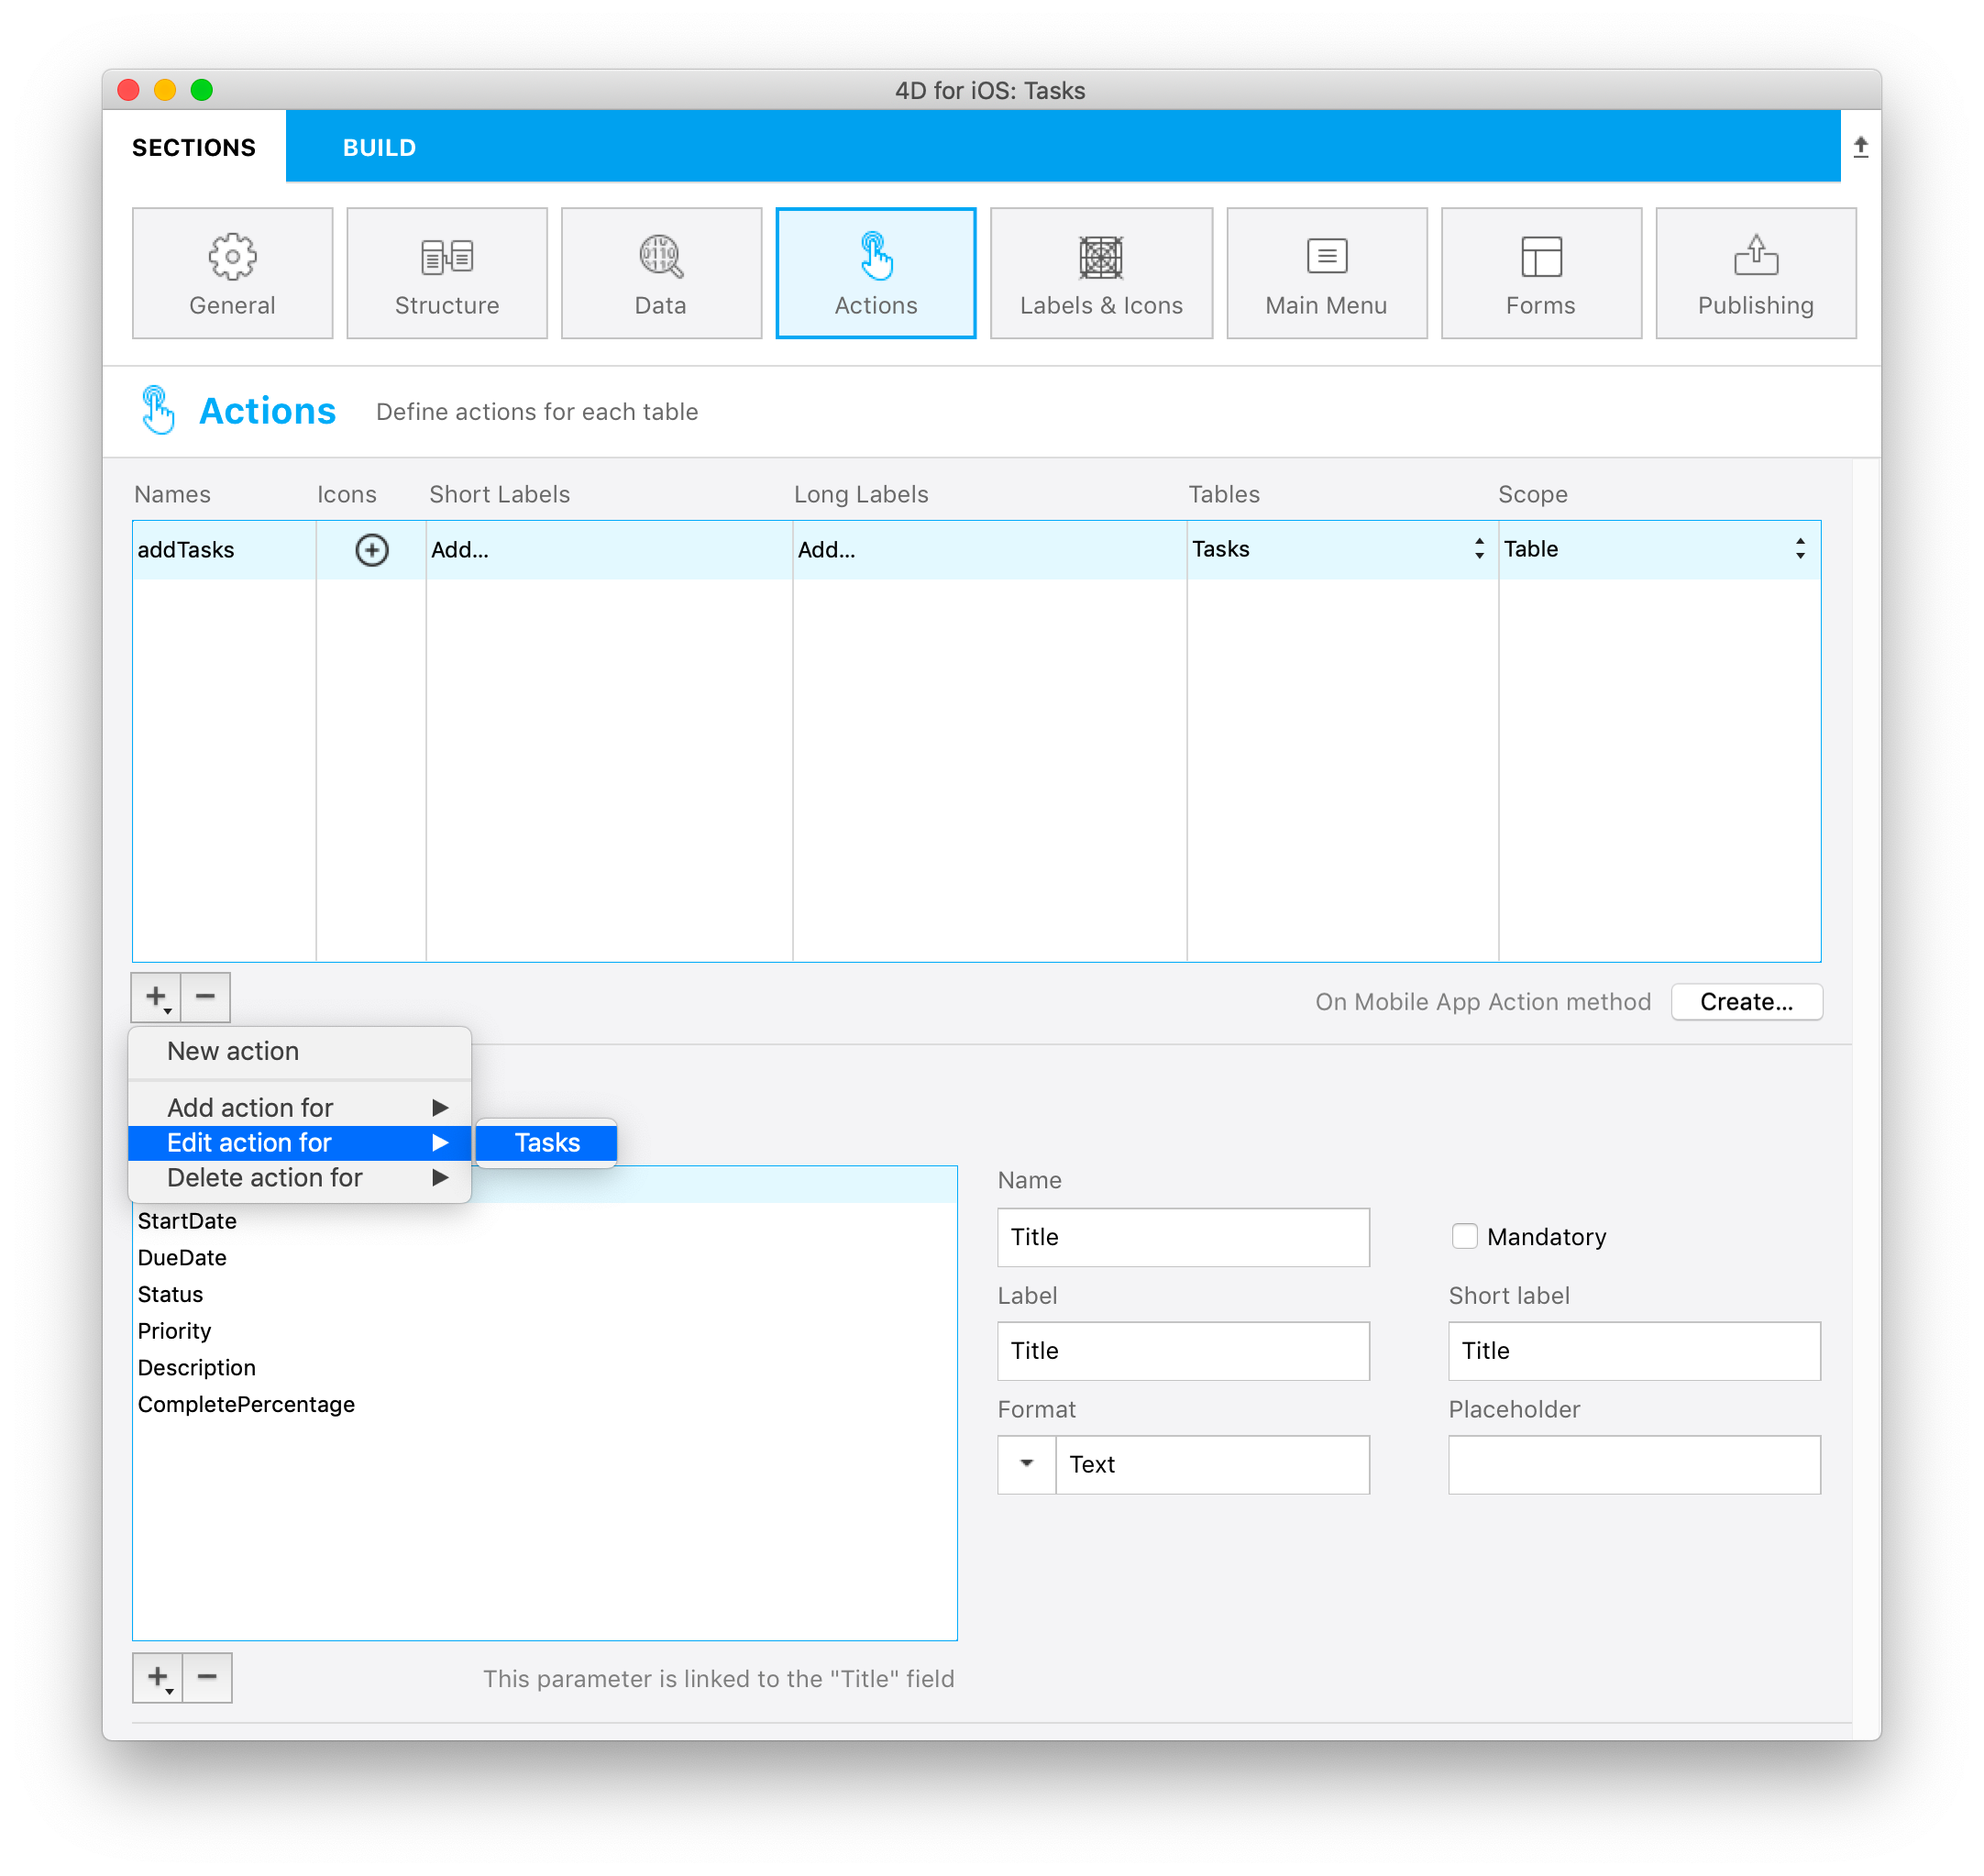
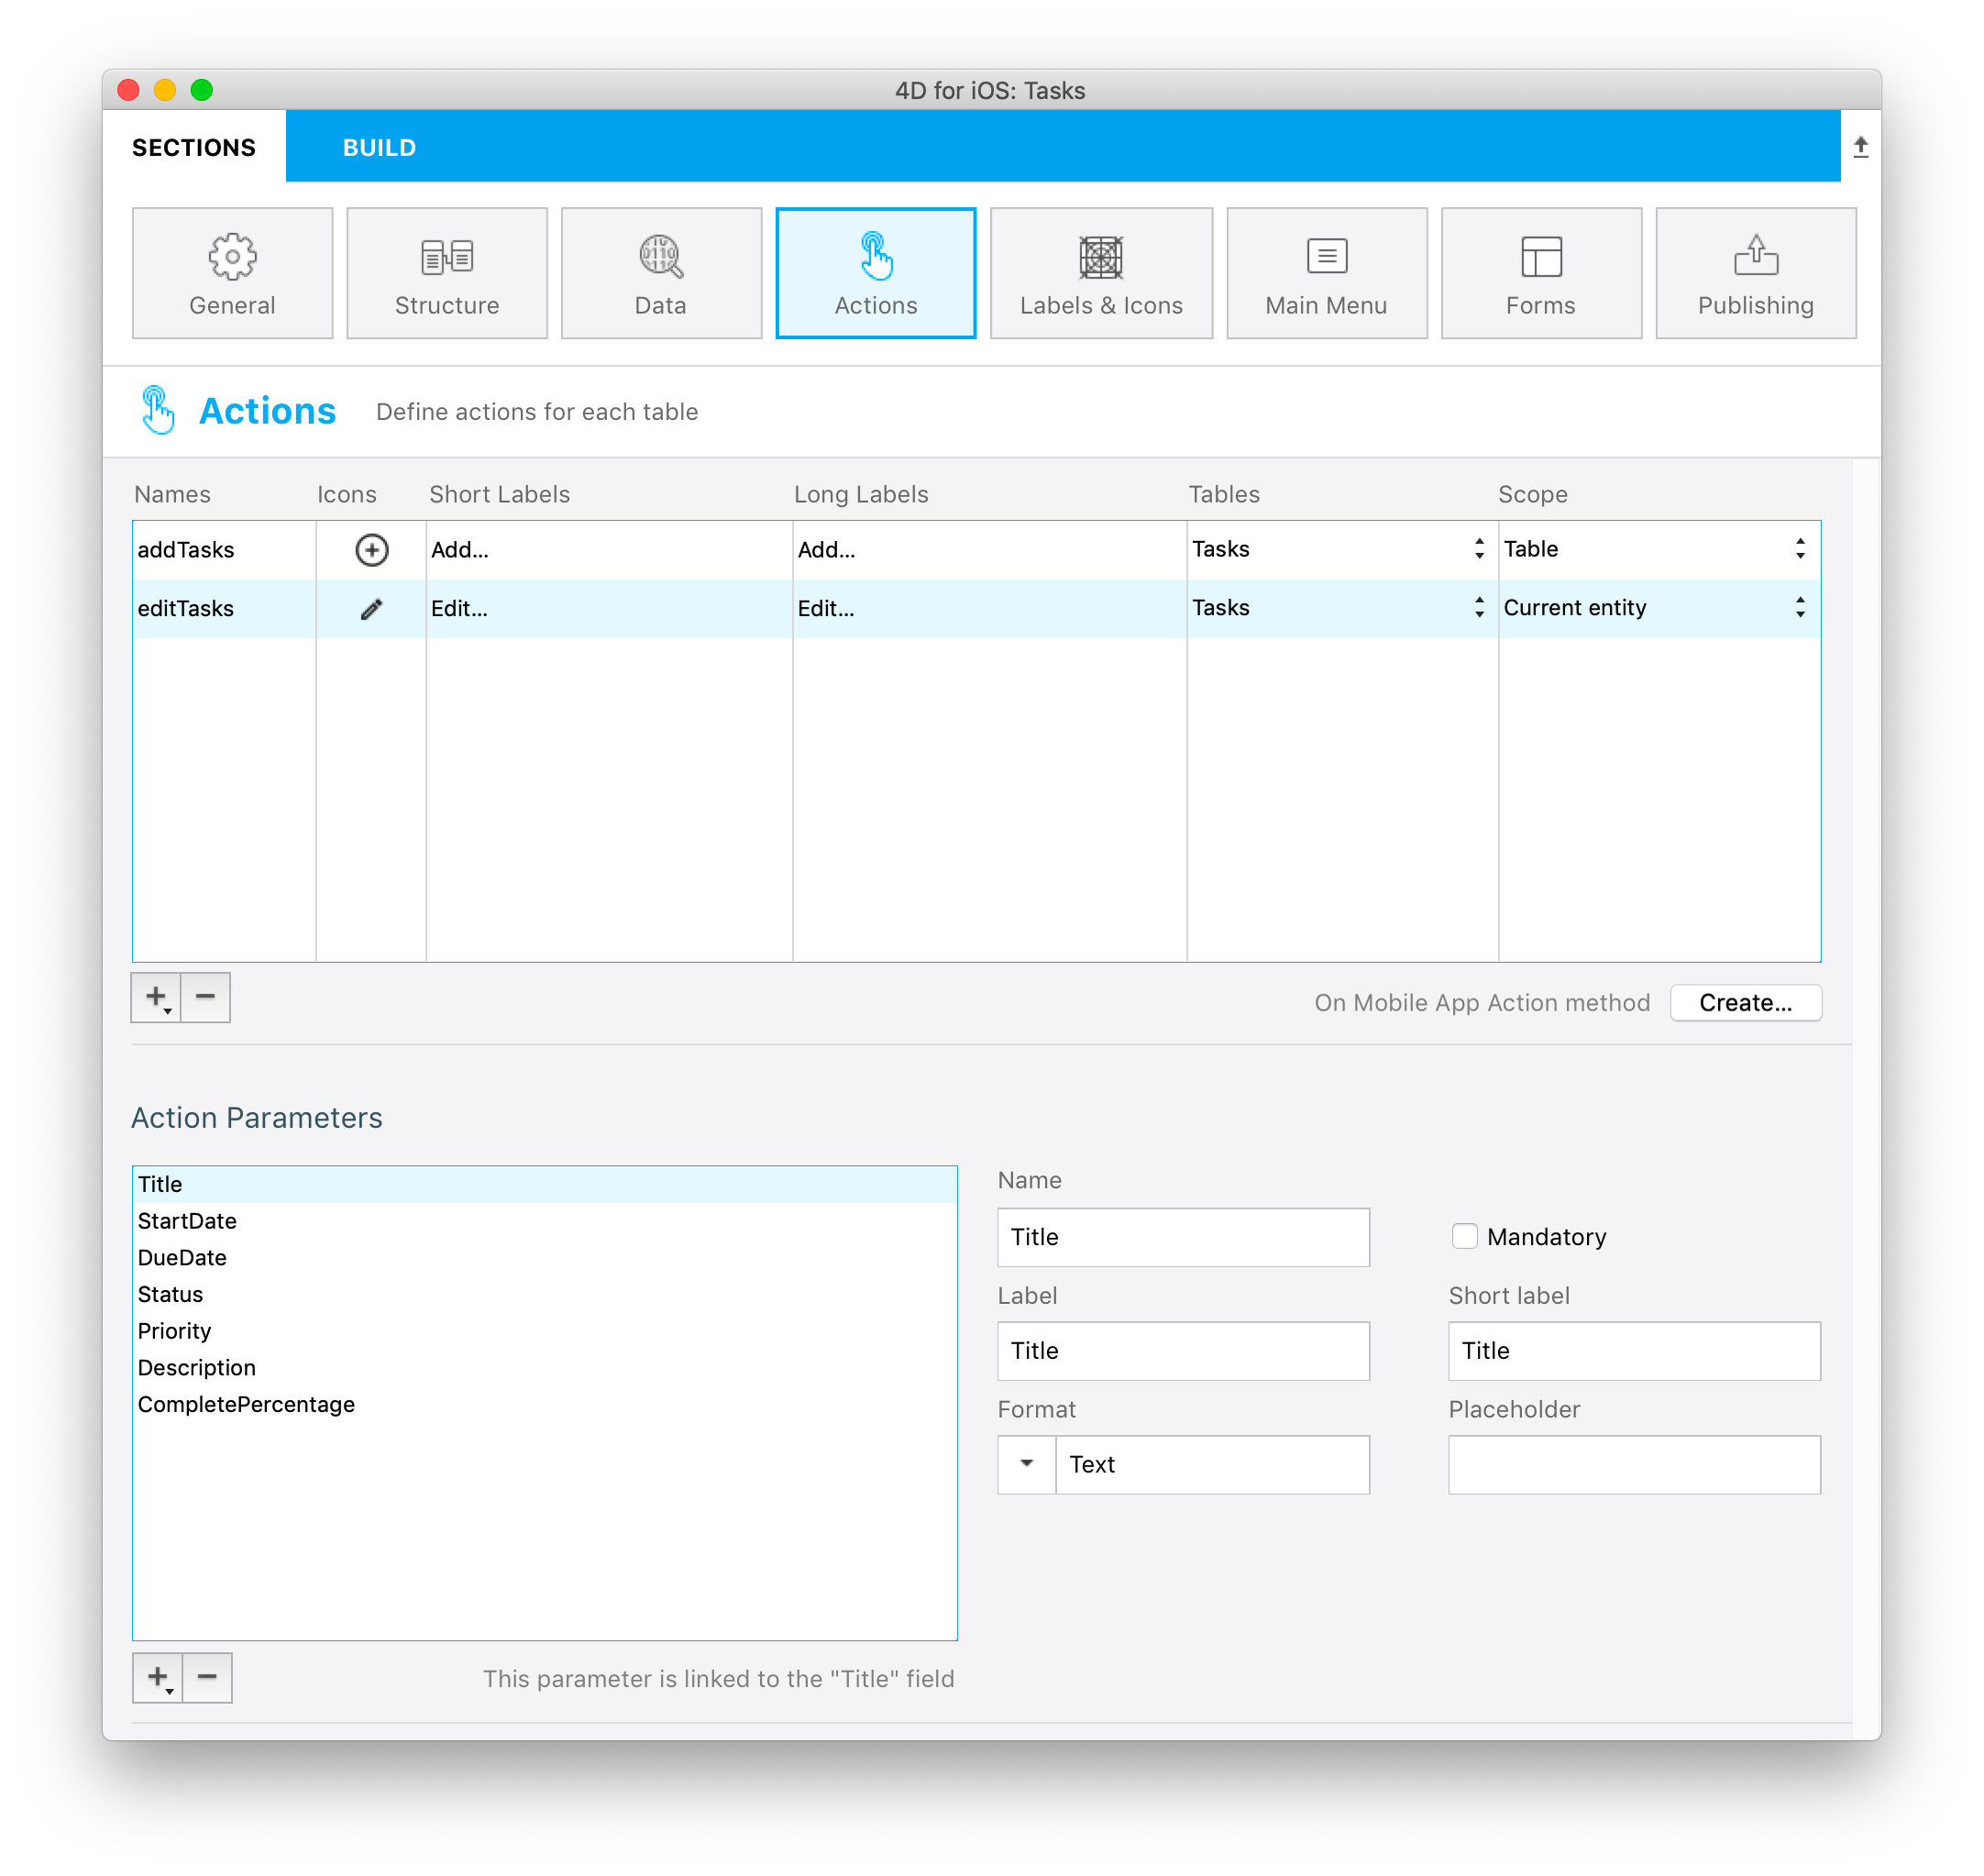
At this point, you will see:
- A new action named "editTasks" with "Edit..." as the default label.
- All available action parameters and their properties are displayed in the Actions parameters section.
Don't worry, we'll handle the 4D code for these actions later. :-)
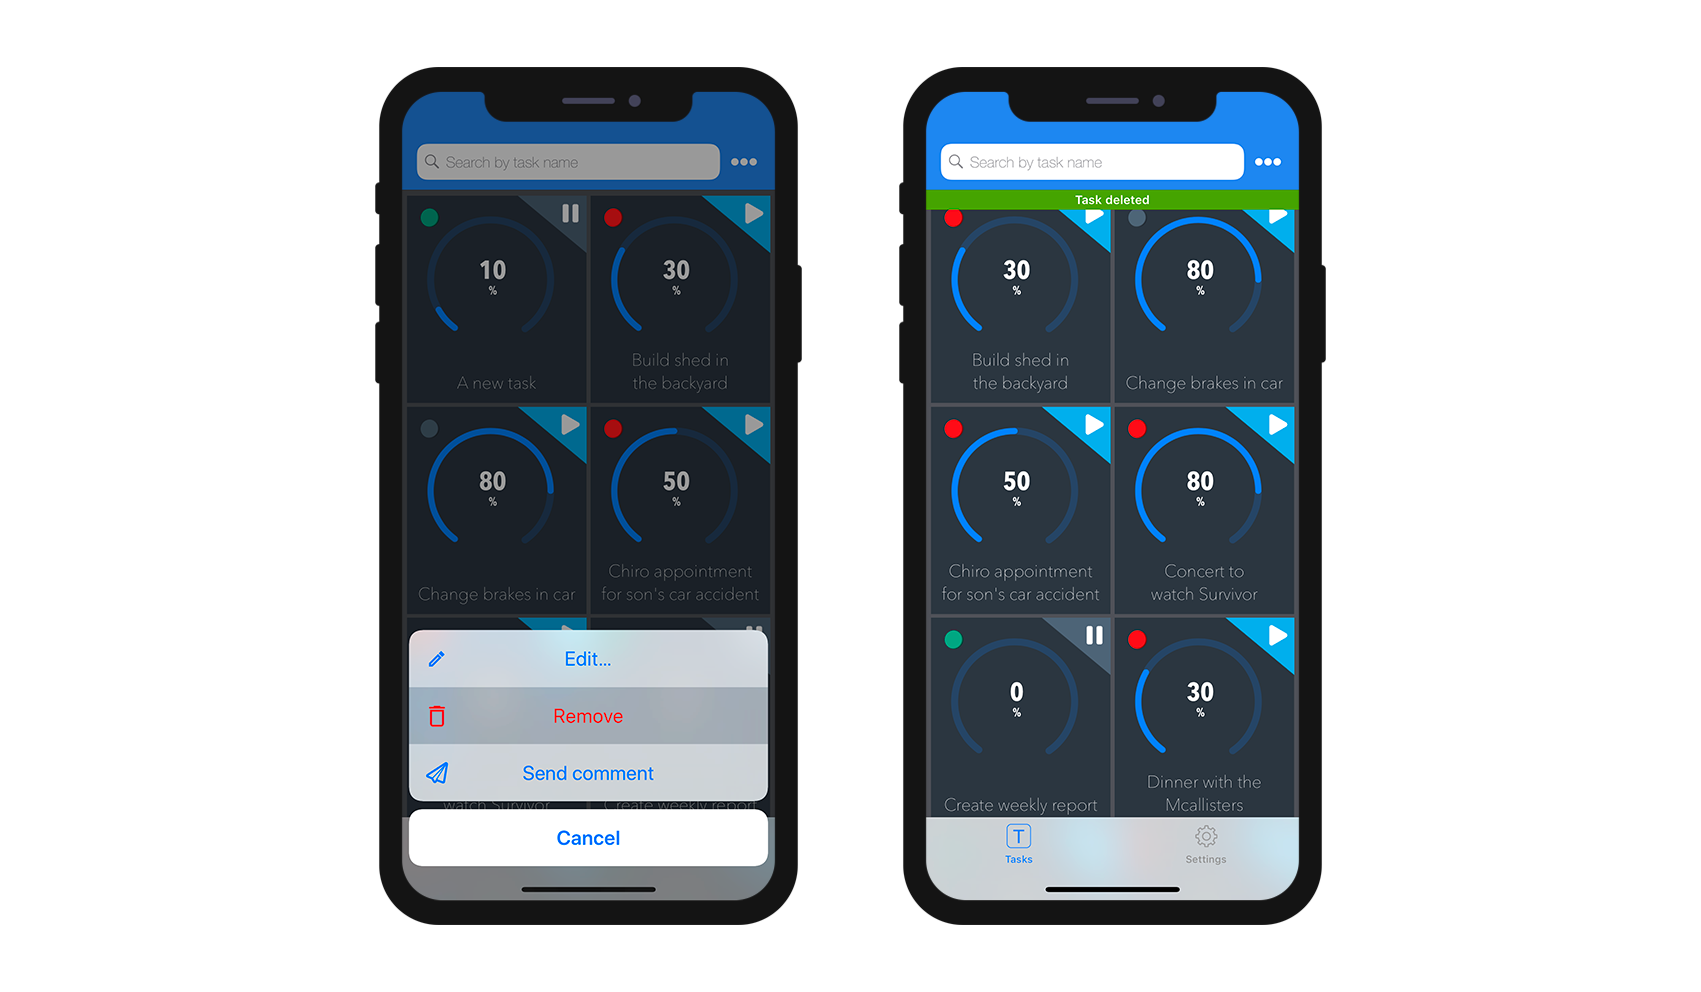
STEP 3. Delete action
The preset Delete action creation process is nearly the same as the Edit action:
- Click on the arrow in the + button at the bottom of the Actions table.
- Select the Delete action for option.
- Select the Tasks table.
At this point, you will see a new action named "deleteTasks" with "Remove" as the default label.
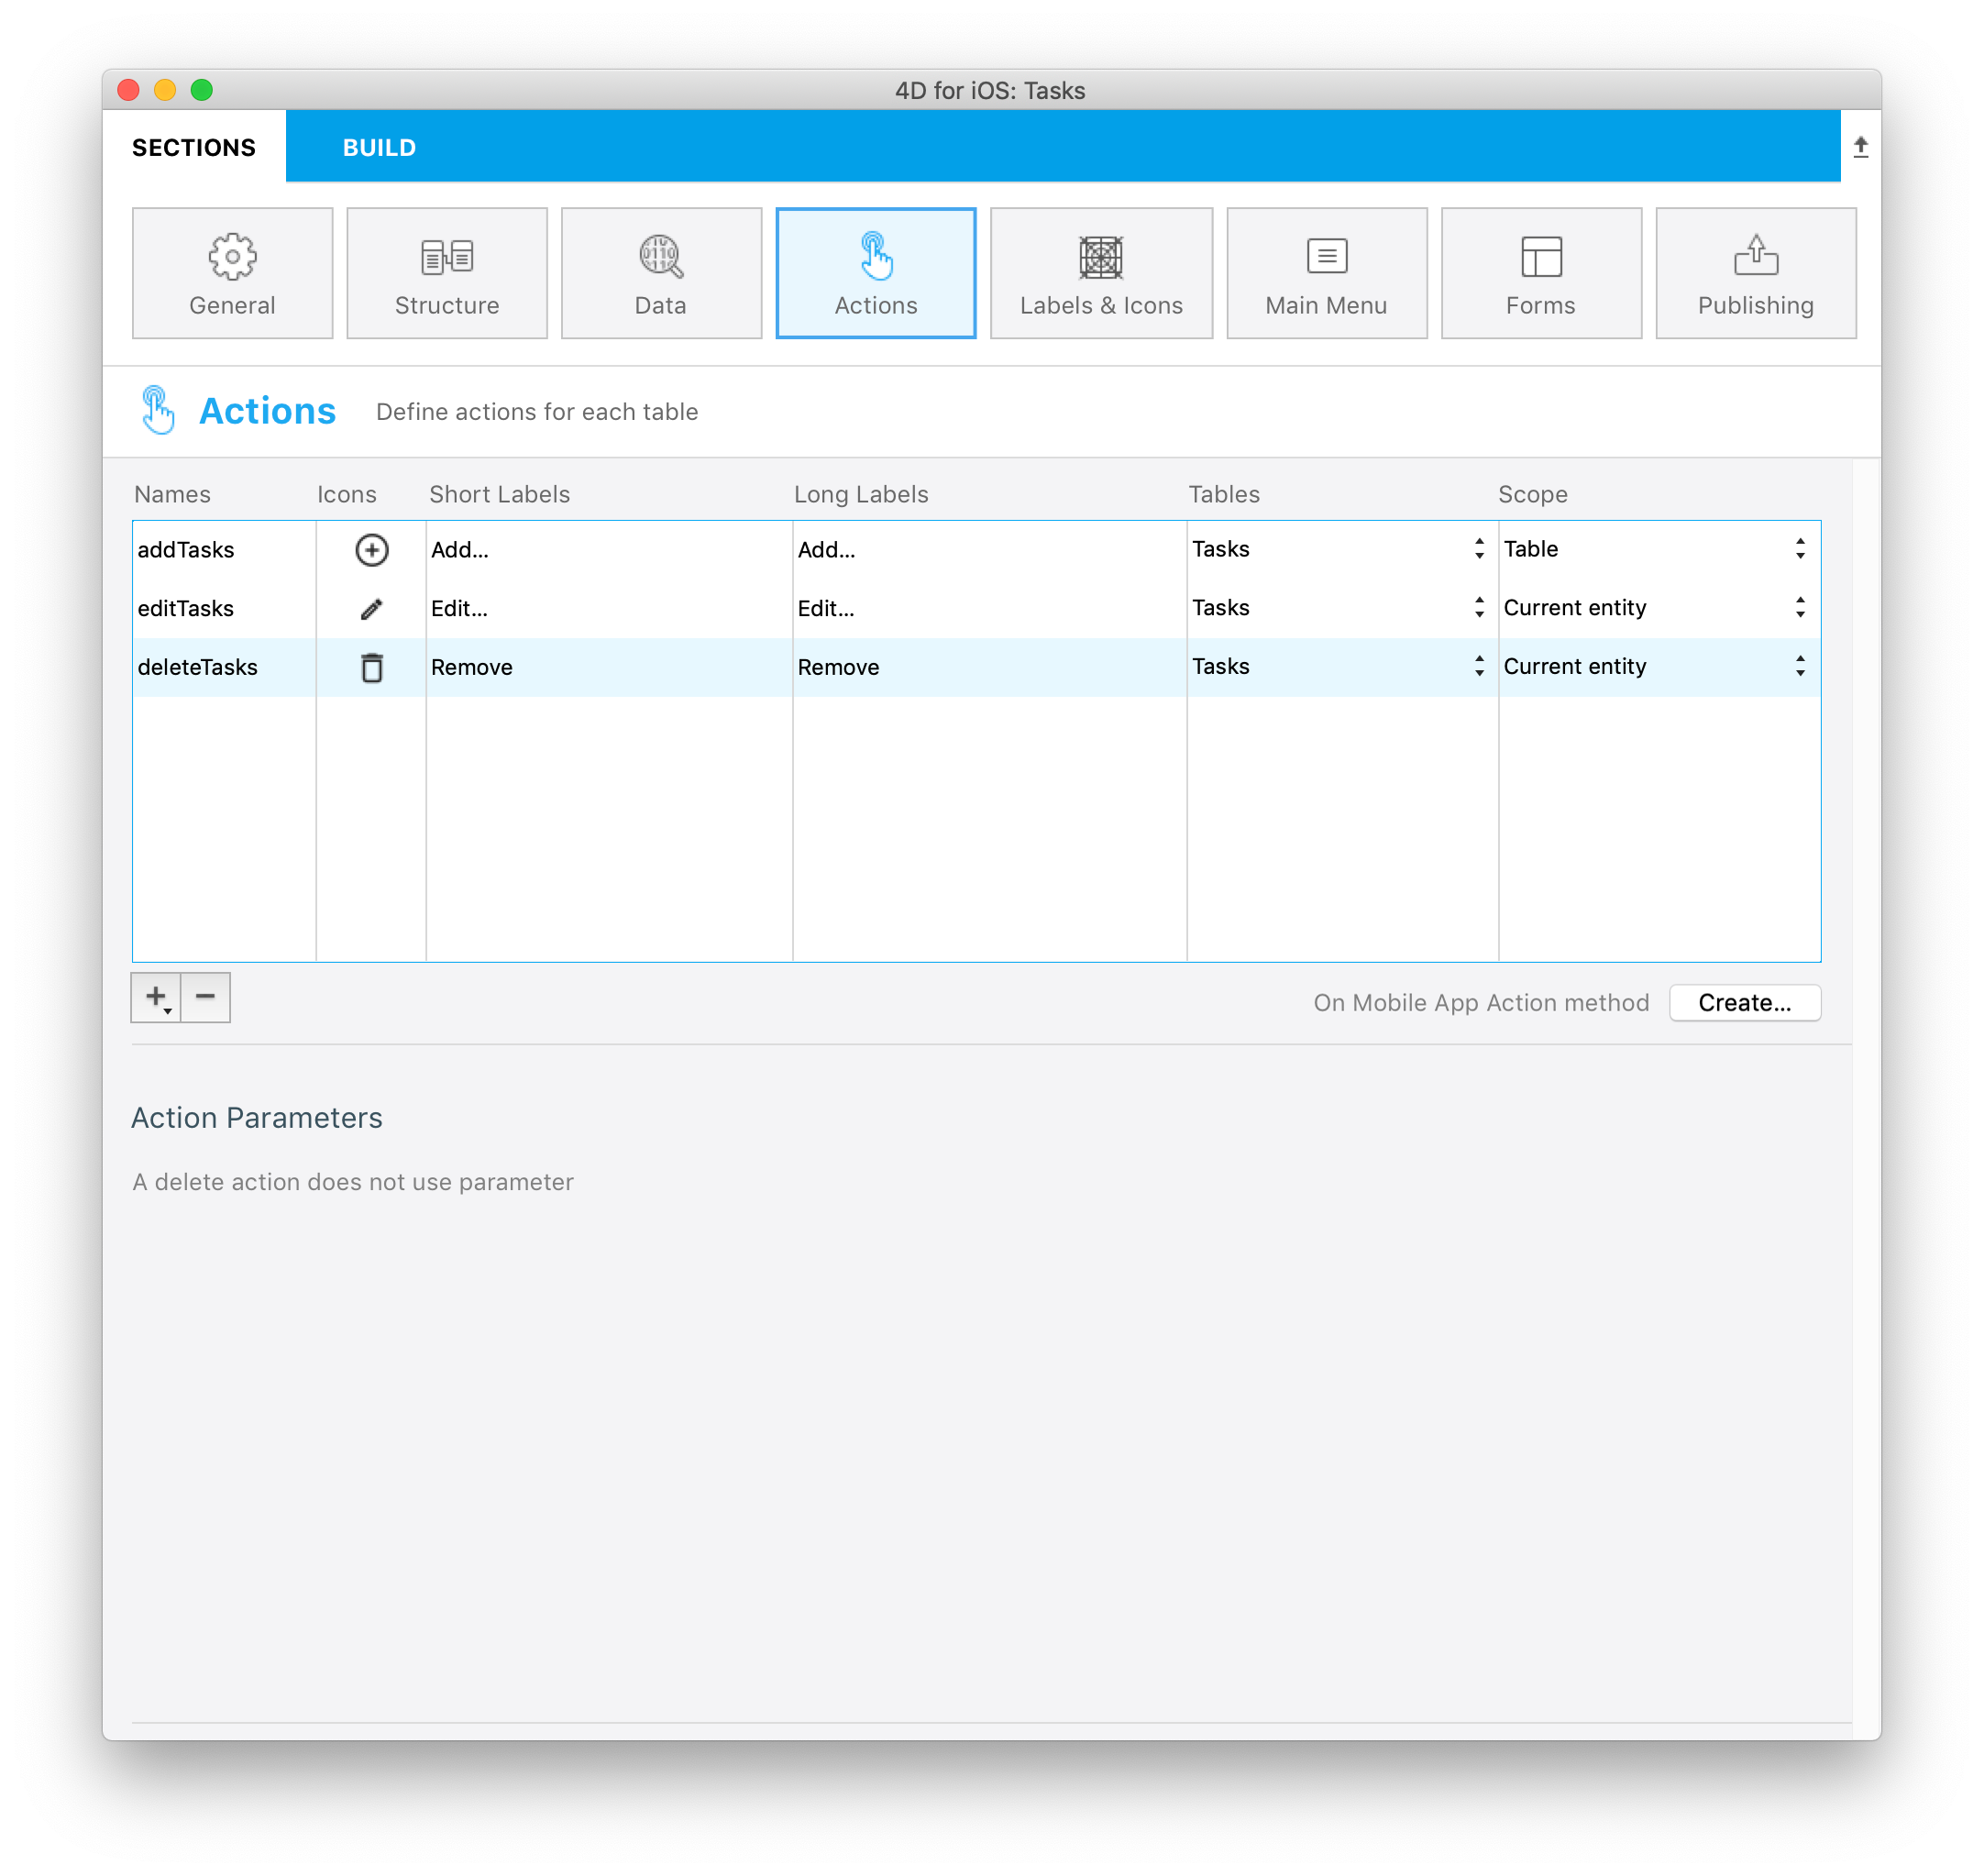
You don't need to worry about parameters or properties for this type of action.
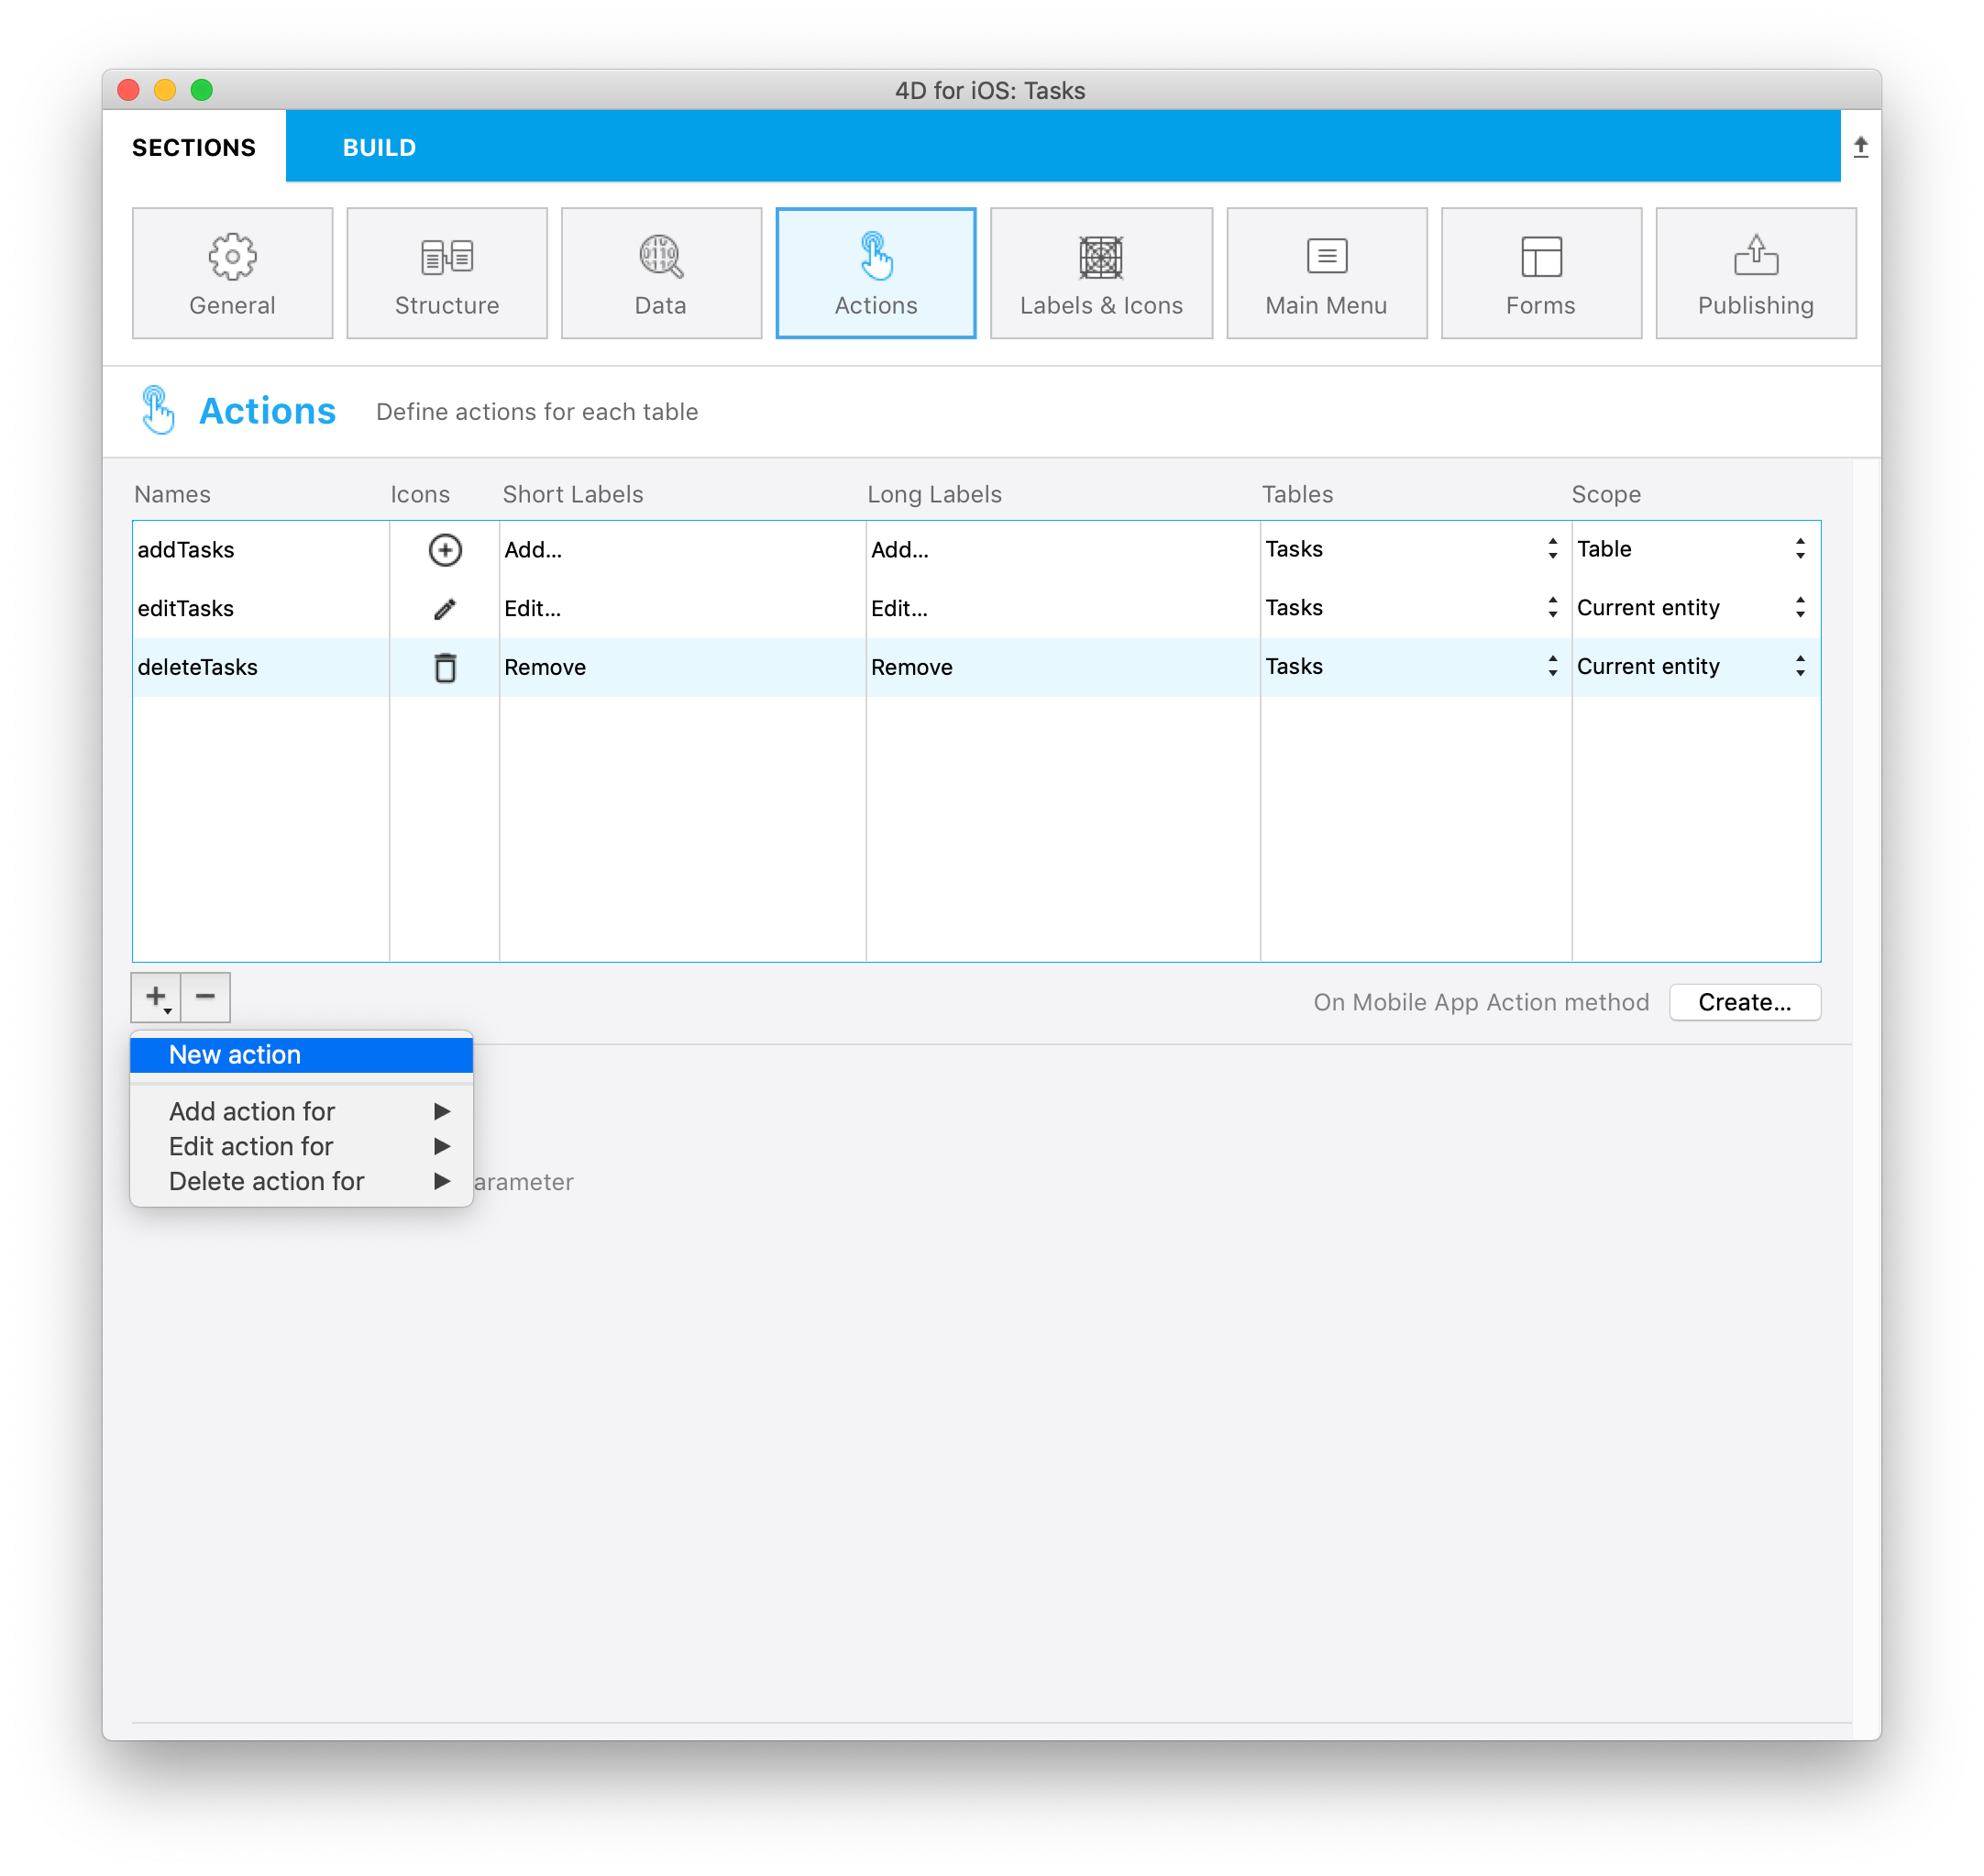
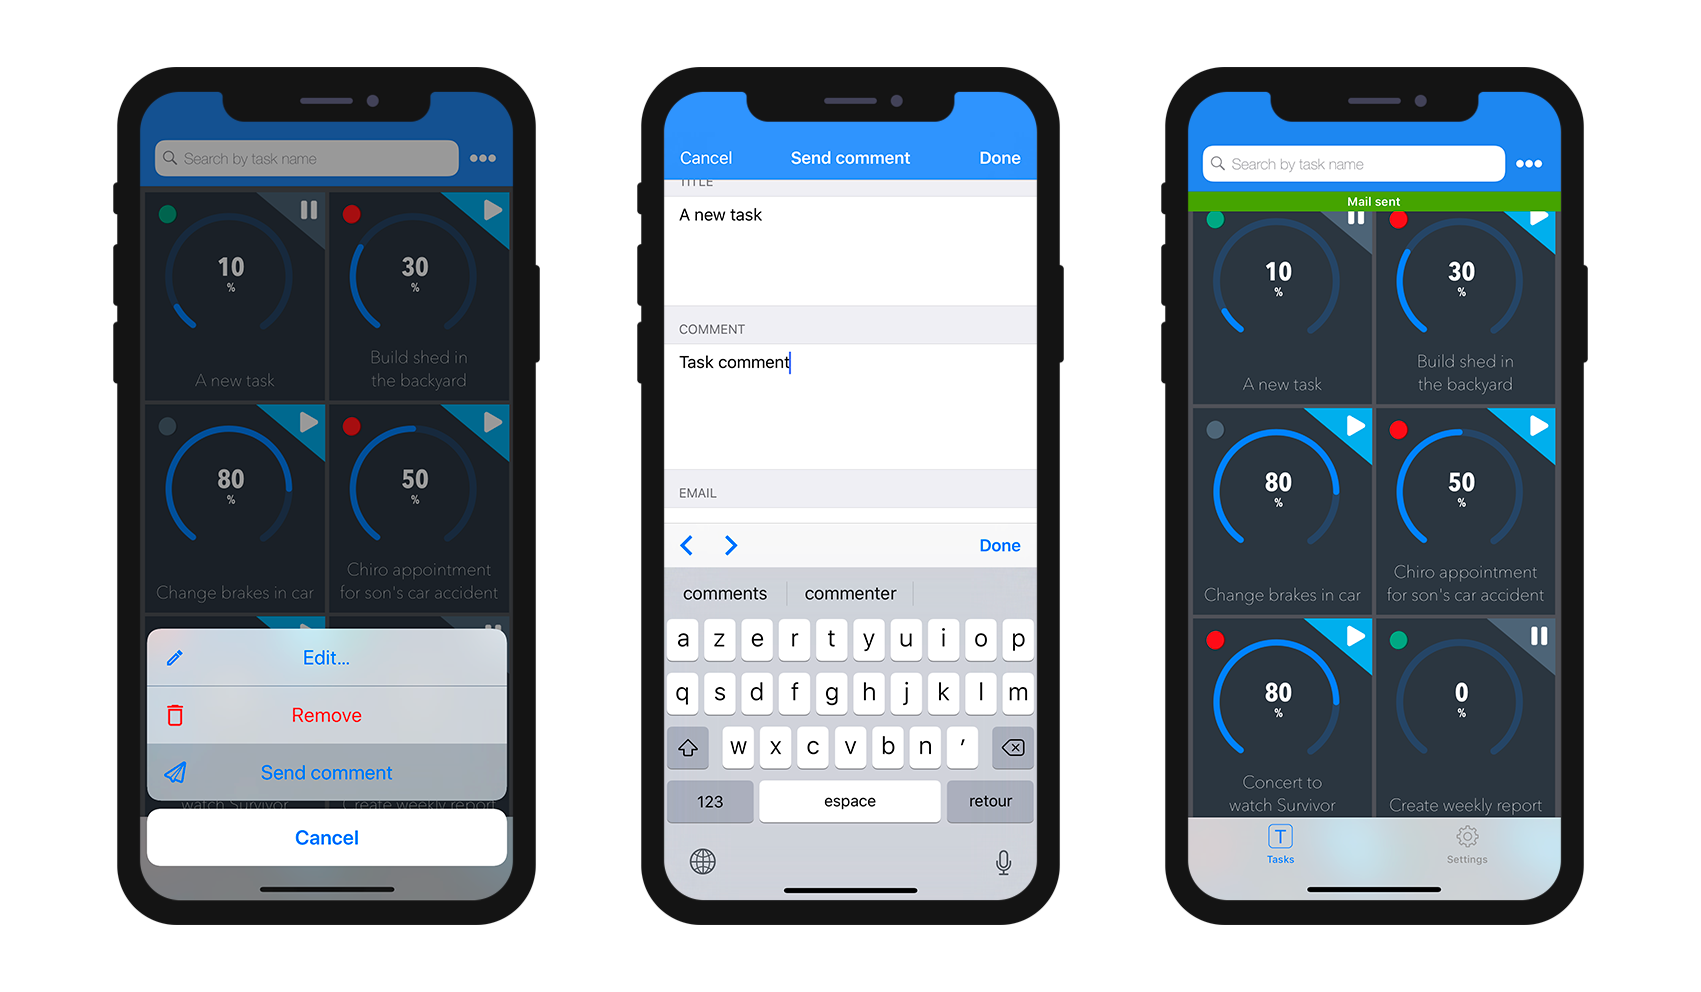
STEP 4. Send a comment action
Now we want to send a comment to a specific email depending on a specific task. To do so, click on the + button and create a new action named sendComment.
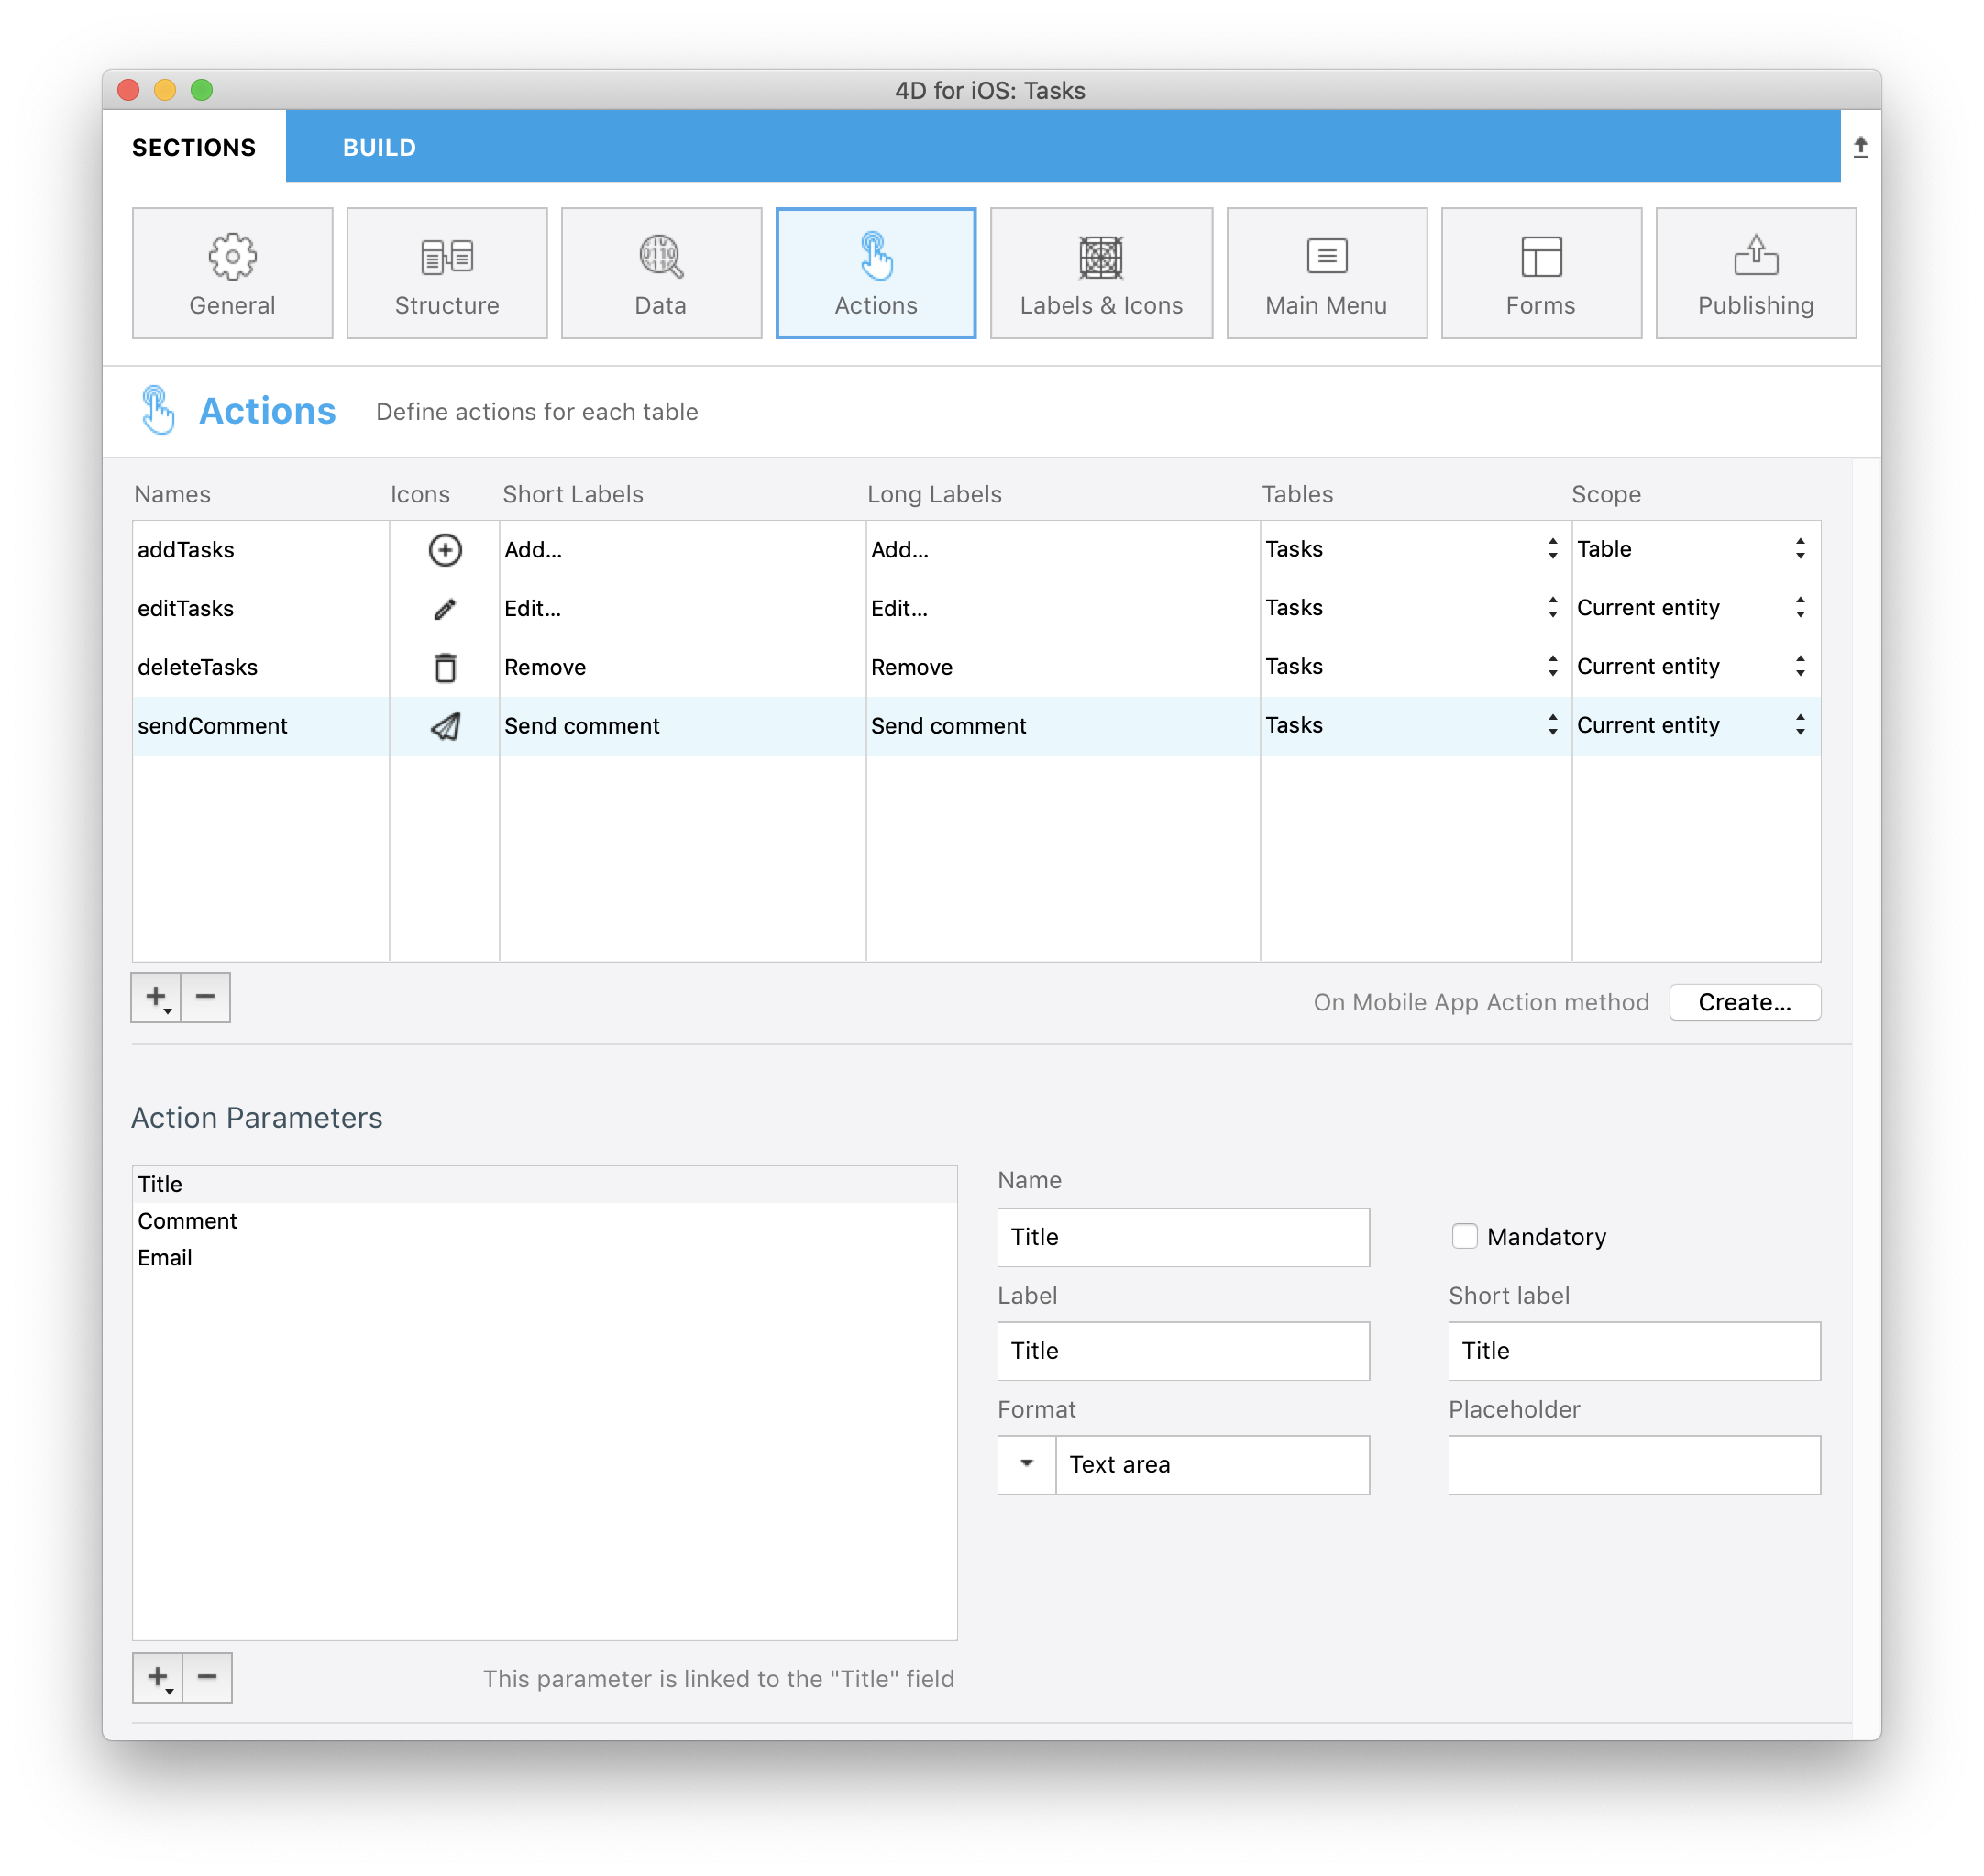
Now let's create three parameters:
- Click on the + button and select Title in the Action Parameters list to include it in the email you're going to send.
- Create a Comment parameter and select Text area as the format property.
- Create an email parameter and select Email address as the format property.
Your Actions section should look like this:
STEP 5. Create the On Mobile App Action
Click on the Create button to create the On Mobile App Action database method.
All of your actions will automatically be included in this database method.
The only thing you need to do is add a reference to your method(s) for the scenario(s) your want to handle.
Here's the final On Mobile App Action database method:
C_OBJECT($0;$response)
C_OBJECT($1;$request)

C_OBJECT($o;$context;$request;$result;$parameters)

$request:=$1  // Informations provided by mobile application

$context:=$request.context
$parameters:=$request.parameters

Case of

    : ($request.action="addTasks")

          // Insert here the code for the action "Add…"

        $o:=New object(\
        "dataClass";$context.dataClass;\
        "parameters";$parameters)

        $result:=addAction ($o)

    : ($request.action="editTasks")

          // Insert here the code for the action "Edit…"

        $o:=New object(\
        "dataClass";$context.dataClass;\
        "ID";$context.entity.primaryKey;\
        "parameters";$parameters)

        $result:=editAction ($o)


    : ($request.action="deleteTasks")

          // Insert here the code for the action "Remove"

        $o:=New object(\
        "dataClass";$context.dataClass;\
        "ID";$context.entity.primaryKey)

        $result:=deleteAction ($o)

    : ($request.action="sendComment")

          // Insert here the code for the action "Send Comment"

        $o:=New object(\
        "dataClass";$context.dataClass;\
        "ID";$context.entity.primaryKey;\
        "parameters";$parameters)


        $result:=sendMail ($o)

    Else

          // Unknown action

End case

$0:=$result
STEP 6. Create All the methods you need
addAction
C_OBJECT($0)
C_OBJECT($1)

C_OBJECT($entity;$in;$out)

$in:=$1

$out:=New object("success";False)

If ($in.dataClass#Null)

    $entity:=ds.Tasks.new()  //create a reference

    For each ($key;$in.parameters)

        $entity[$key]:=$in.parameters[$key]

    End for each

    $entity.save()  //save the entity


    $out.success:=True  // notify App that action success
    $out.dataSynchro:=True  // notify App to refresh the selection
    $out.statusText:="Task added"

Else

    $out.errors:=New collection("No Selection")

End if

$0:=$out
editAction
C_OBJECT($0)
C_OBJECT($1)

C_OBJECT($dataClass;$entity;$in;$out;$status;$selection)

$in:=$1

$selection:=ds[$in.dataClass].query("ID = :1";String($in.ID))

If ($selection.length=1)

    $entity:=$selection[0]

    For each ($key;$in.parameters)

        $entity[$key]:=$in.parameters[$key]

    End for each

    $status:=$entity.save()

    $out:=New object

    If ($status.success)

        $out.success:=True  // notify App that action success
        $out.dataSynchro:=True  // notify App to refresh this entity
        $out.statusText:="Task edited"

    Else

        $out:=$status  // return status to the App

    End if

Else

    $out.success:=False  // notify App that action failed

End if

$0:=$out
deleteAction
C_OBJECT($0)
C_OBJECT($1)

C_OBJECT($dataClass;$entity;$in;$out;$status;$selection)

$in:=$1

$selection:=ds[$in.dataClass].query("ID = :1";String($in.ID))

If ($selection.length=1)

    $entity:=$selection.drop()

    $out:=New object

    If ($entity.length=0)

        $out.success:=True  // notify App that action success
        $out.dataSynchro:=True  // notify App to refresh this entity
        $out.statusText:="Task deleted"

    Else

        $out:=$status  // return status to the App

    End if

Else

    $out.success:=False  // notify App that action failed

End if

$0:=$out
sendEmail
C_OBJECT($0;$out)
C_OBJECT($1;$in)

C_OBJECT($dataClass;$entity;$selection)

$in:=$1

$selection:=ds[$in.dataClass].query("ID = :1";String($in.ID))

If ($selection.length=1)

    $entity:=$selection[0]

    For each ($key;$in.parameters)

        $entity[$key]:=$in.parameters[$key]

    End for each

    $out:=New object

    $server:=New object
    $server.host:="smtp.gmail.com"
    $server.port:=465
    $server.user:="test@mail.com"
    $server.password:="yourPassword"

    $transporter:=SMTP New transporter($server)

    $email:=New object
    $email.subject:="New comment about one of your task"
    $email.from:="yourEmail"
    $email.to:=$emailToSend
    $email.htmlBody:="<h1>Comment from Tasks for iOS</h1>"+"<p><b>Task:</b> "+$taskTitle+"</p><p><b>Comment:</b> "\
    +$commentToSend+"</p><br><p><i>Send from my 4D for iOS app</i></p>"\

    $status:=$transporter.send($email)
    If ($status.success)
        $out.success:=True  // notify App that action success
        $out.statusText:="Mail sent"

    Else
        $out.success:=False  // notify App that action failed
        $out.statusText:="Mail not sent"

    End if

Else

    $out.success:=False  // notify App that action failed

End if

$0:=$out
Don't forget to add your own values for the sendEmail action.
STEP 7. Build your app
It's time to build your app!
Now, if you click on the Action button in the navigation bar, you'll be able to create a new task.
Holding and maintaining pressure on your new task cell in the List Form, will show that an Edit... action is available in the action list.
Send a comment using the Send comment action.
And finally you can delete an entity using the Delete... action.
STEP 8. Where to go from here?
Congratulations! Your Tasks iOS app is now complete and you can now modify your app data direclty from your device and sychronize it with your server!
Download the completed project: