Customize your 4D for iOS App
Now, let's do some storyboard modification ... from simple to complex.

STEP 1. Simple label modification
We'll start by modifying a label's font and color:
- Open the ContactDetailsForm.storyboard file from the Navigation tab.
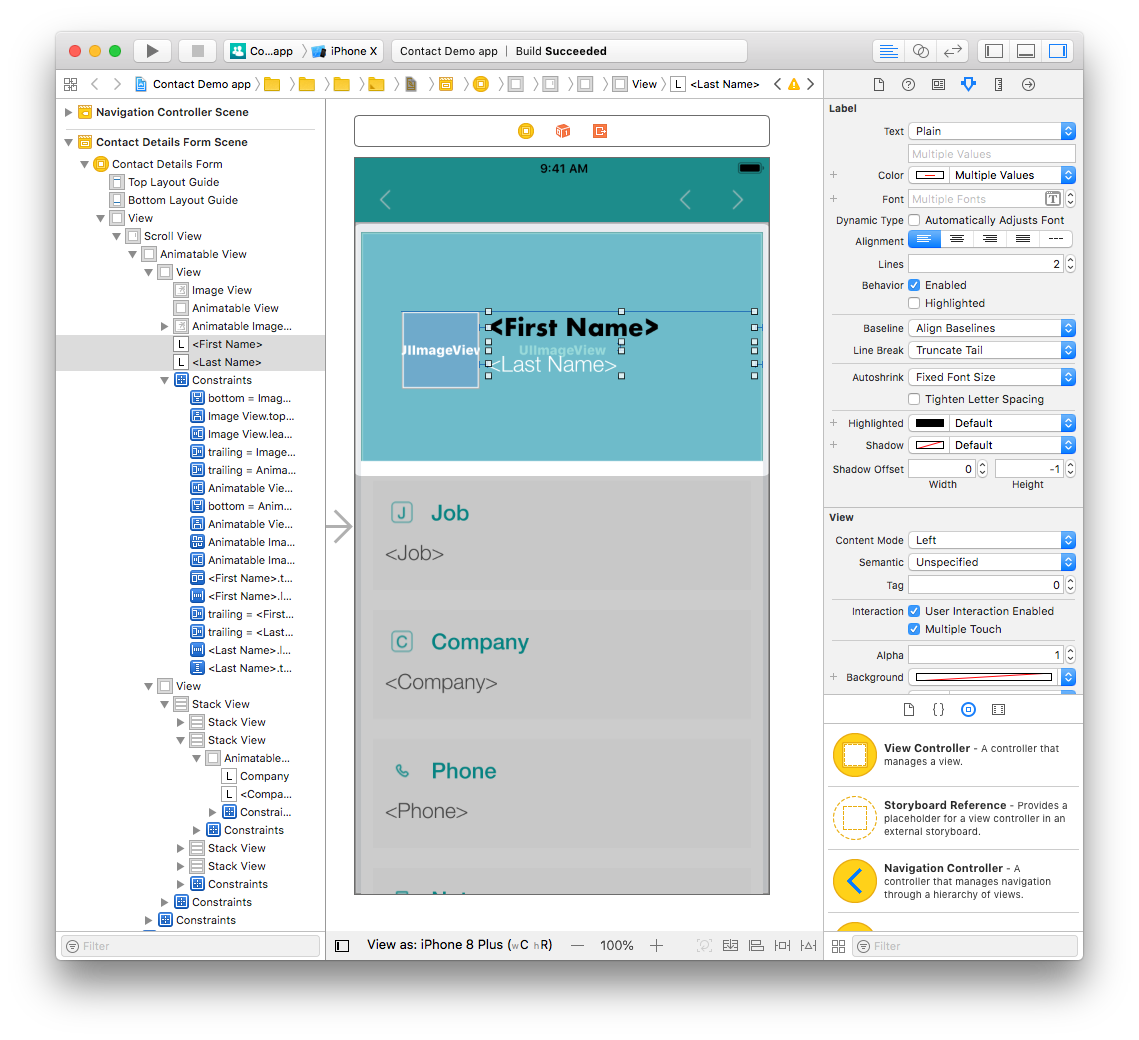
- Click on the First Name label (you can also select it from the interface builder or the left pane).
- Select the Attributes inspector pane from the Utility area.
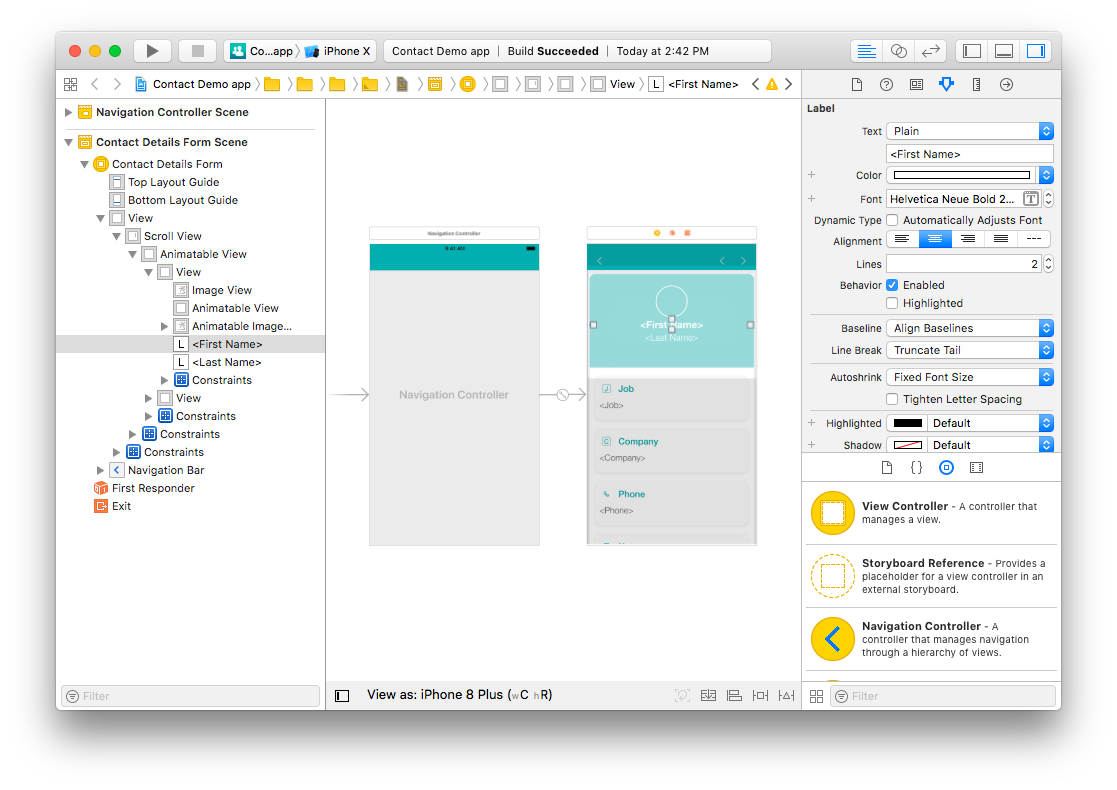
- Change the font from Helvetica Neue Bold to Futura Bold.

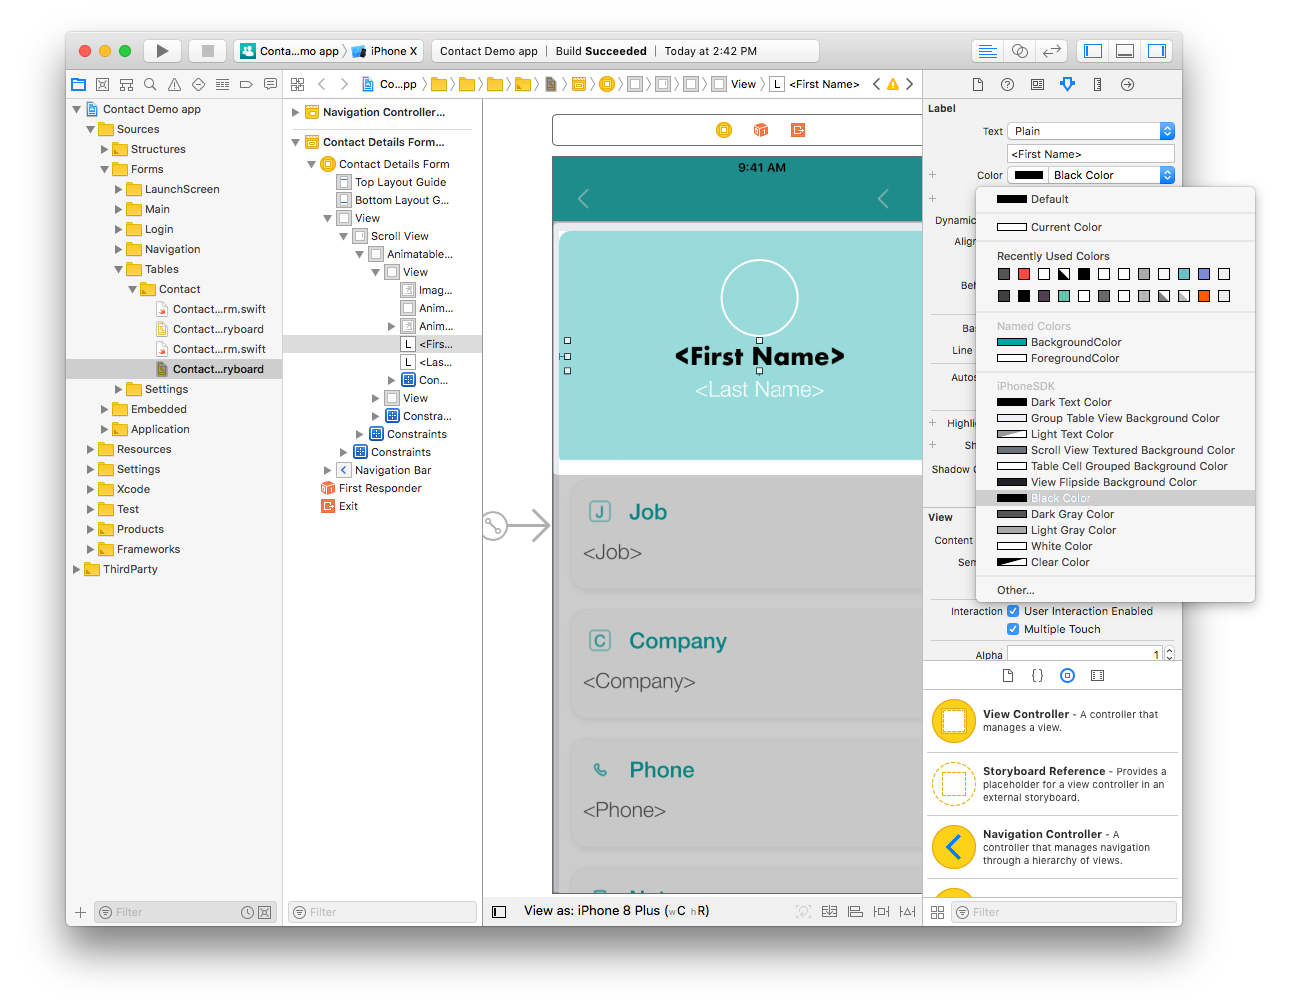
- You can also change the color of the font from the same pane.
STEP 2. Change profile picture position
All 4D for iOS templates use constraints for the app's elements to be well displayed on all devices.
In the ContactDetailsForm.storyboard file, the picture, First Name, and Last Name labels are all currently center aligned.
Let's change it to appear like this:
First, vertically align the picture and drag the First Name and Last Name labels to the right of the picture.
Next, select the image and go to the Size attributes pane from the Utility area. Change the X value from 161.67 to 40.67 and the Y value from 28 to 79.
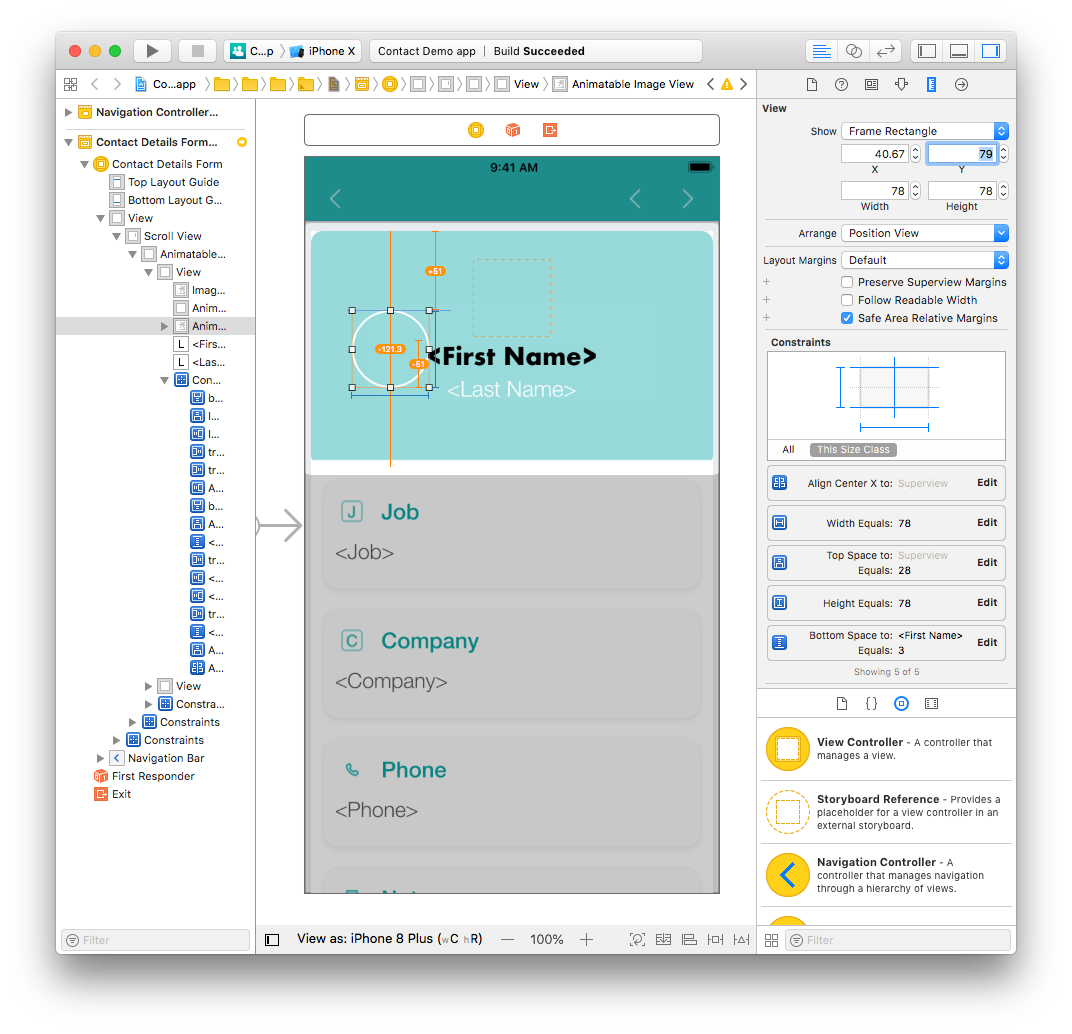
As you can see, the position has changed but Xcode is displaying yellow lines...why? These yellow lines represent constraints which are no longer valid.
STEP 3. Update profile picture constraints
To vertically align the picture in the center in the Superview (the view which contains it), we need to delete the existing constraints and add new ones.
The image currently has the following constraints:
- Width Equals: A width of 78 pixels.
- Height Equals: A height of 78 pixels.
- Align Center X: Centers the image on a previously defined horizontal axis.
- Top Space: An amount of space from the top of the image to the top of the view.
- Bottom space to
<First Name>: The previously defined space between the First Name label and the image.
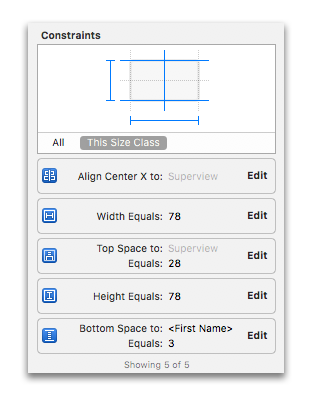
Delete all of the constraints except Width and Height (you'll modify these later from the Size inspector in the Constraints section). The picture outline should be now in red because the constraints are missing.
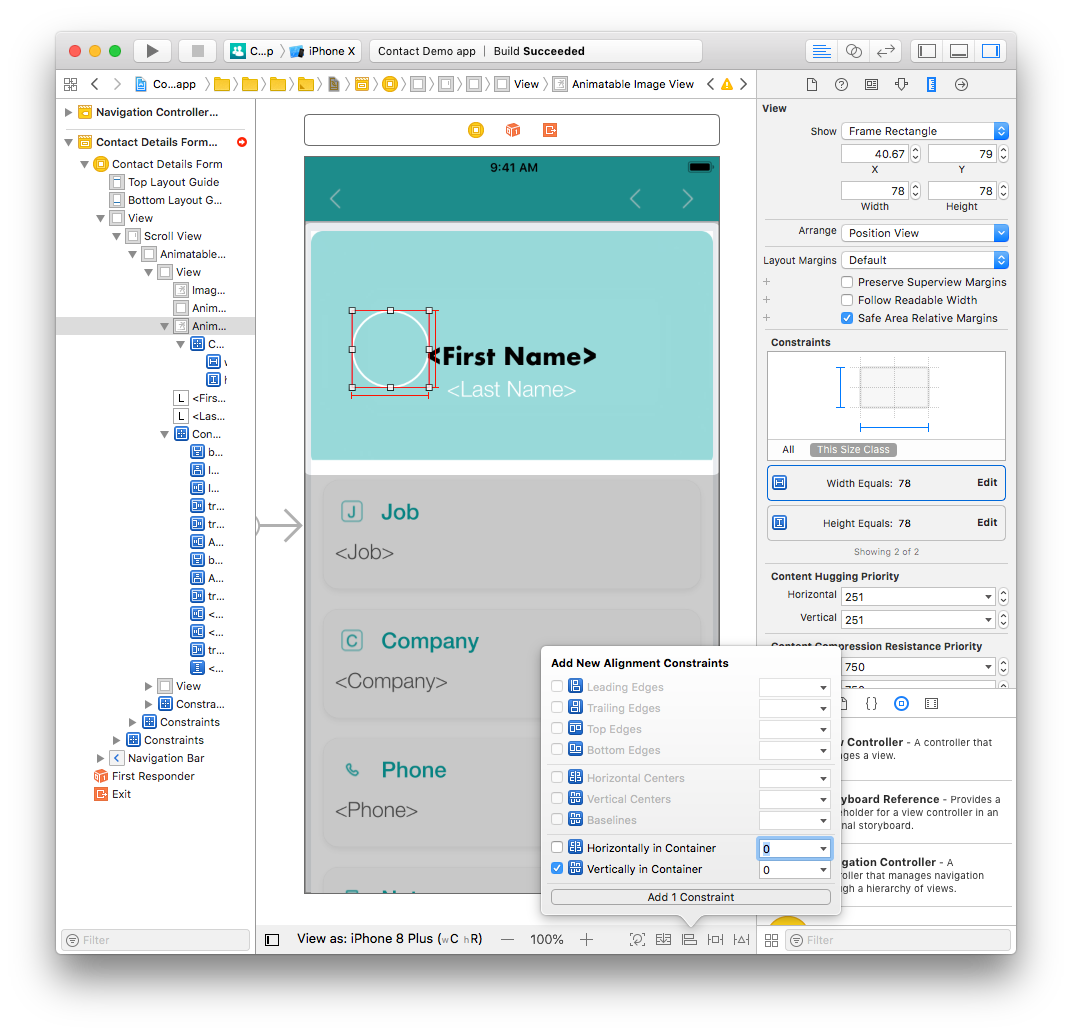
Click on the Align button (at the bottom of the Interface Builder window) and check the Vertically in Container checkbox.
Next, click on the Add New Constraints button and add a leading space constraint (the left constraint).
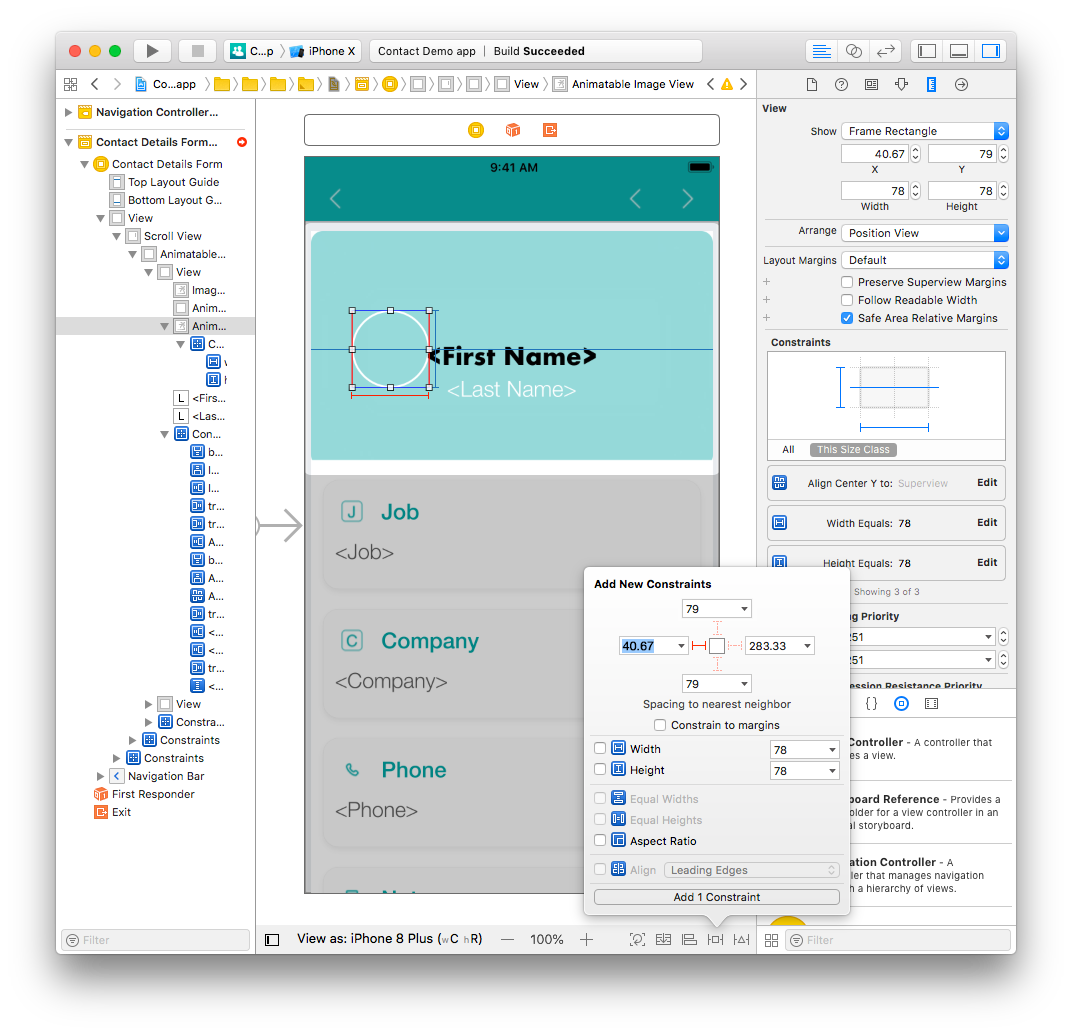
At this point, all the profile picture constraints should be blue.
Congratulations! Your profile picture is now well positioned with the correct constraints.
TIPS
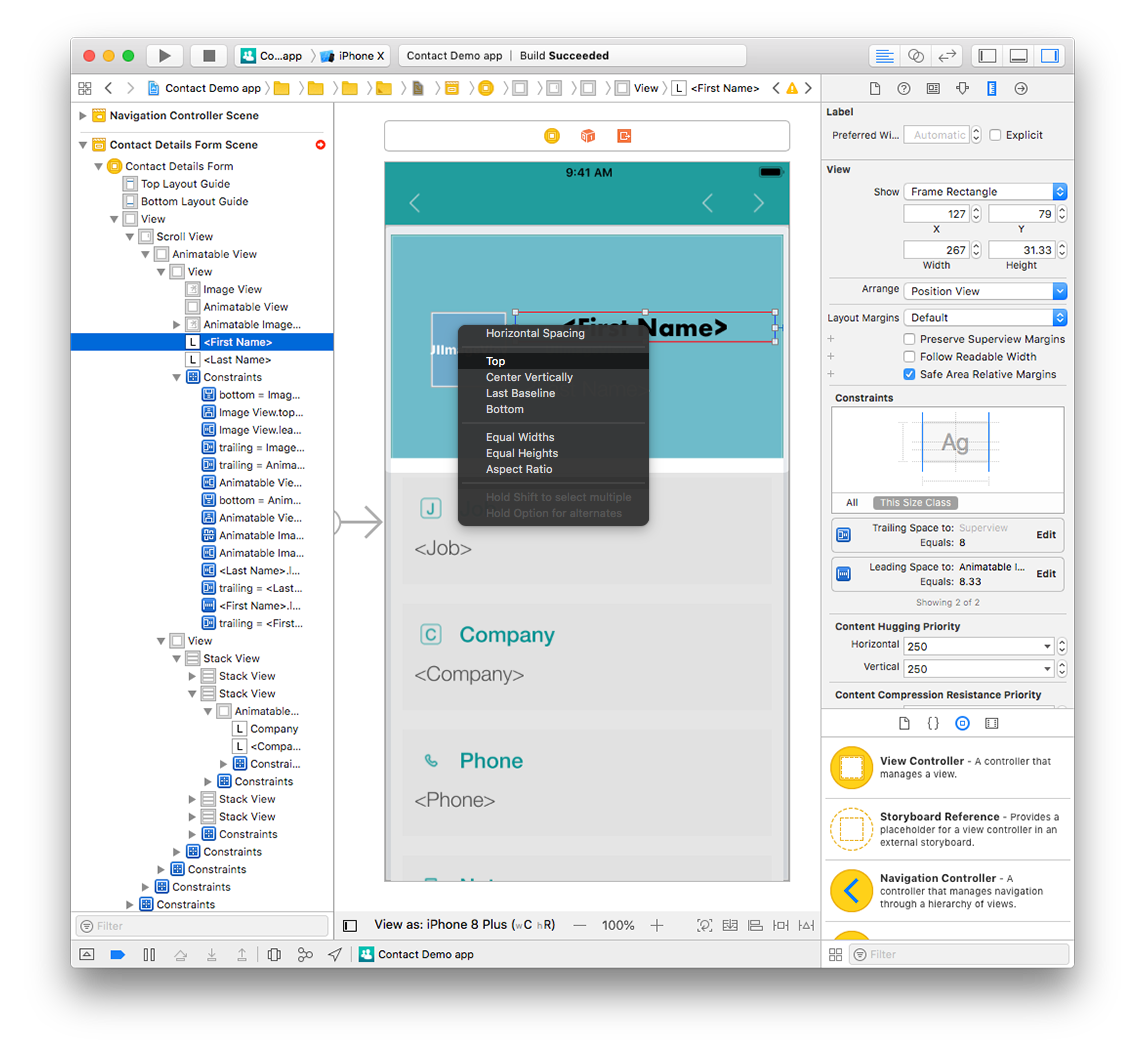
To create a constraint between two views, press Ctrl and drag one of the views to the other. When you release the mouse button, the Interface Builder displays a menu with a list of possible constraints.
You can delete constraints by either selecting them from the Size inspector or from the Interface Builder.
STEP 4. Update label positions and constraints
Now, let's work on the First Name label.
We'll begin by changing the position and width:
- Select the First Name label from the Interface Builder.
- Next, change the Width from 386 to 267 pixels.
- Change the X value from 8 to 127 pixels and the Y value from 28 to 79 pixels.
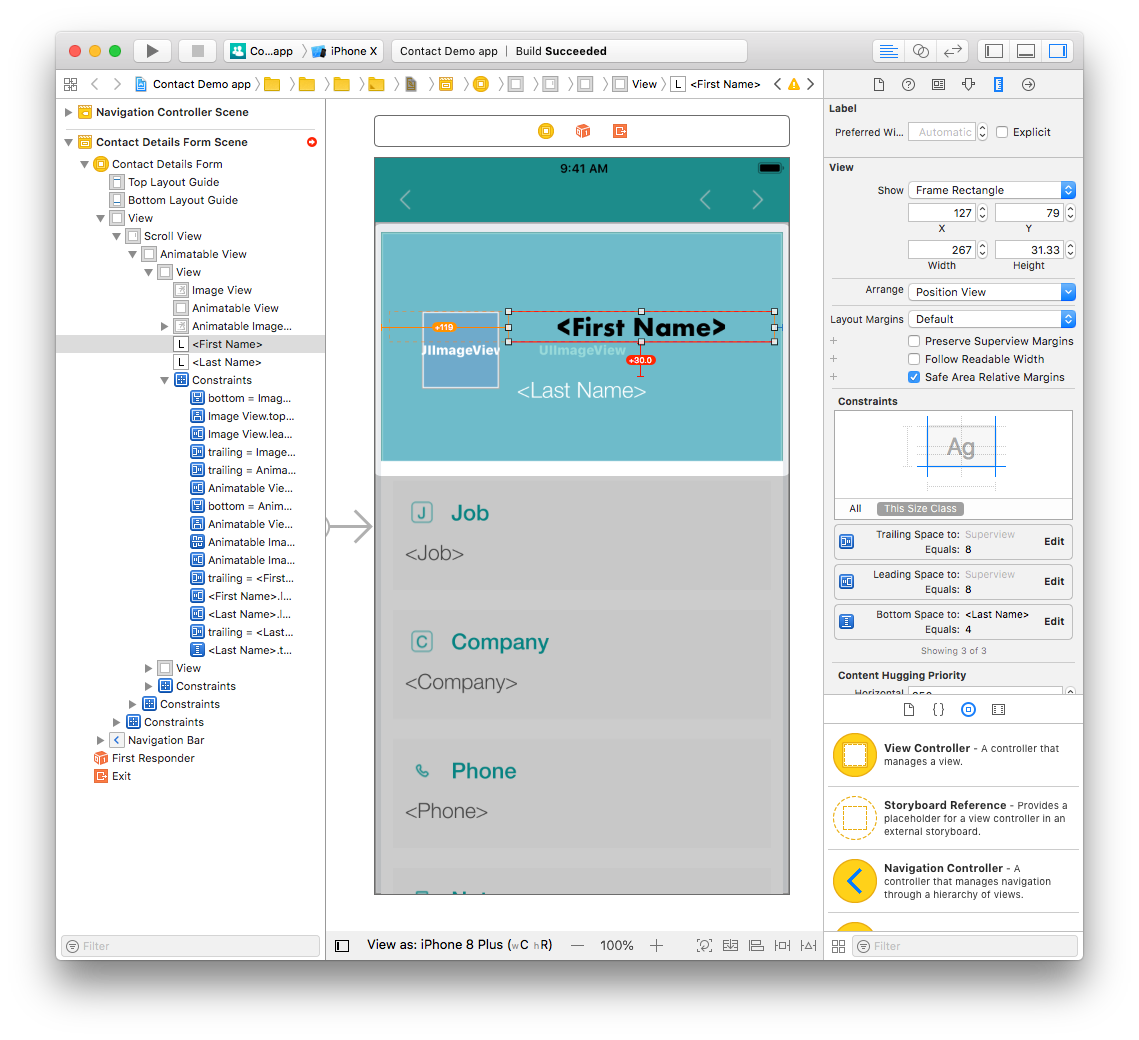
Modify the remaining constraints:
- Delete the leading and the bottom space constraints from the Size inspector.
- Add a leading space constraint by clicking on the Add New Constraints button to position the First Name label to the right of the Profile picture.
- Press Ctrl and drag the First Name label to the Profile picture. Select the top constraint in the menu to top align both elements.
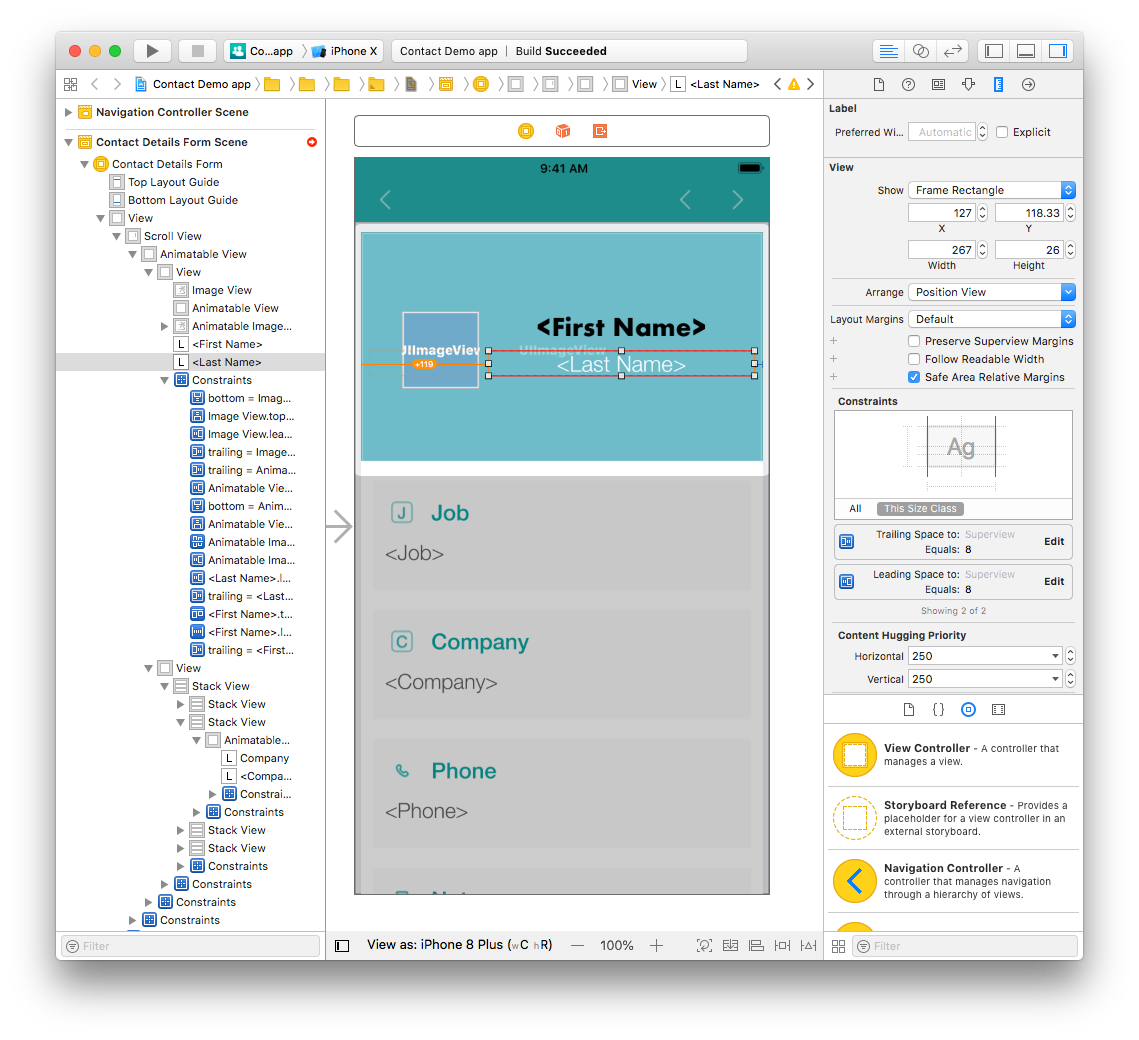
Finally, we'll work on the Last Name label.
Change the position and width:
- Select the Last Name label from the Interface Builder.
- Change the width from 386 to 267 pixels.
- Change the X value from 8 to 127 pixels and the Y value from 144.33 to 118.33 pixels.
Modify the remaining constraints:
- Delete the leading space constraints from the Size inspector.
- Add a leading space and top space constraints by clicking on the Add New Constraints button.
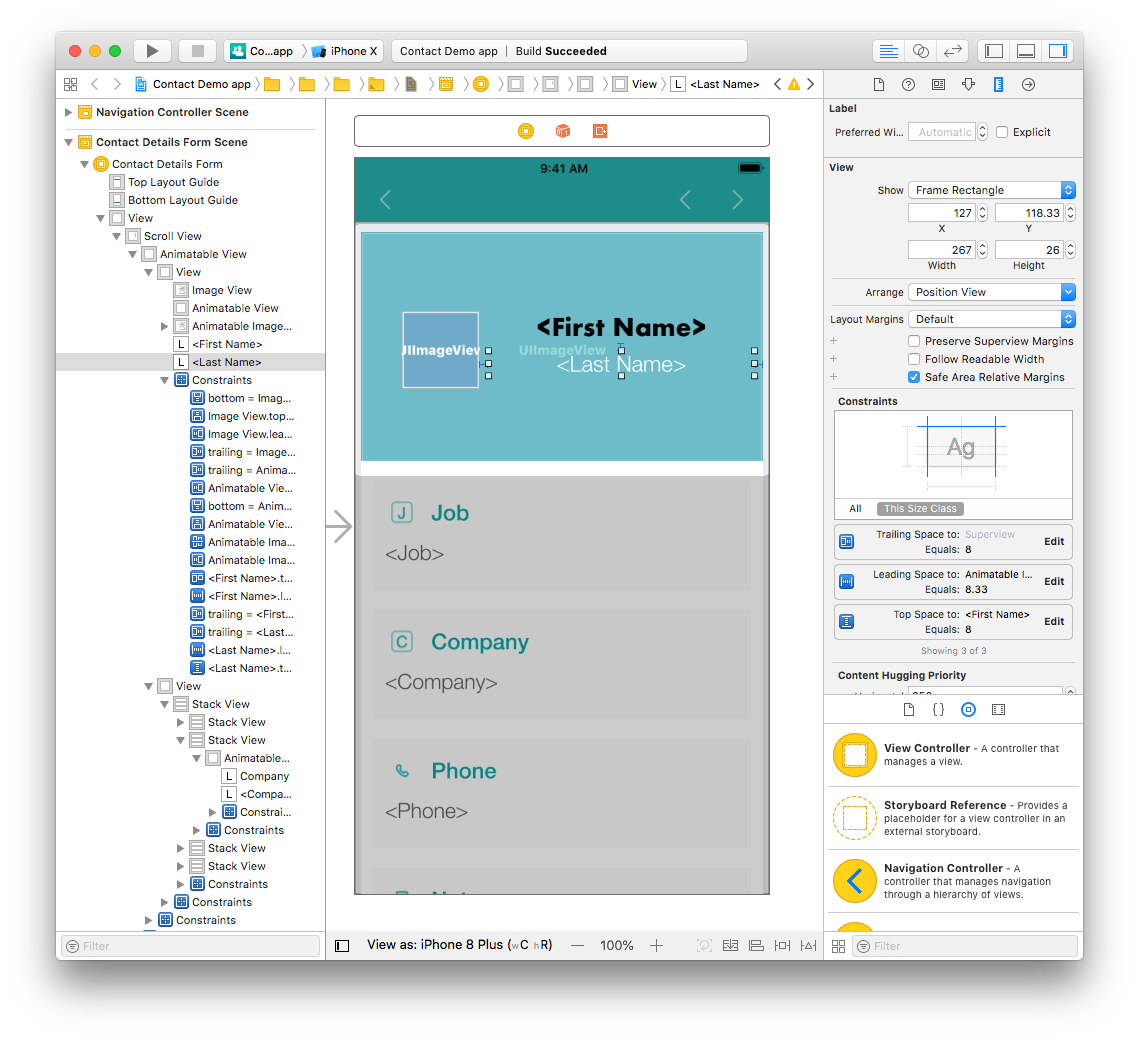
Both of your name labels are now repostioned.
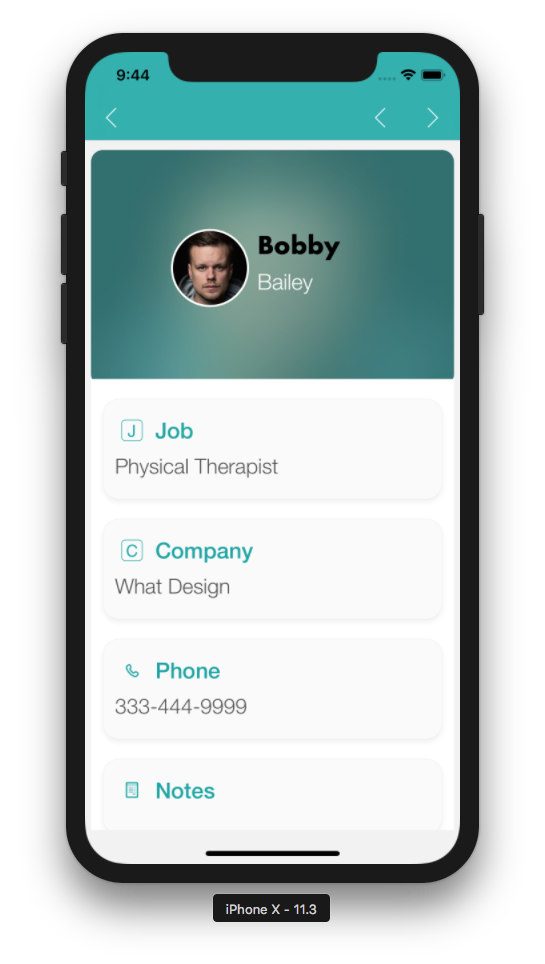
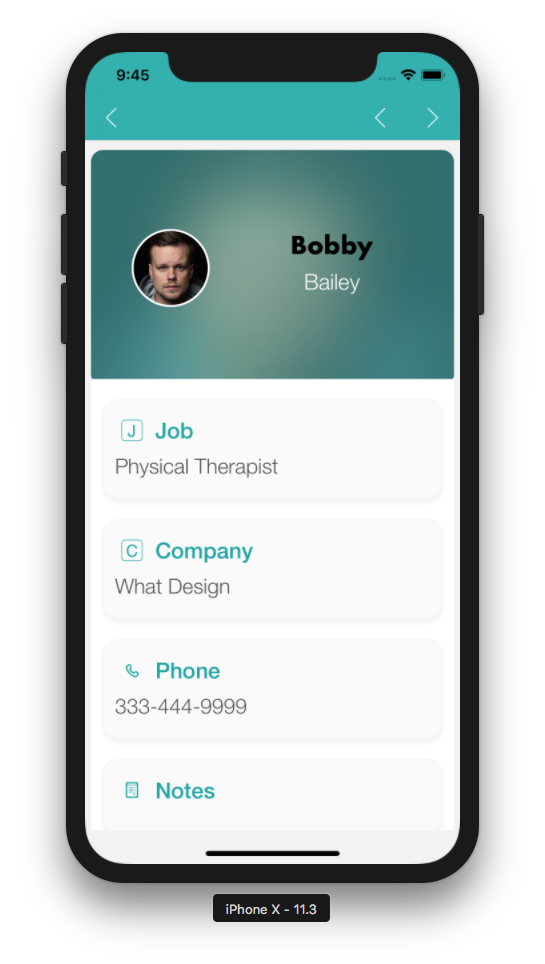
Let's see the results in the Simulator !
Hmmmm. That's not exactly the result we wanted ...
- Select the First Name and Last Name labels and change the alignment from center to left in the Attributes inspector.
- Next, select the Profile picture and double click on the leading space constraint.
- Change the Constant value from 40.67 to 80 pixels.
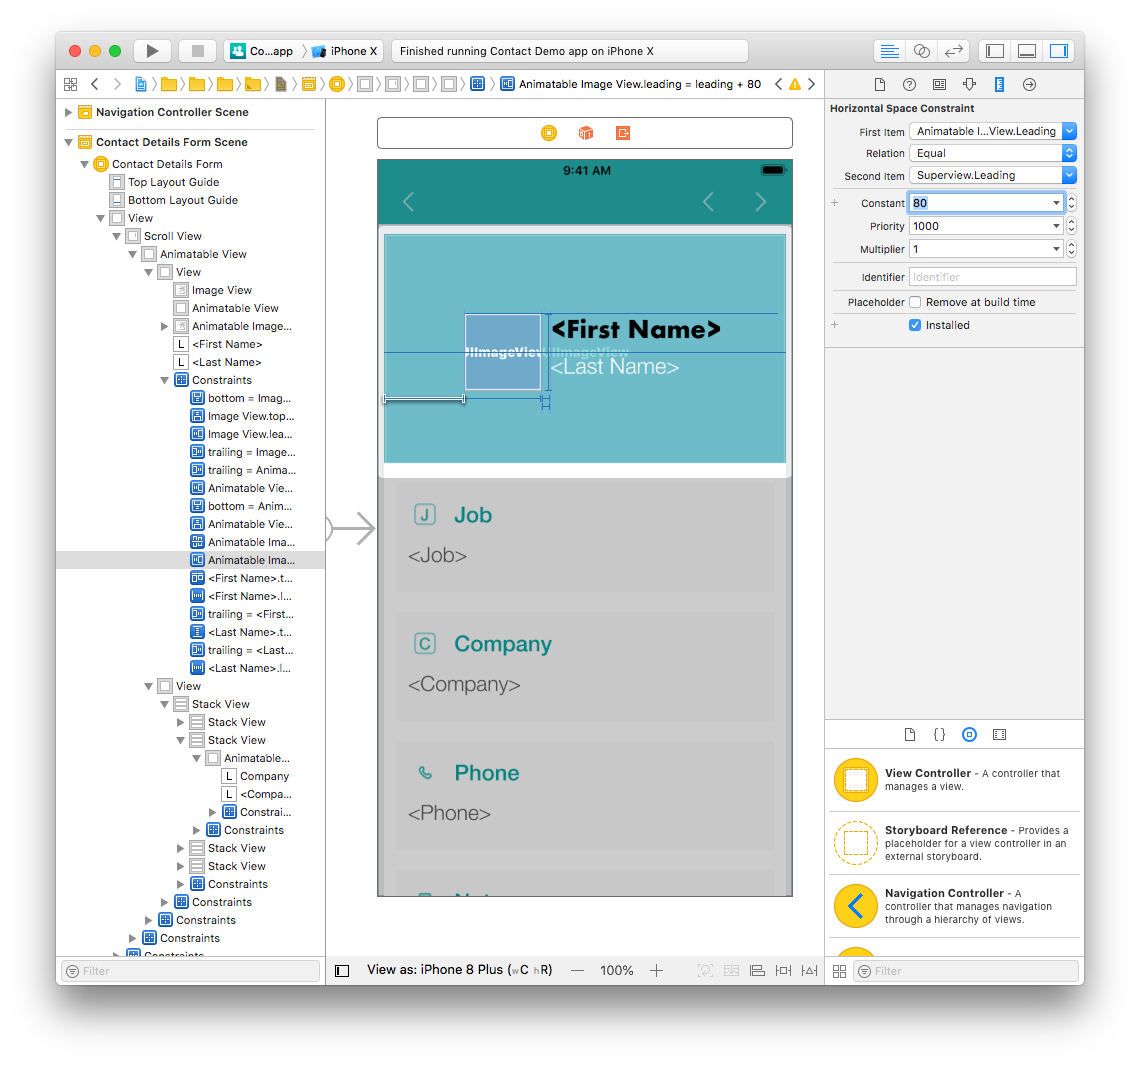
Much better! Now all constraints are working and the labels aren't breaking other constraints.
As you can see, customizing your app is very simple!