Actions
This section allows you to:
- create actions to execute 4D code from your iOS app.
- define and add parameters to your actions.
Project Editor Side
Create your action
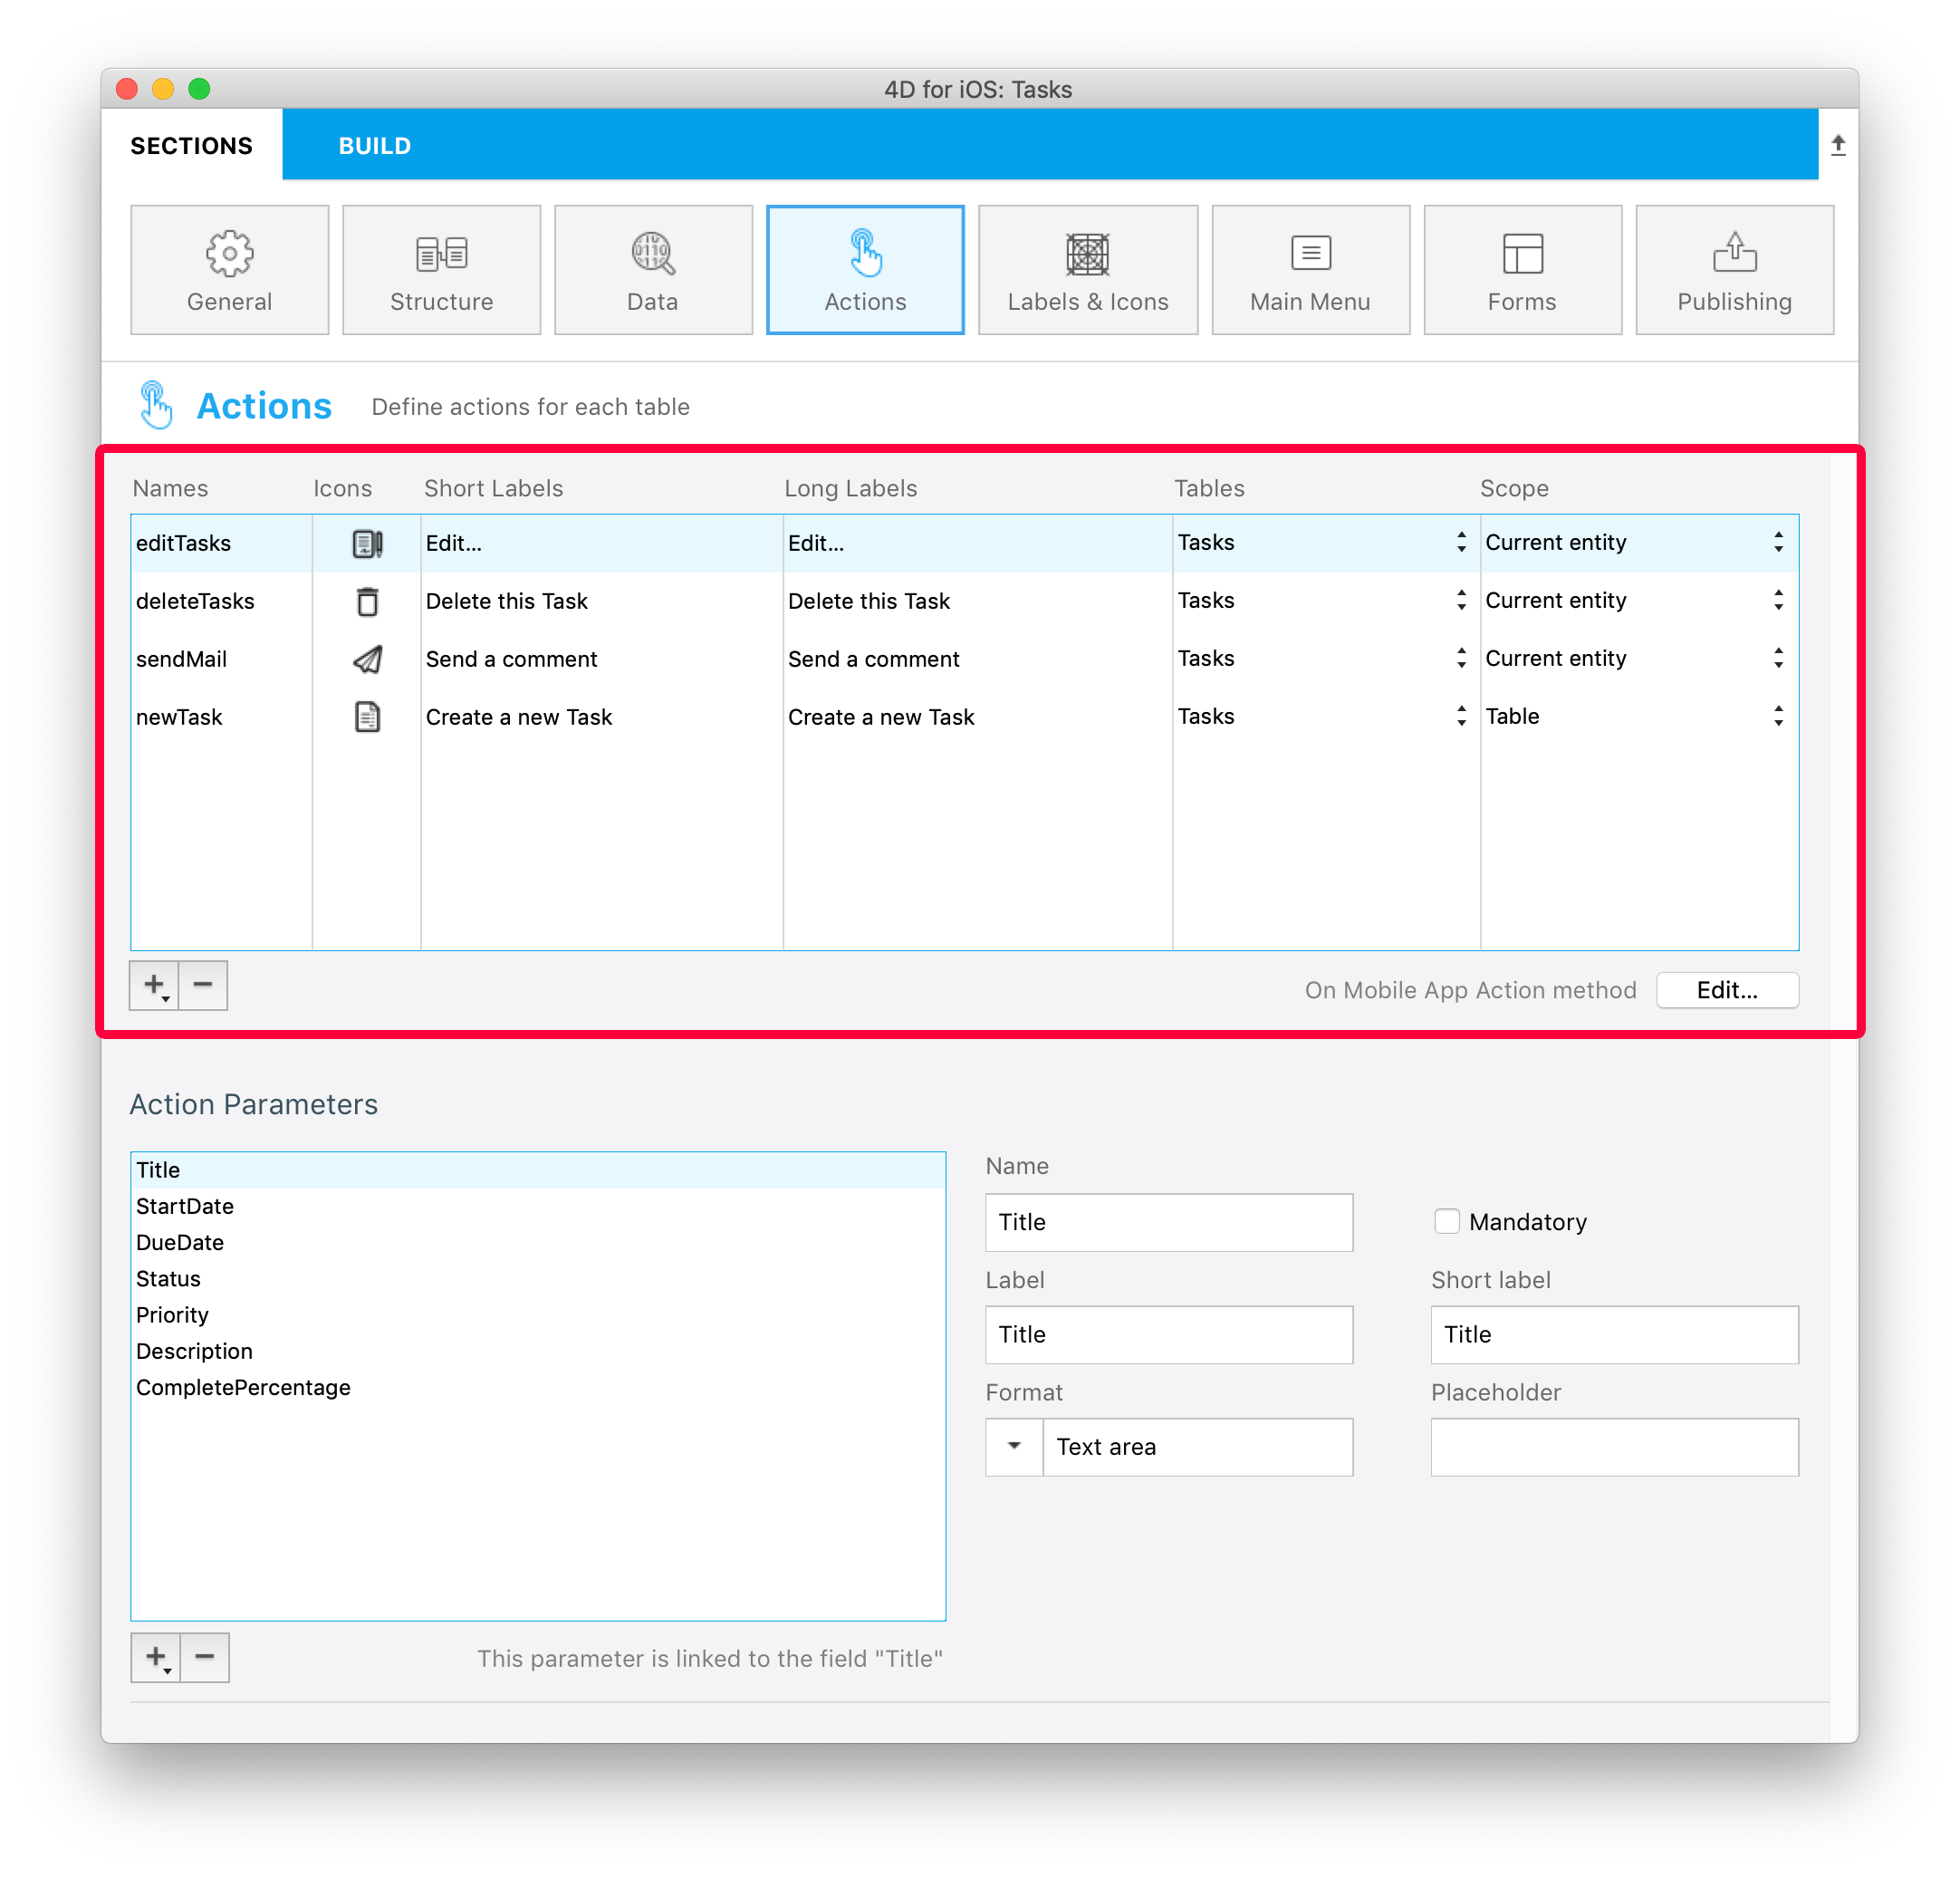
You can create a new action by clicking on the + button at the bottom of the Actions table. A new line will appear in the Actions table.
Then, you'll need to define the following elements:
- Names: The action name to use in the On Mobile App Action database method to trigger your 4D code.
- Icons: The icon to choose from your icon library. You can also add your own icon by following this tutorial.
- Short and long Labels: The labels for the actions to display in your app.
- Table: The table on which you want to apply the action.
- Scope: Where to use the action, an entity or a table.
Add parameters to your action
As of 4D v17R6, you can add action parameters and edit data directly from your app.
For each parameter, you can edit the following properties:
- Name
- Long label
- Short label
- Format
- Input constraints (define minimum or maximum values)
- Placeholder
- Mandatory field definition
- Default value
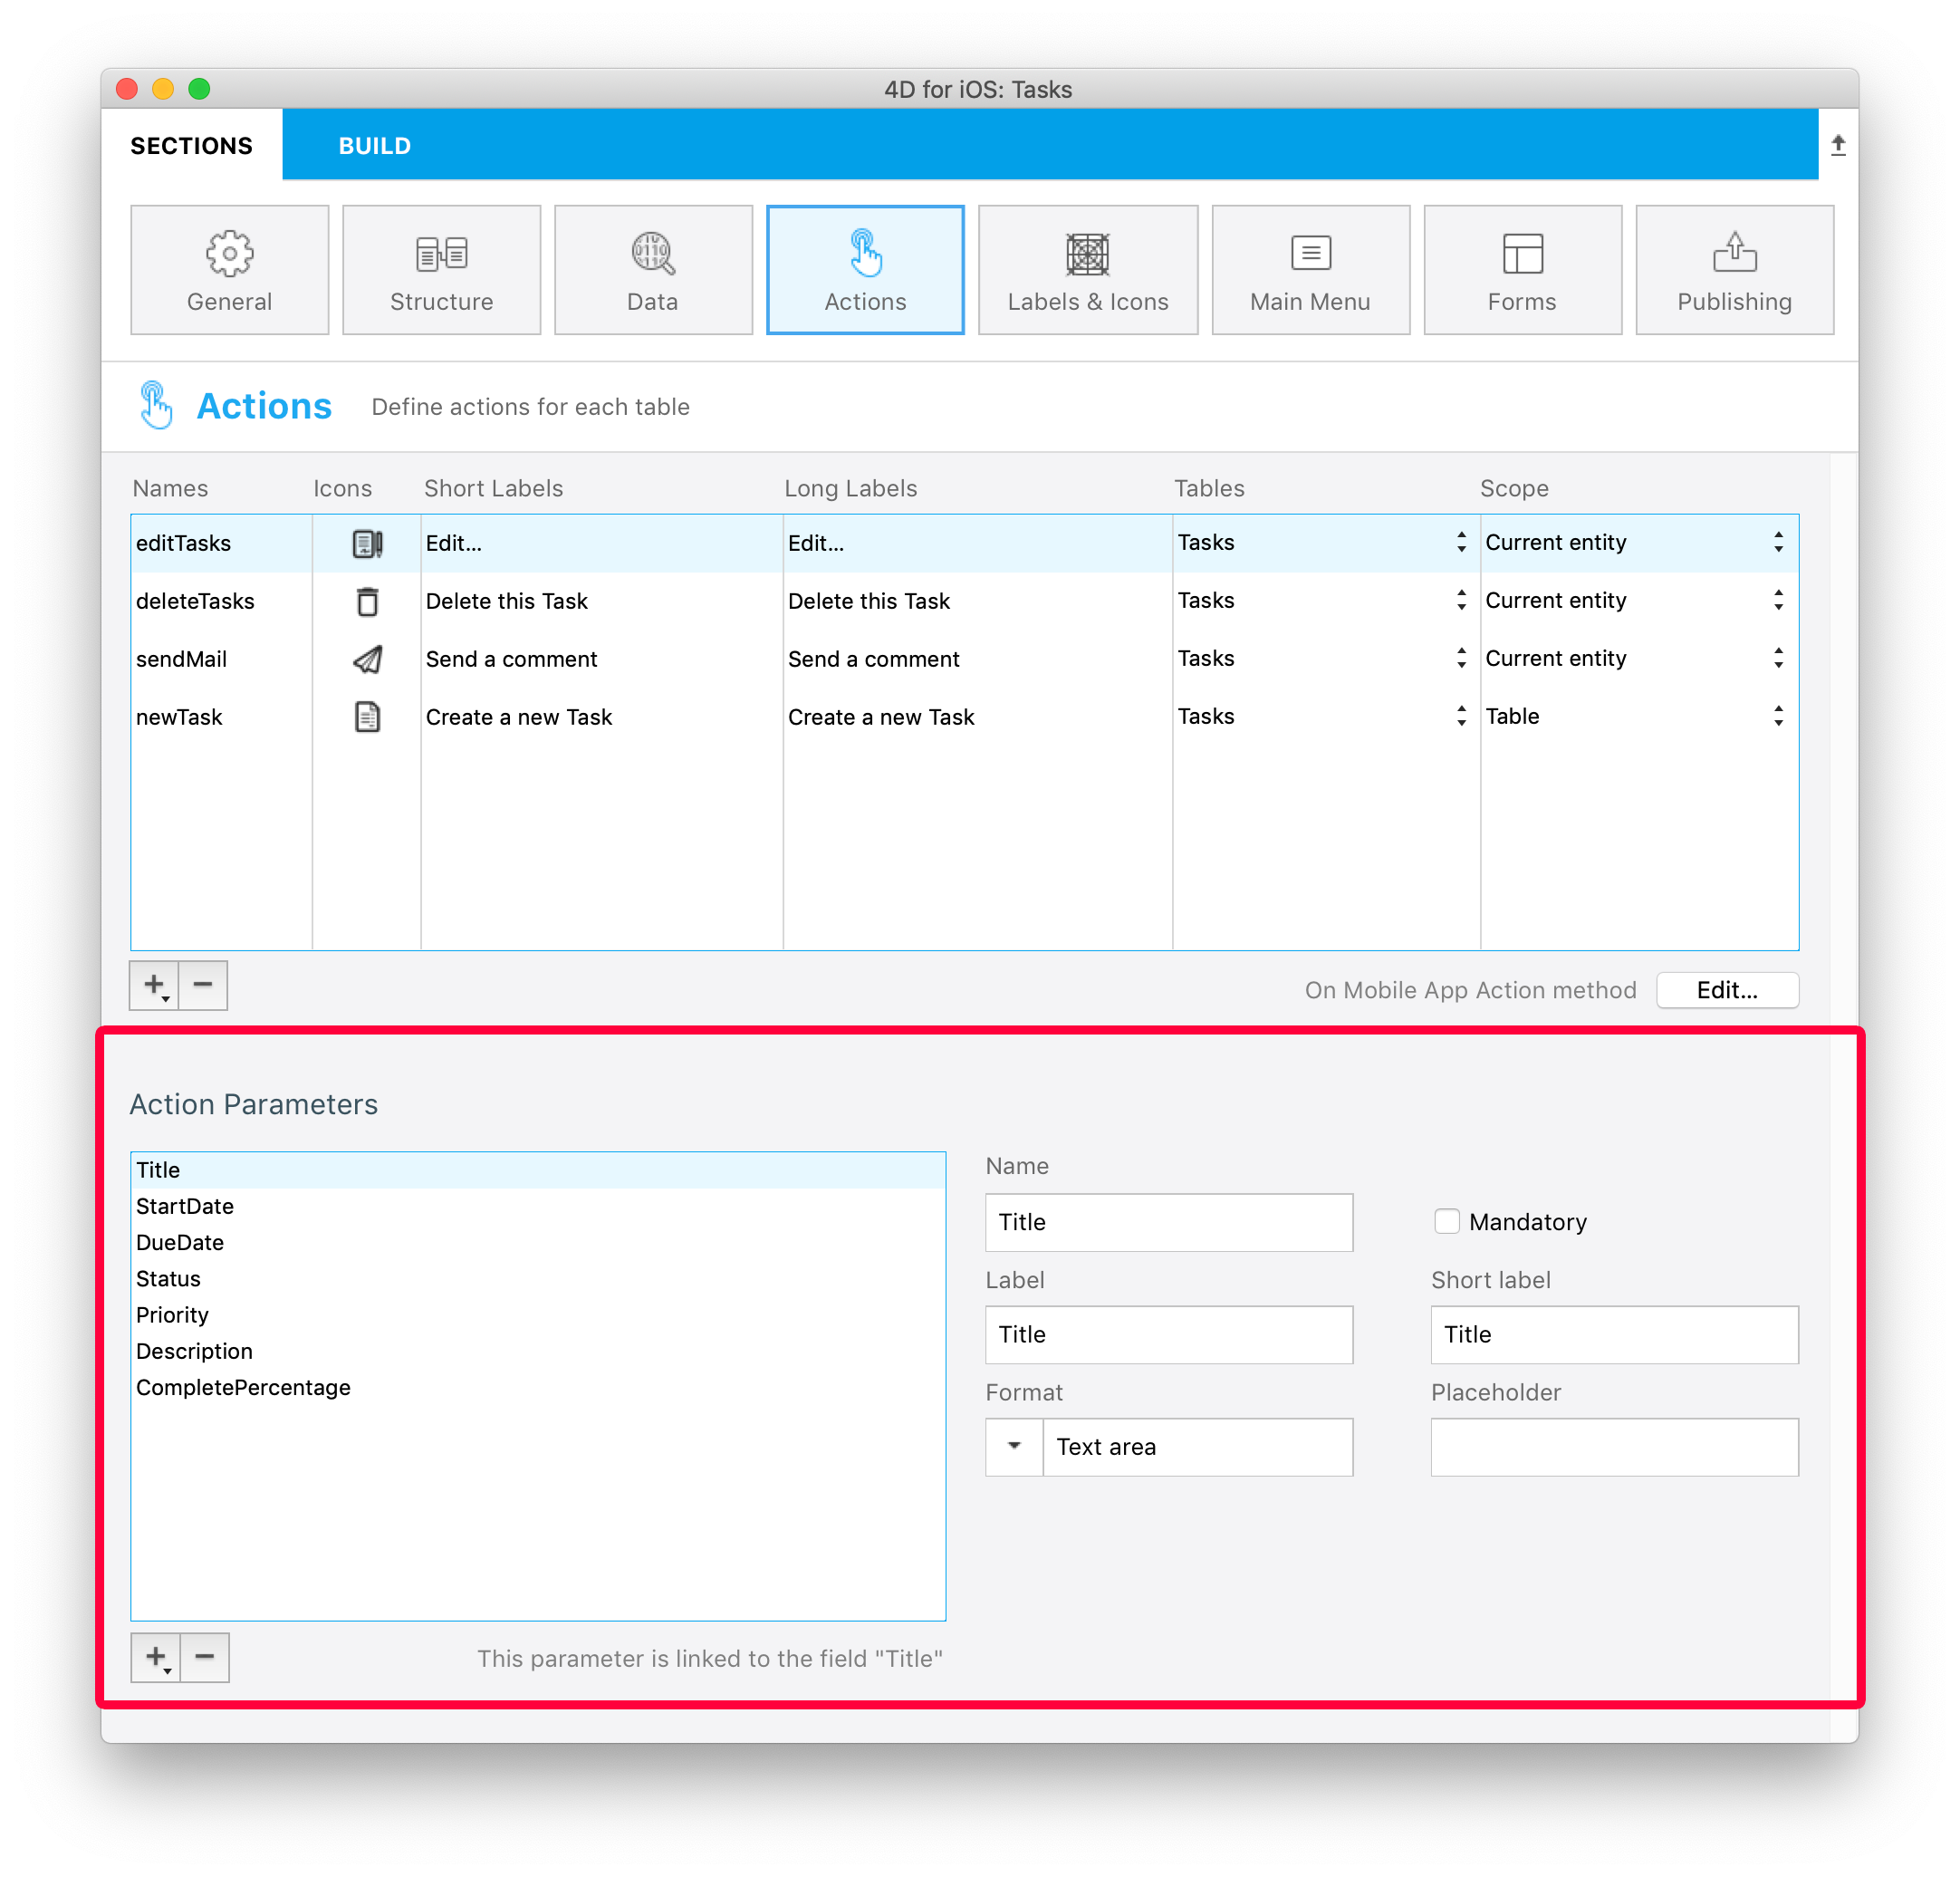
You are free to change the order of the parameters, using drag-and-drop.
Here are the different Formats that you can select for a parameter:
| TEXT | |
|---|---|
| Format | Description |
| Text | Capitalize the first letter of a string |
| Email Address | Optimized iOS keyboard for email entry |
| Phone Number | iOS keypad for entering telephone numbers. |
| Account | Optimized iOS keyboard for username entry |
| Password | Optimized to handle passwords |
| URL | Optimized iOS keyboard for URL entry |
| Zip Code | Optimized iOS keyboard for zip code entry |
| Text area | Includes multiple lines of text in a single field |
| Barcode | Extract barcode associated value. Supported formats : EAN8, EAN13, Code 39, Code 93, Code 128, QR Code, UPC, PDF417 |
| NUMBER | |
| Format | Description |
| Number | Numbers with decimals |
| Integer | Numbers without decimals |
| Scientific | Scientific Notation |
| Percentage | Percent Notation |
| Spell Out | Convert numbers into strings |
| DATE | |
| Format | Description |
| Date | Nov 23, 1937 |
| Short Date | 11/23/37 |
| Long Date | November 23, 1937 |
| Full Date | Tuesday, November 23, 1937 |
| TIME | |
| Format | Description |
| Time | 3:30 PM |
| Duration | 2 hours 30 minutes |
| BOOLEAN | |
| Format | Description |
| Boolean |  |
| Check mark |  |
| IMAGES | |
| Signature | Allow to sign with the finger |
Preset actions
4D for iOS includes three preset (predefined) actions to manage your app content:
- Edit
- Add
- Delete
1. Add action
4D for iOS makes the Add actions creation process very simple.
All you need to do is selecting the Add action for option, accessible from the + button at the bottom of the Actions table.
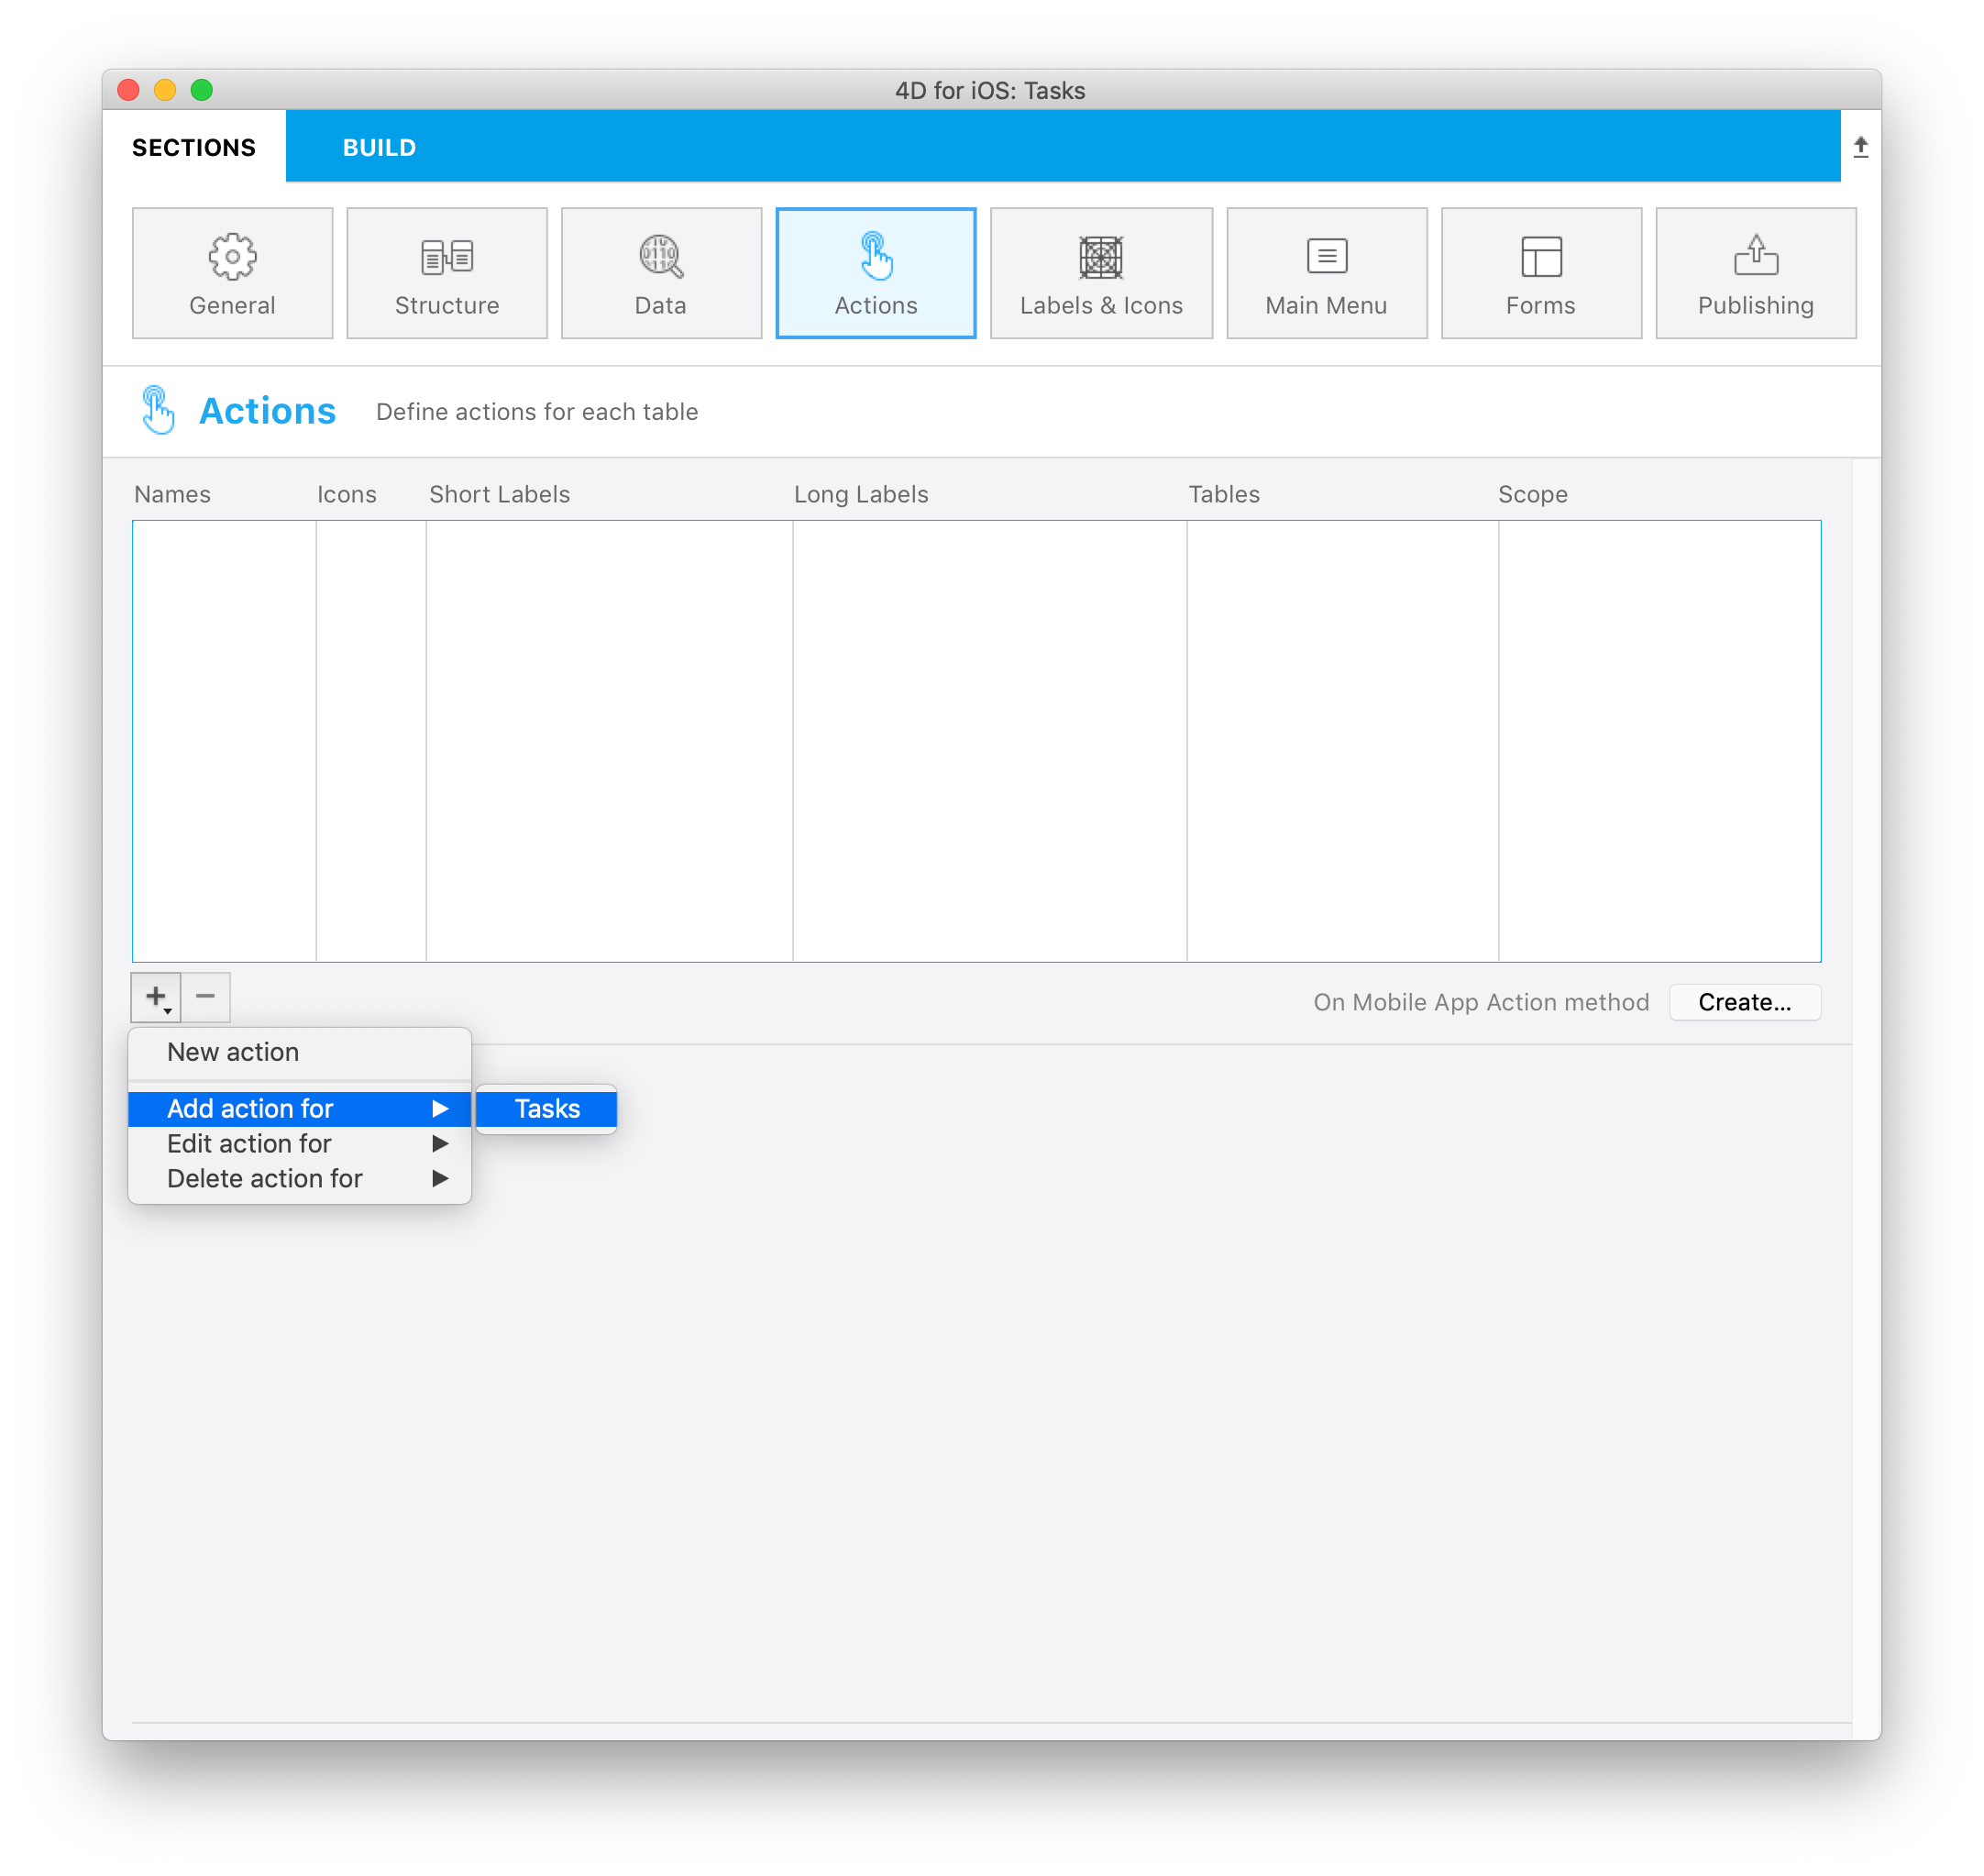
Then, simply select the table you want to link to this add action. And this is it!
This will automatically create all the parameters for you in the Project Editor. In the generated app, it will allow you to edit each field value.
For this kind of action, you will see that all properties are already filled in for your convenience, on the right side of the parameter's list.
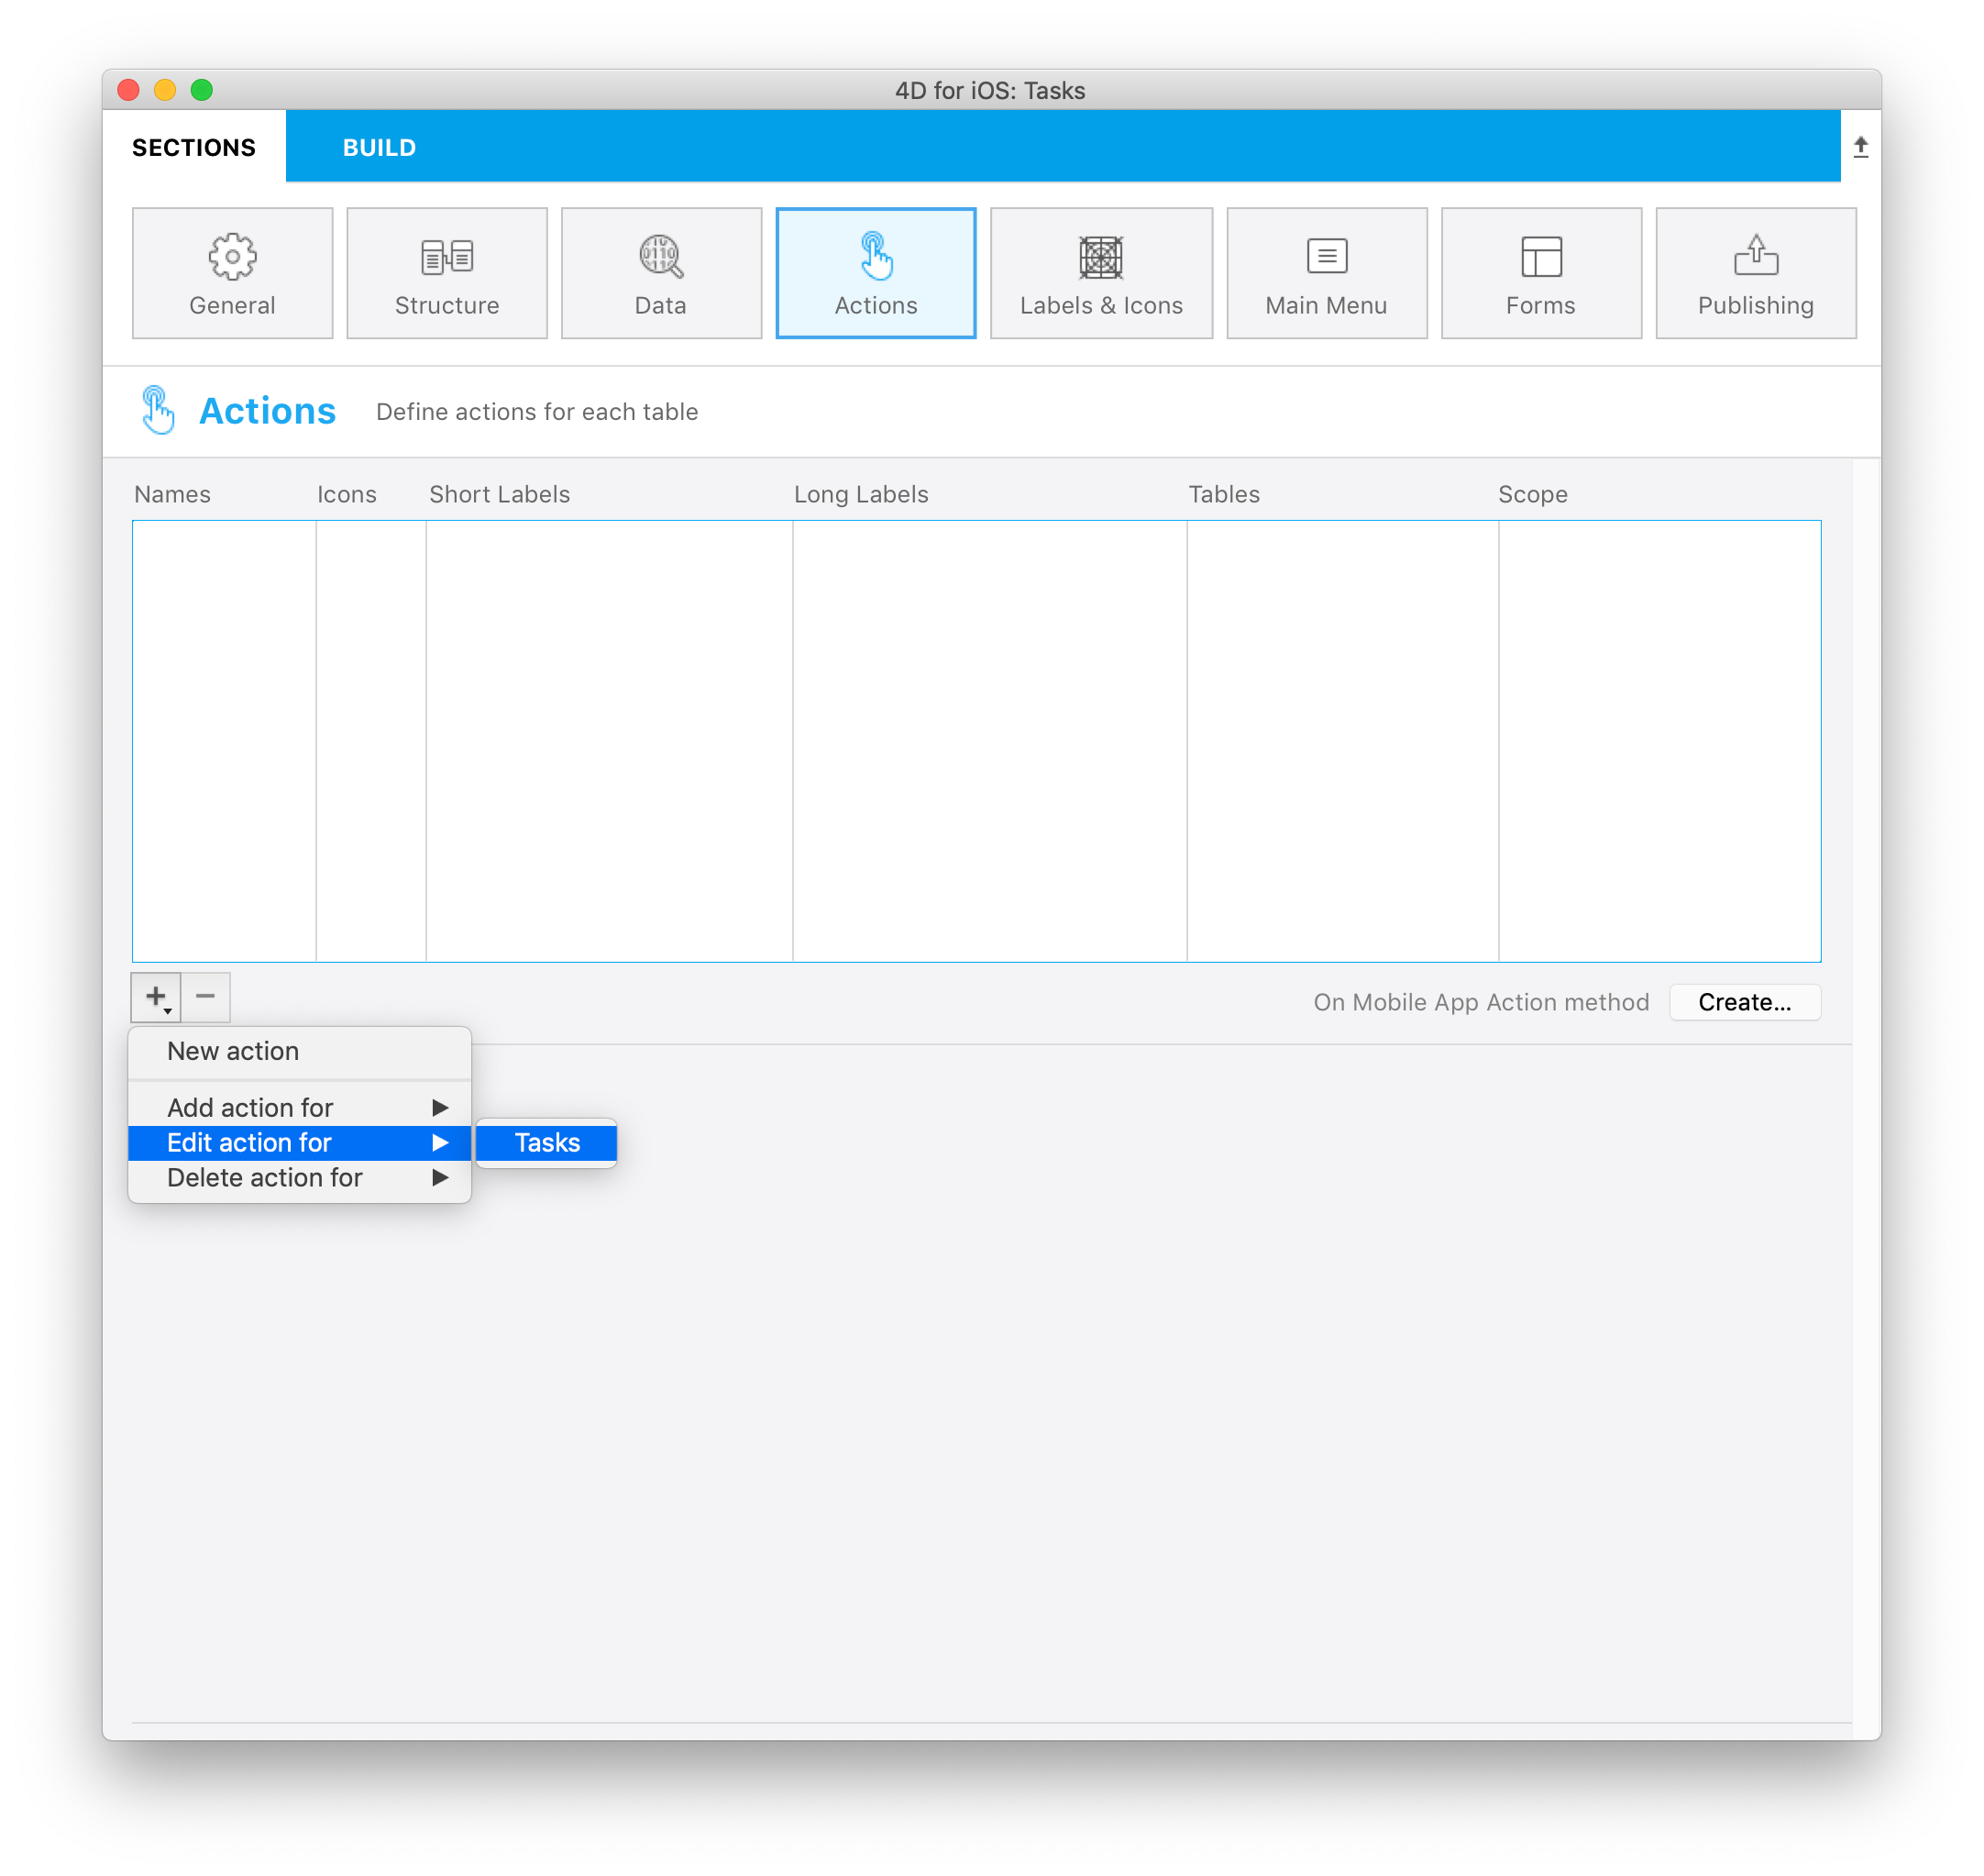
2. Edit action
The creation of Edit actions follows the same process as the Add actions, with the exception that you will not be able to define default values from the Actions section.
3. Delete action
The creation of Delete action follows the same process as the Edit action. The only difference is that this action allows you to remove an entity.
To create a Delete action, select the Delete action for option accessible from the + button at the bottom of the Actions table.
This type of action should be used with caution.
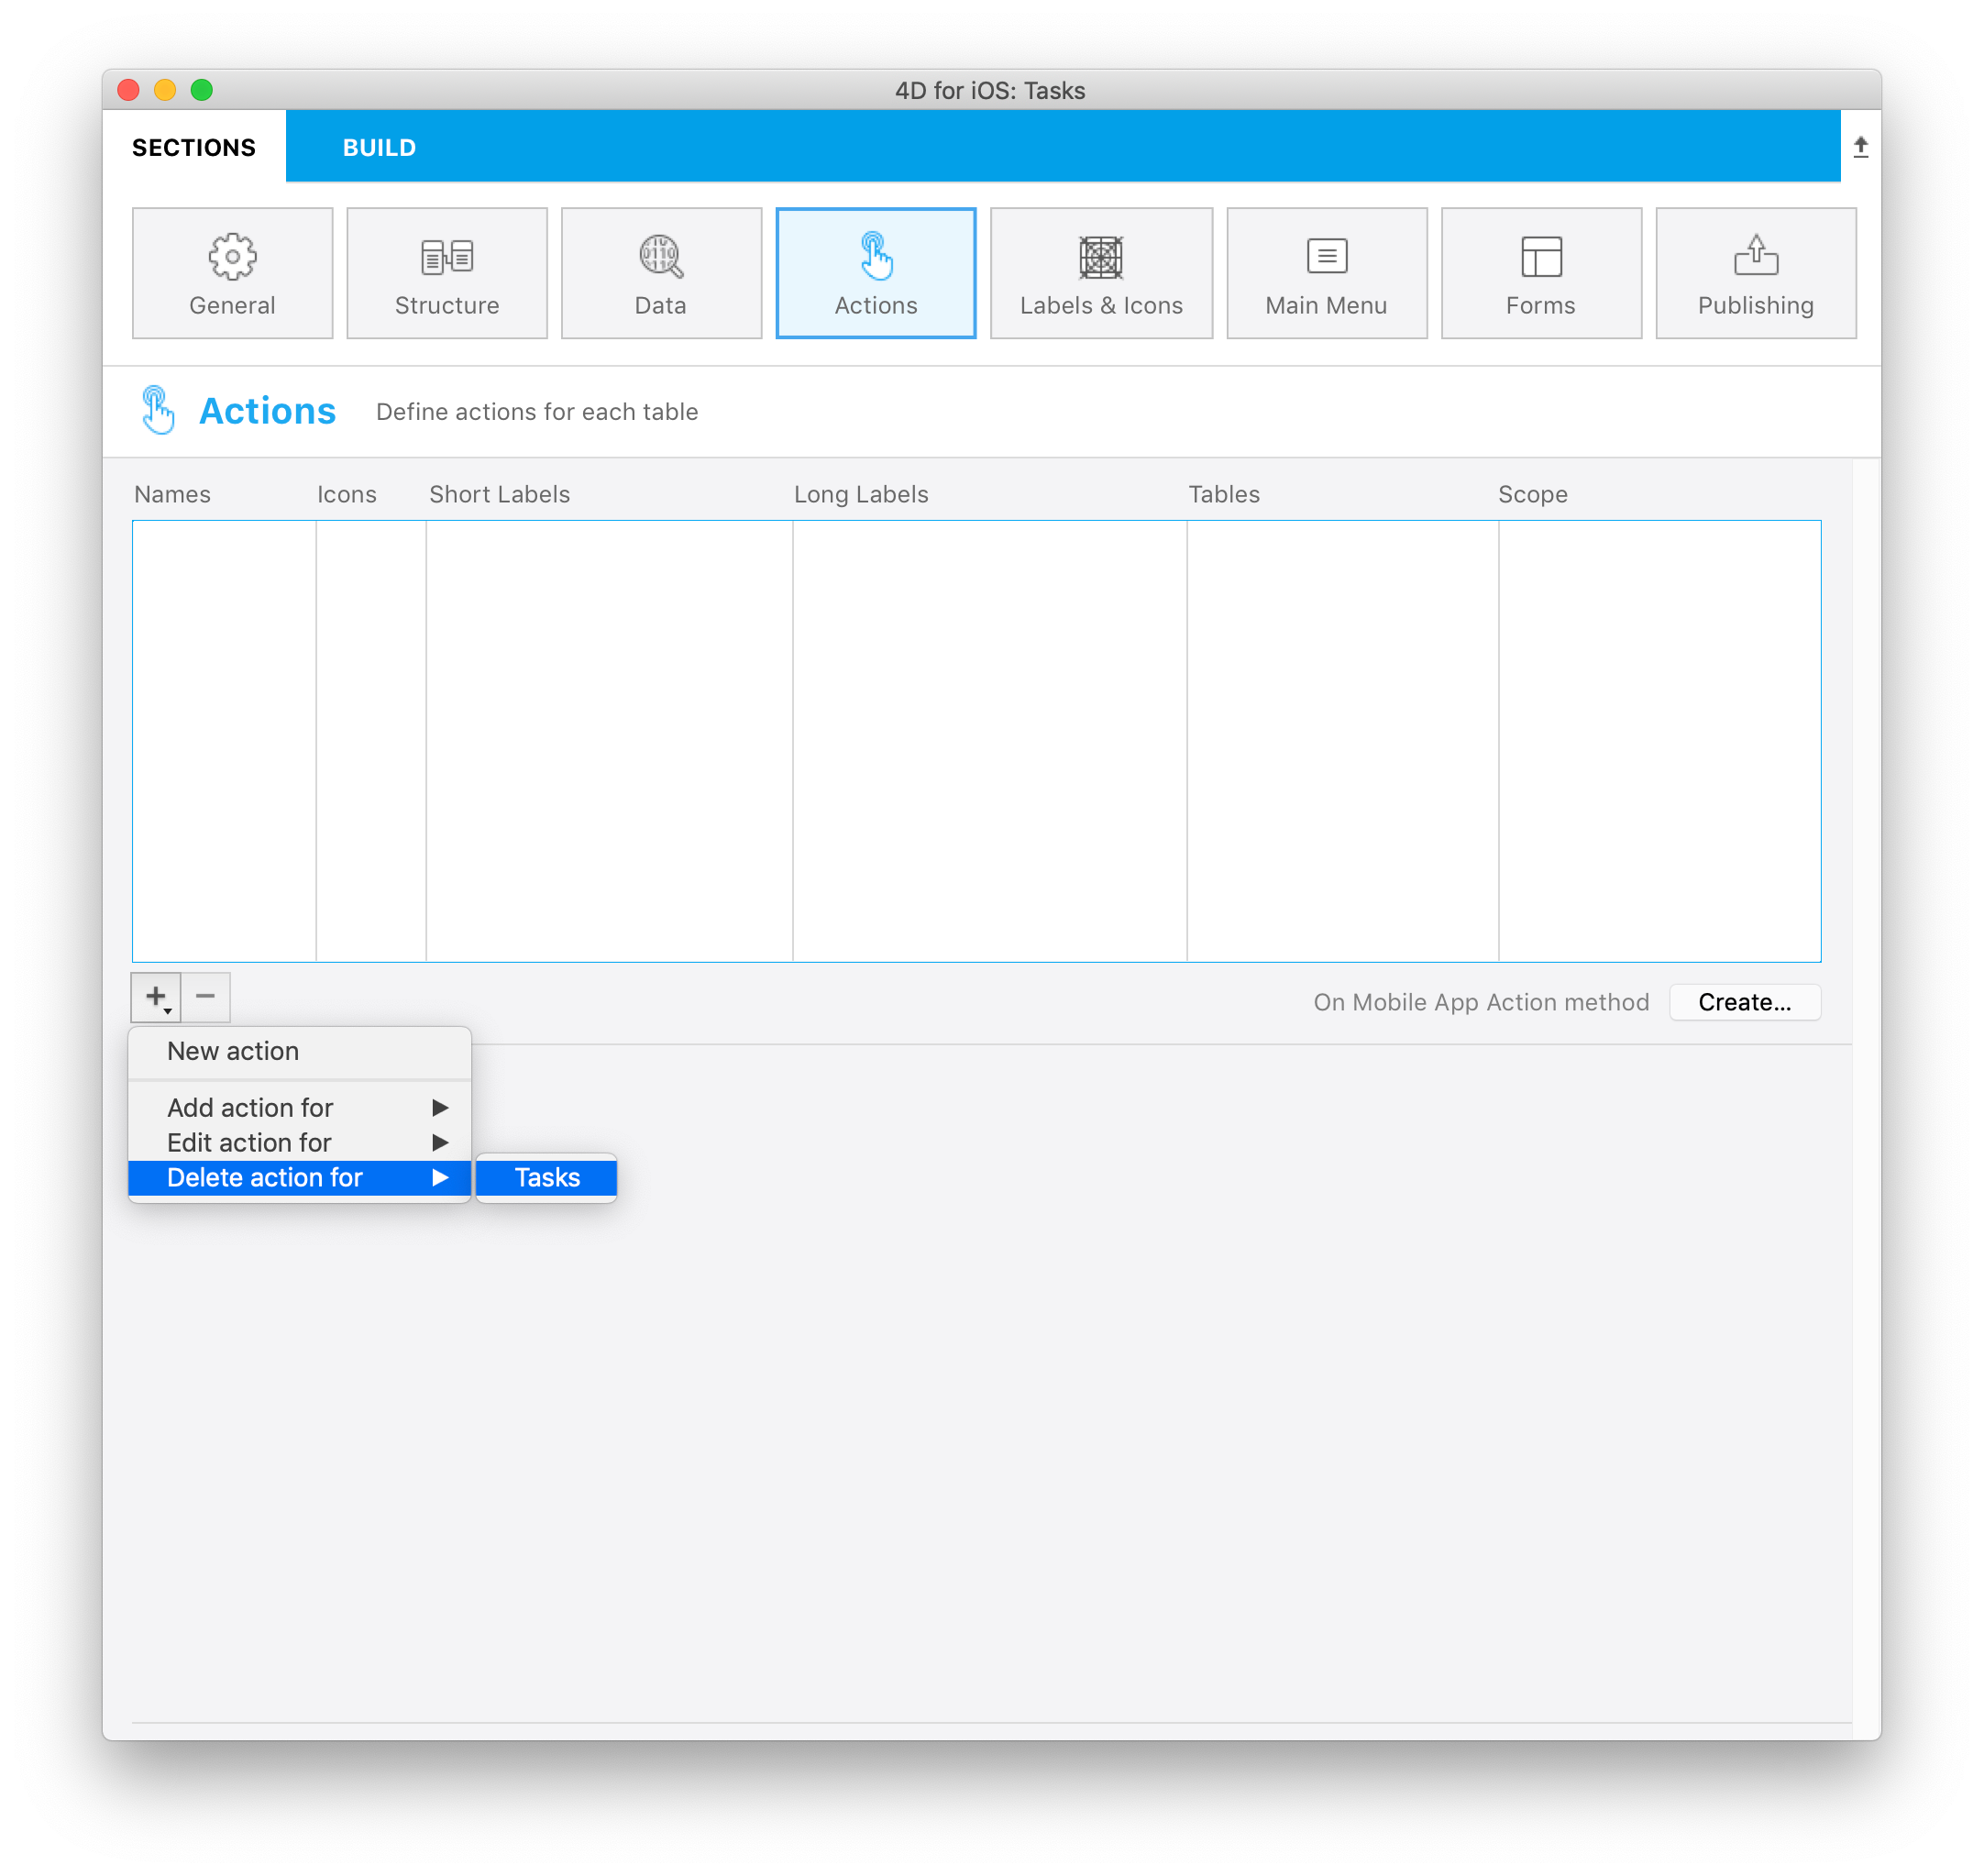
For Edit and Add actions, you are free to modify:
- The parameters, by adding or removing a parameter using the + and - buttons at the bottom of the Action parameters list.
- The properties, by defining them the way you want.
On Mobile App Action
The On Mobile App Action database method is available to call all your 4D methods.
After creating all your actions, just click on the Create button from the Actions table to automatically generate a Case of code block that includes all your action names in the On Mobile App Action method.
NOTE
- You can refresh the selection after executing an action using
$out.dataSynchro:=True.- You can notify the app user when an action has been executed using
$out.statusText:="Message you want to display".- You can also decide to force the "close the Edition form" using
$out.close:=True.
iOS app Side
In your iOS app, actions are available in your List and Detail forms in different ways, depending on the templates you select in the Forms section.
Table List forms
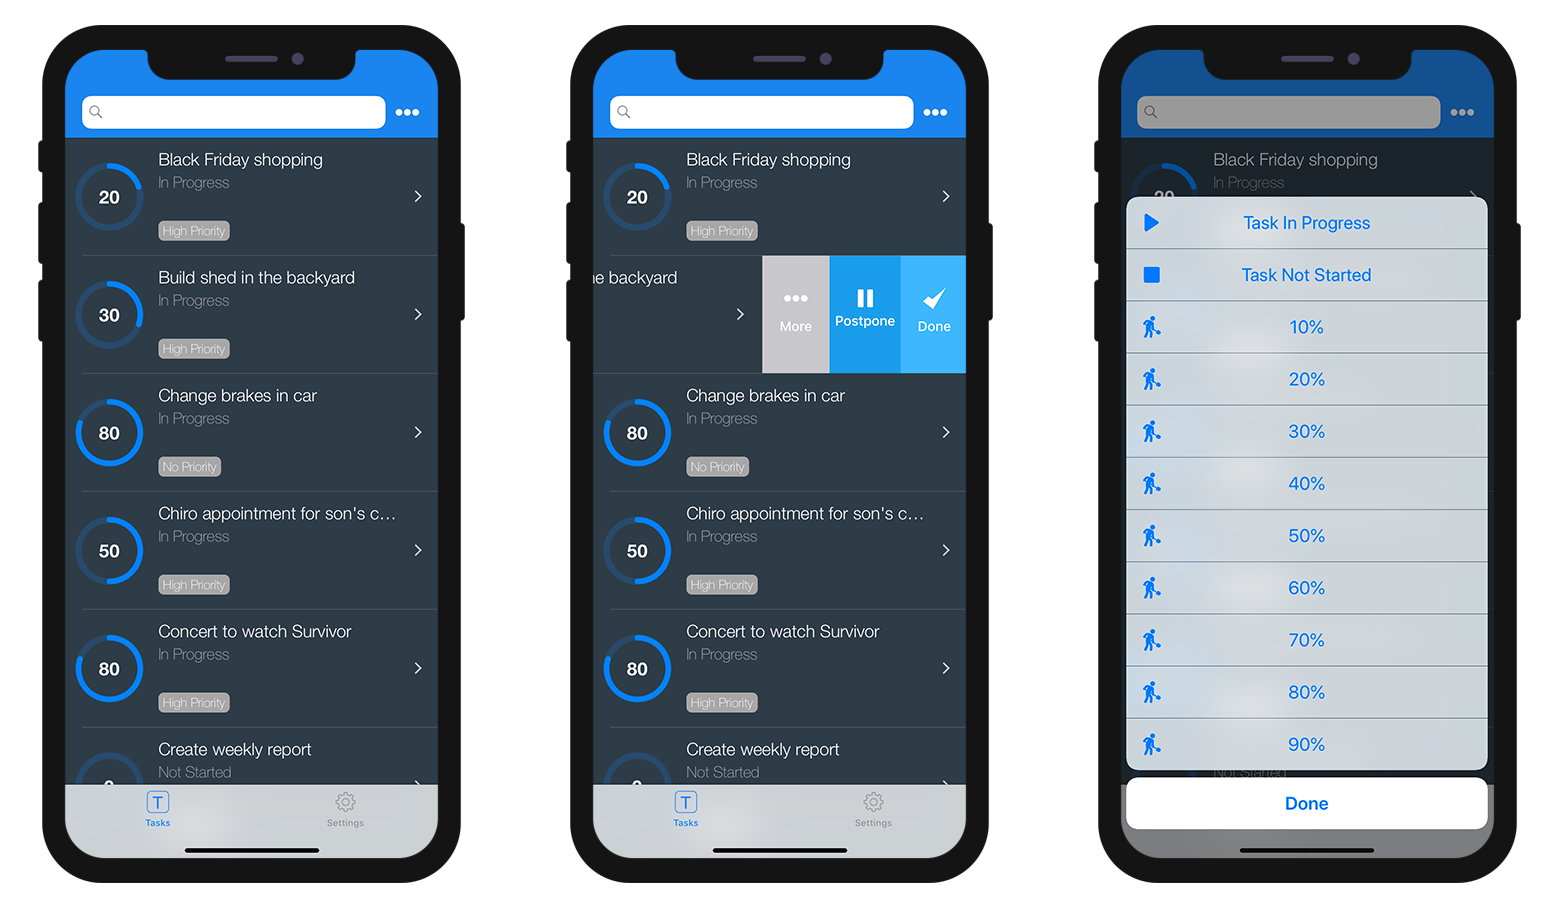
- Entity action: Swipe left on a cell to display the available actions in a List form. A "More" button is displayed if you've defined more than three actions per entity.
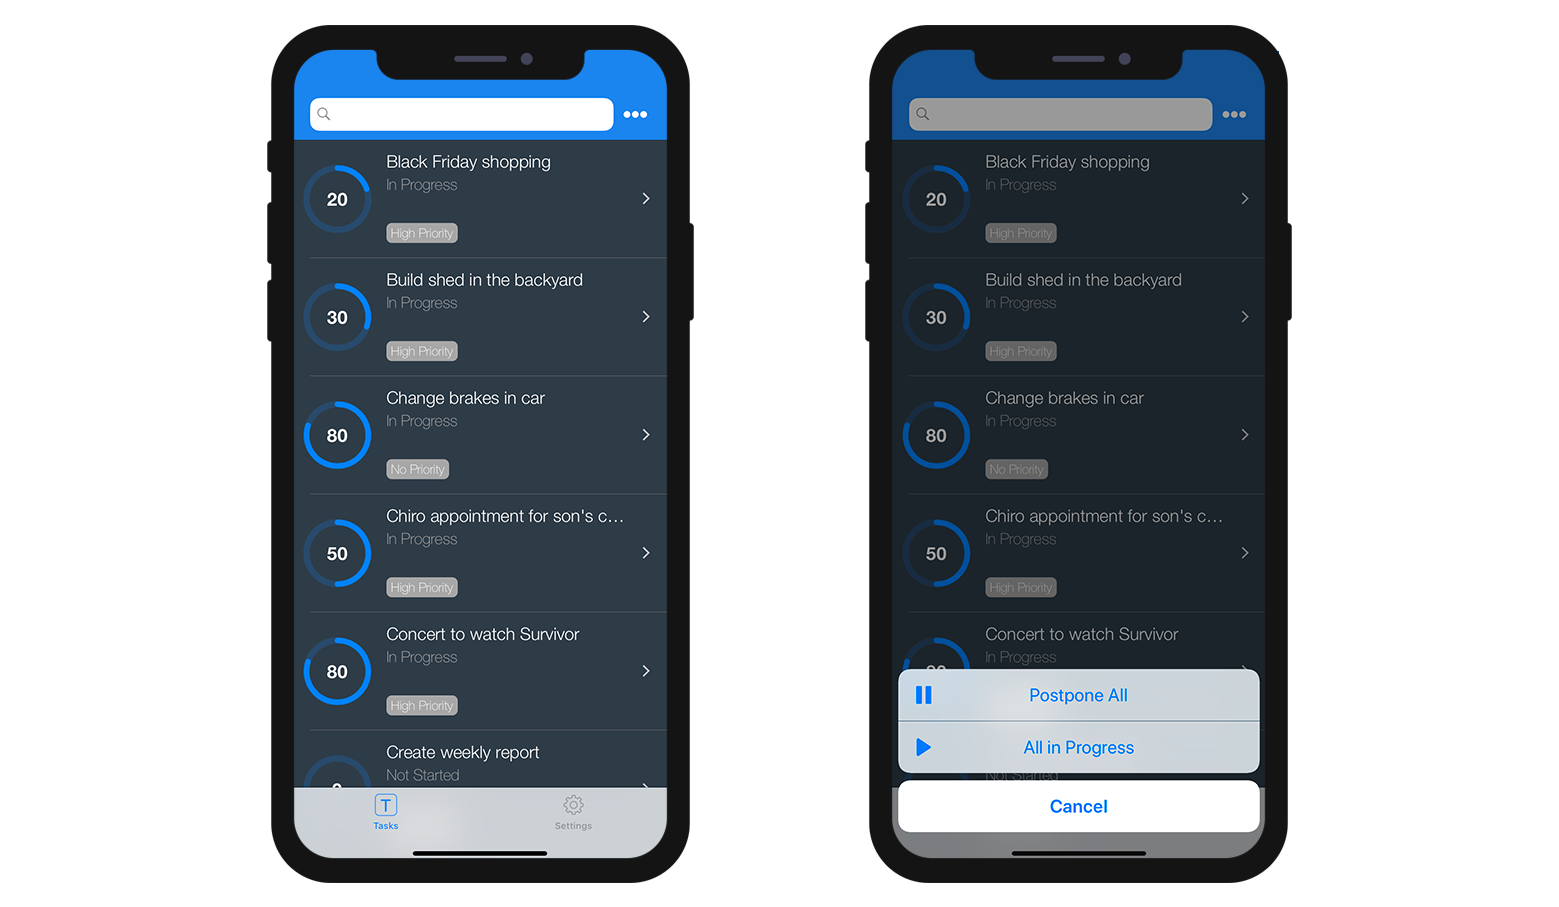
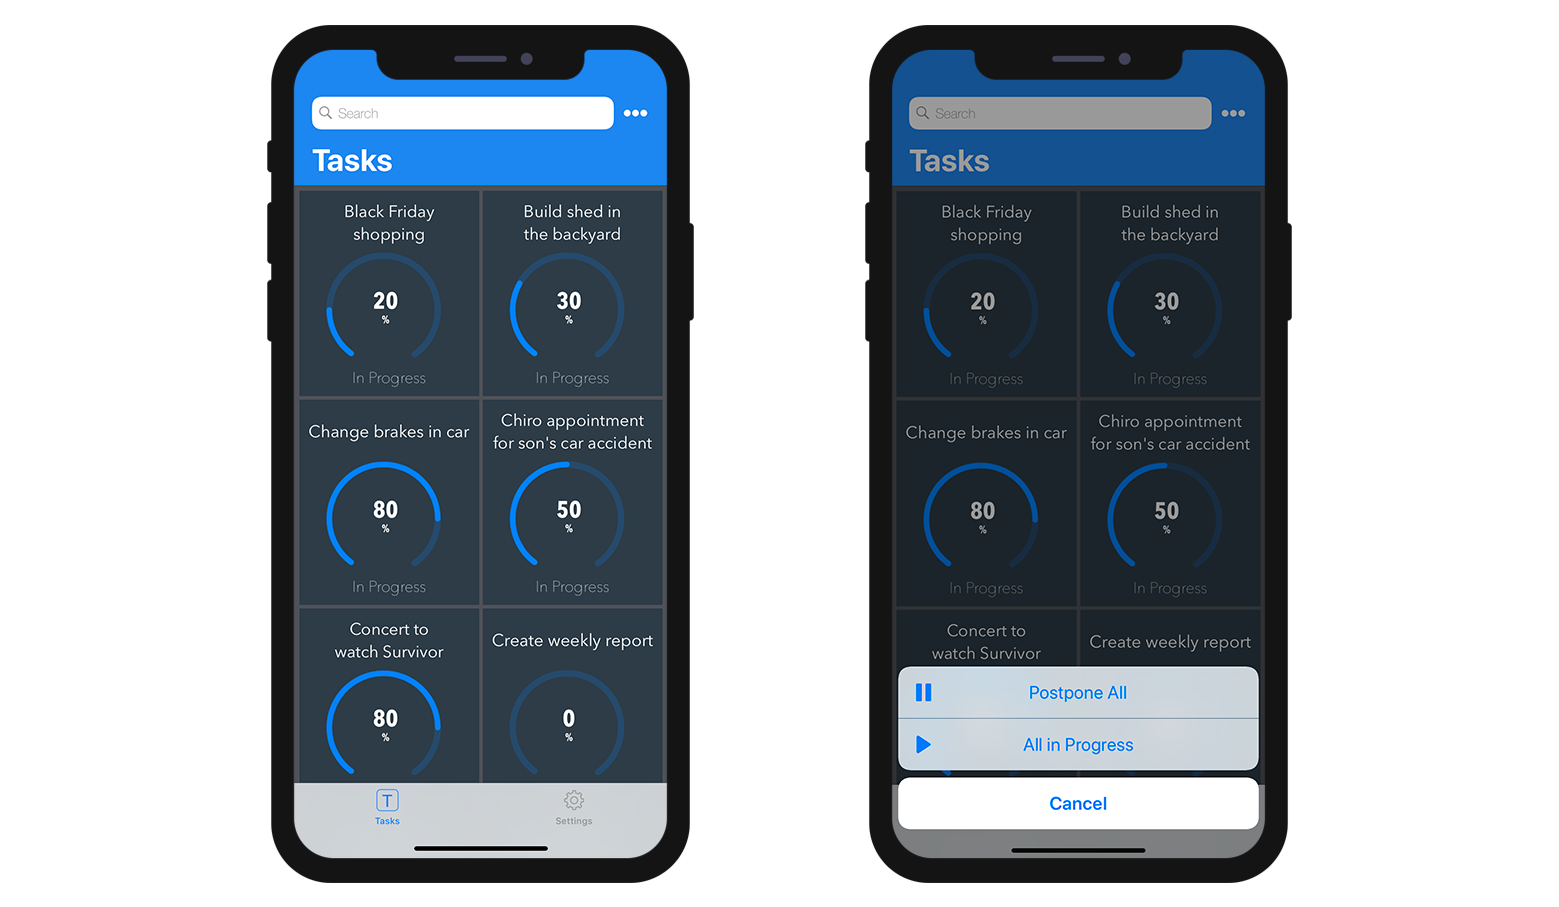
- Table actions: A generic actions button is available in the navigation bar to display a list of available table actions.
TIPS
Actions will be displayed in the same order as defined in the Action section.
Collection List forms
- Entity action: Depending on the template, actions are displayed by clicking on a generic button or by maintaing the pressure on a cell.
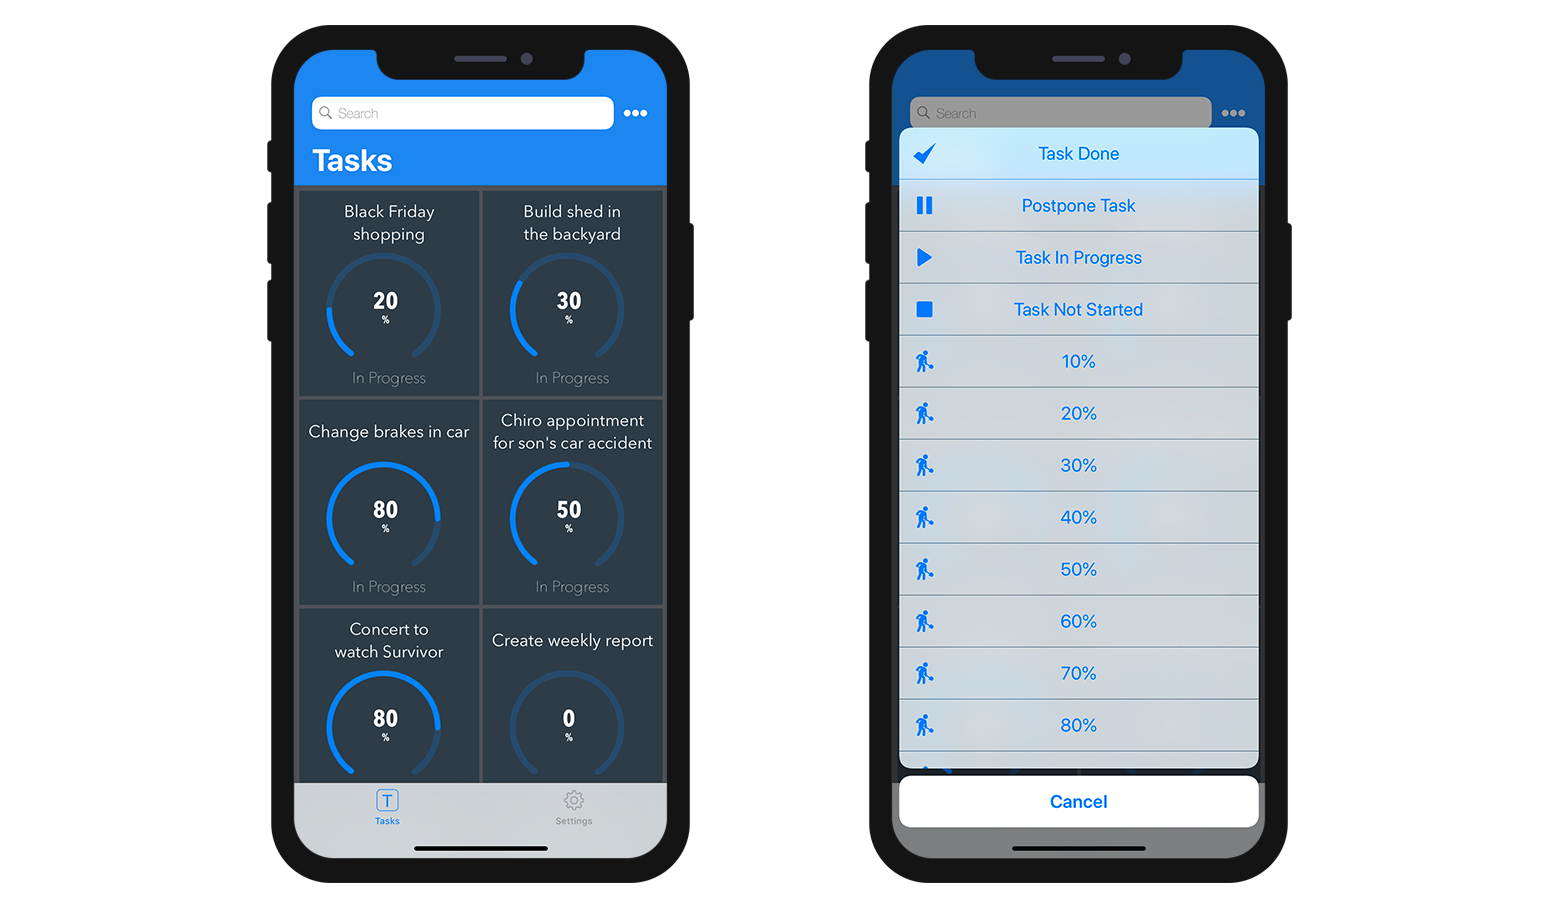
- Table actions: As for the Table List forms, a generic Actions button is available in the navigation bar to display a list of availble table actions.
Detail forms
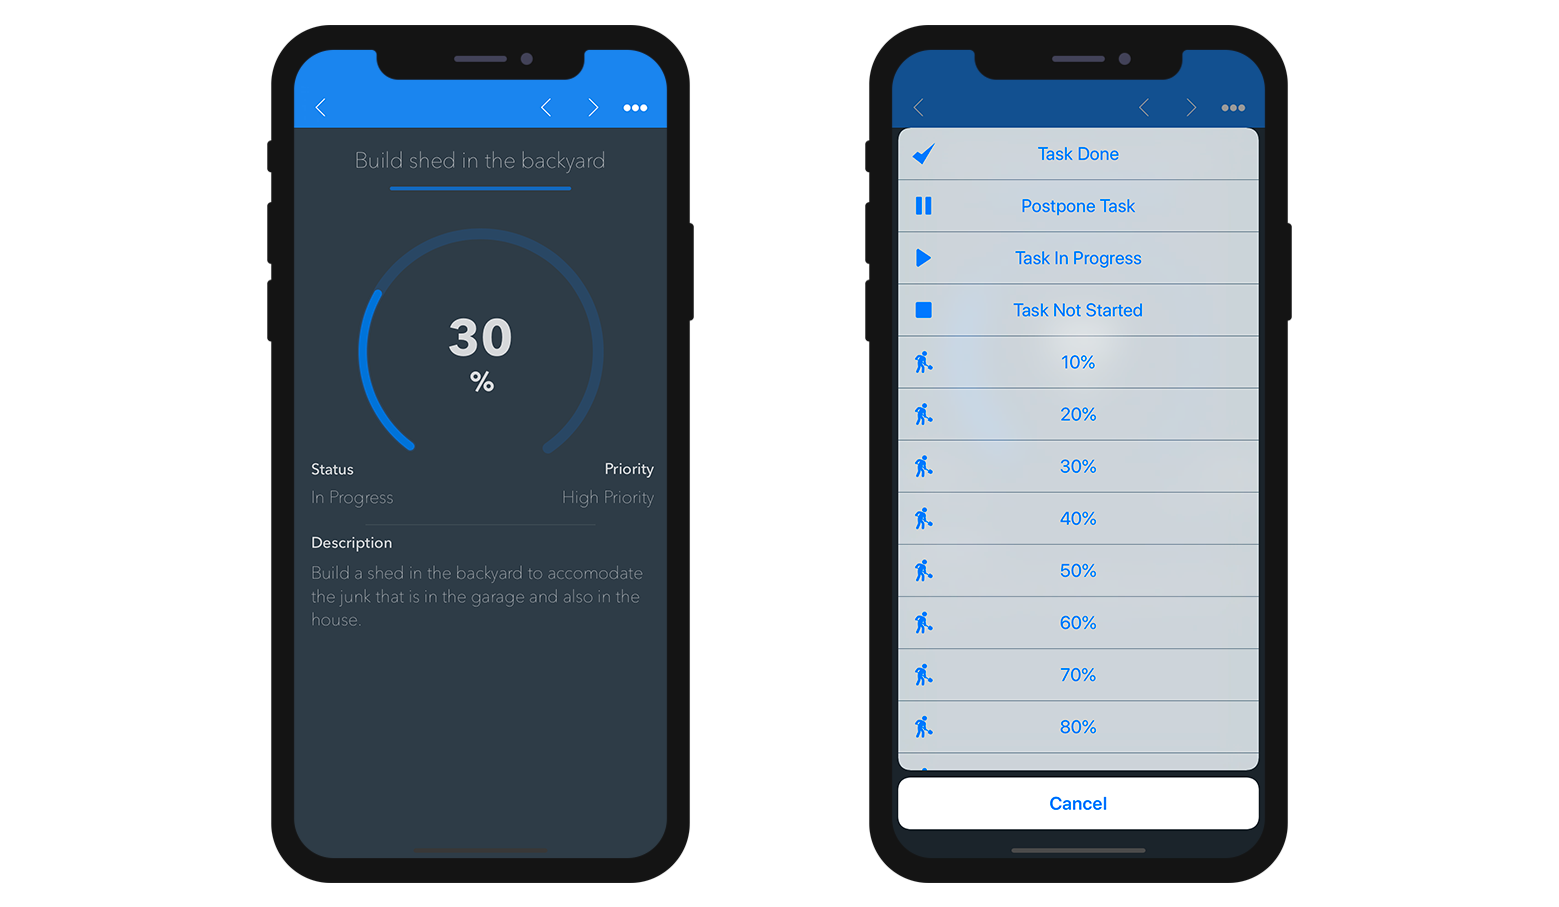
As with Table actions in List forms, a generic Actions button is available in the navigation bar to display all your entity actions in a list.
Edition forms
If you have created an Edit or an Add action, as soon as you select it from the action list, an Edition form will appear.
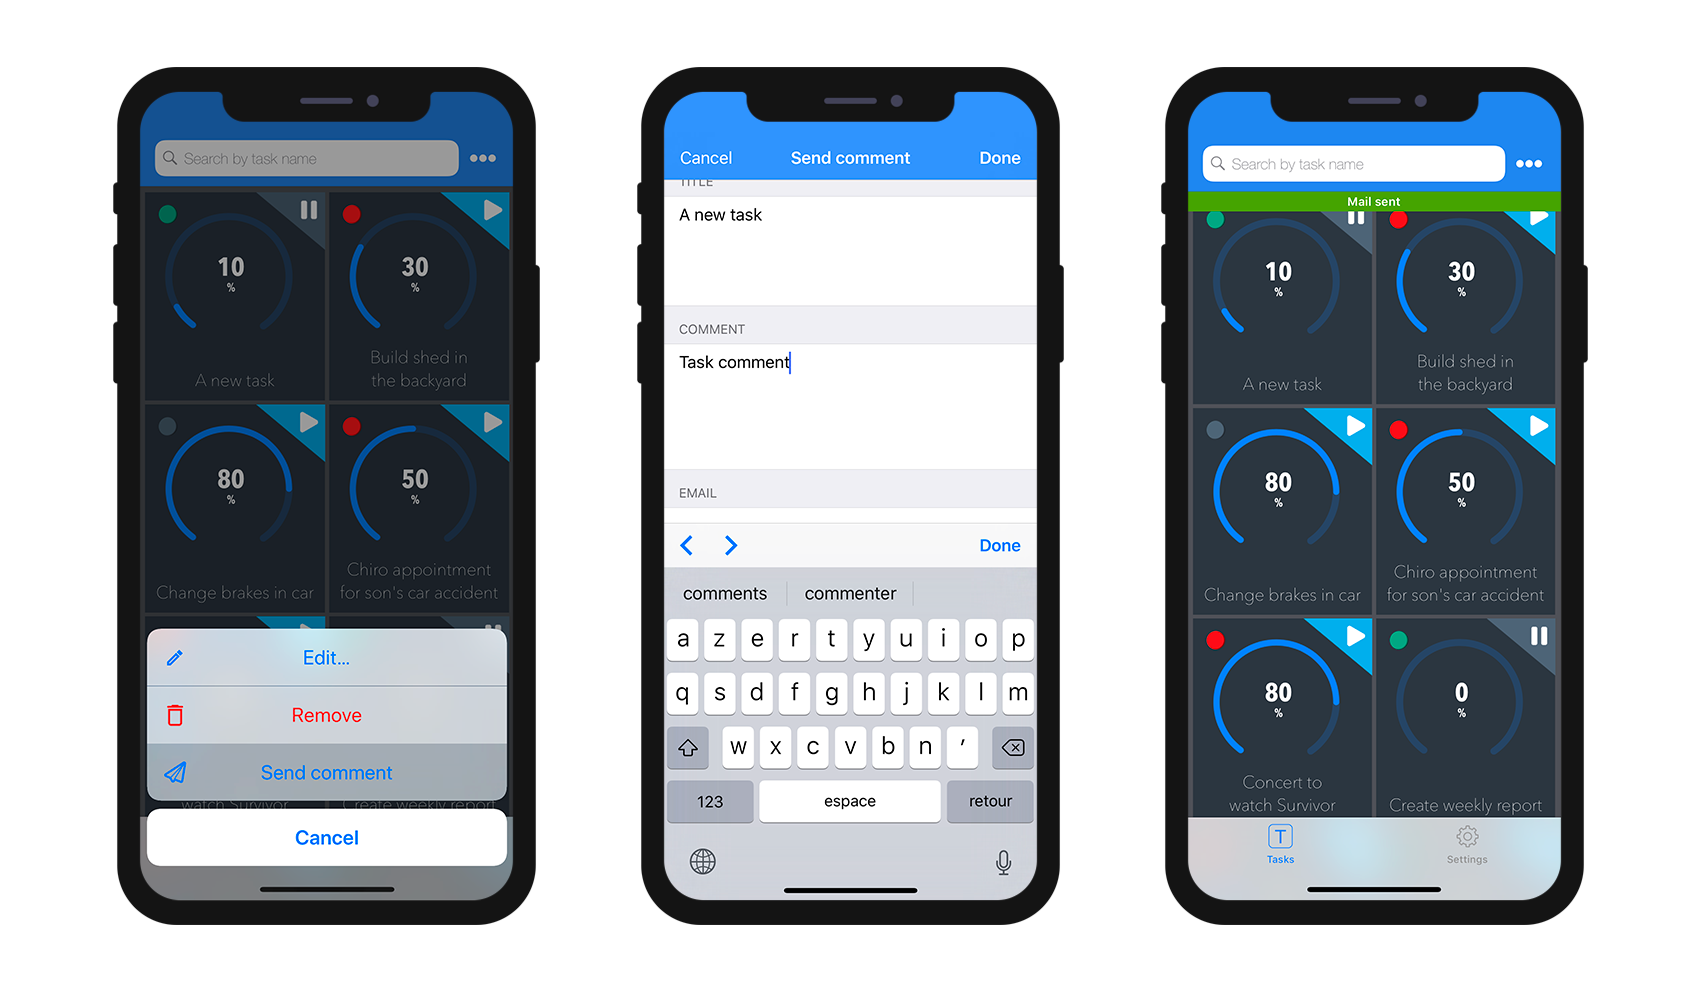
From here, you can:
- edit all your fields by selecting them, and
- validate or cancel your modifications, using the Done or Cancel buttons (available in the navigation bar).
For your convenience, the Edition form includes a few special features:
- The keyboard type depends on the selected parameter type in the Action section.
- You can go to the next or previous field using the arrow on top of the keyboard.
- The iOS keyboard can be closed by clicking anywhere outside of a field.
- Indication is given to the user when a value is not valid.
- The view focuses on empty mandatory fields when the user clicks the Done button.