Archive and export your Project
OBJECTIVES
- Archive and export your 4D for iOS project
- Generate .ipa and manifest files
PREREQUISITES
- Apple Enterprise Developer Program
- A secured web server
- 57 x 57 px icon
- 512 x 512 px icon
⒈ Xcodeの設定
Following validation of your account by Apple, open Xcode and add your Apple Enterprise Developer account in Preferences > Accounts.
Xcode will automatically install required provisioning and certificates.
⒉ Team IDを取得する
- Log into your Apple Developer Account. You can find your Team ID in Membership.
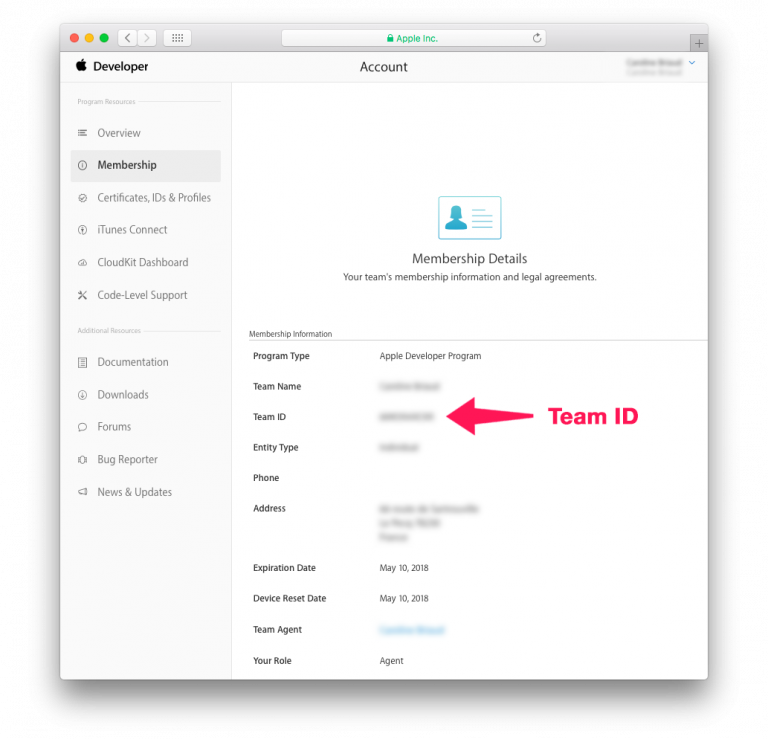
⒊ 4D for iOS configuration
Launch 4D for iOS
On the SECTIONS tab:
- General: Enter your Team ID.
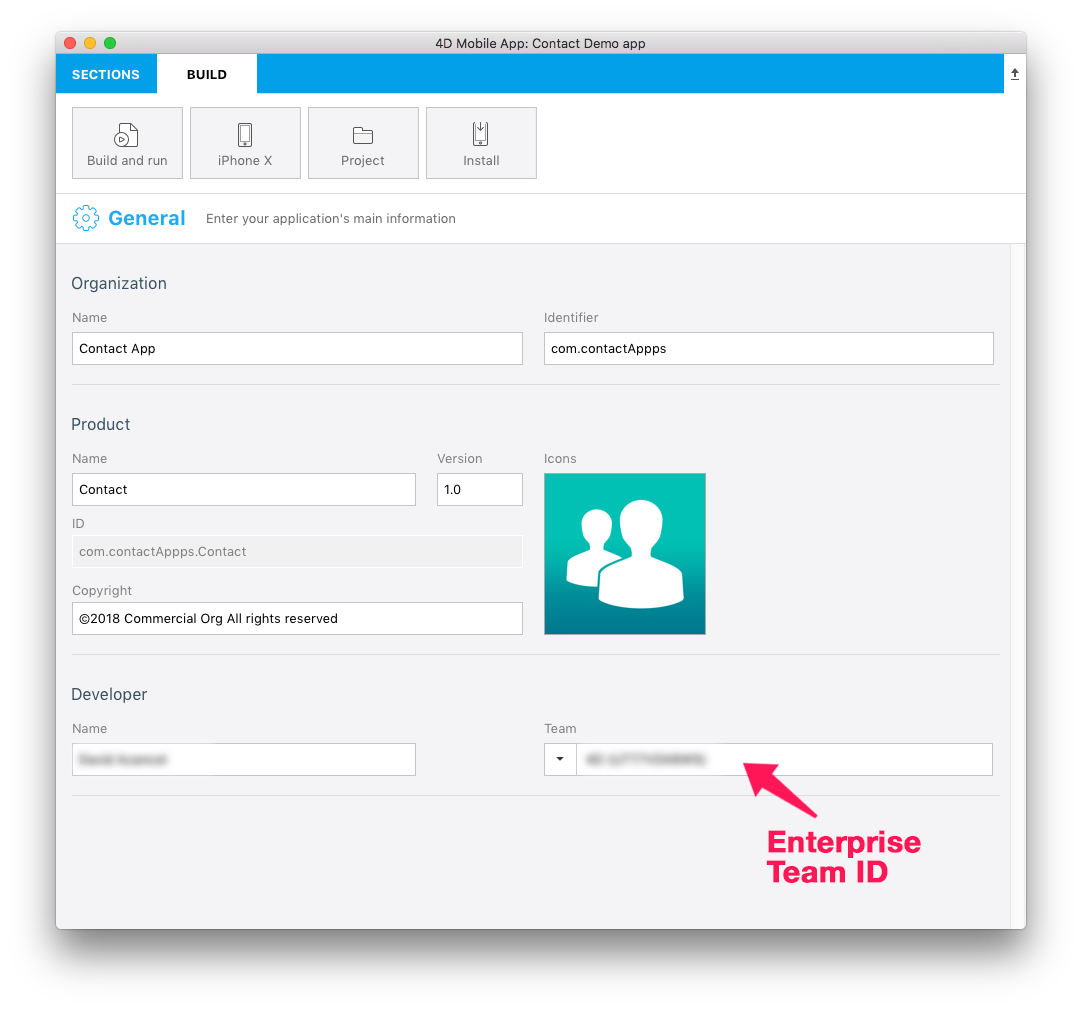
- Publishing: Enter your production URL (HTTPS is mandatory for deployment).
On the BUILD tab:
- Build and Run: Build your project.
⒋ Open your project with Xcode
- From the 4D for iOS Project Editor's BUILD tab, click on Project > Open the project with Xcode
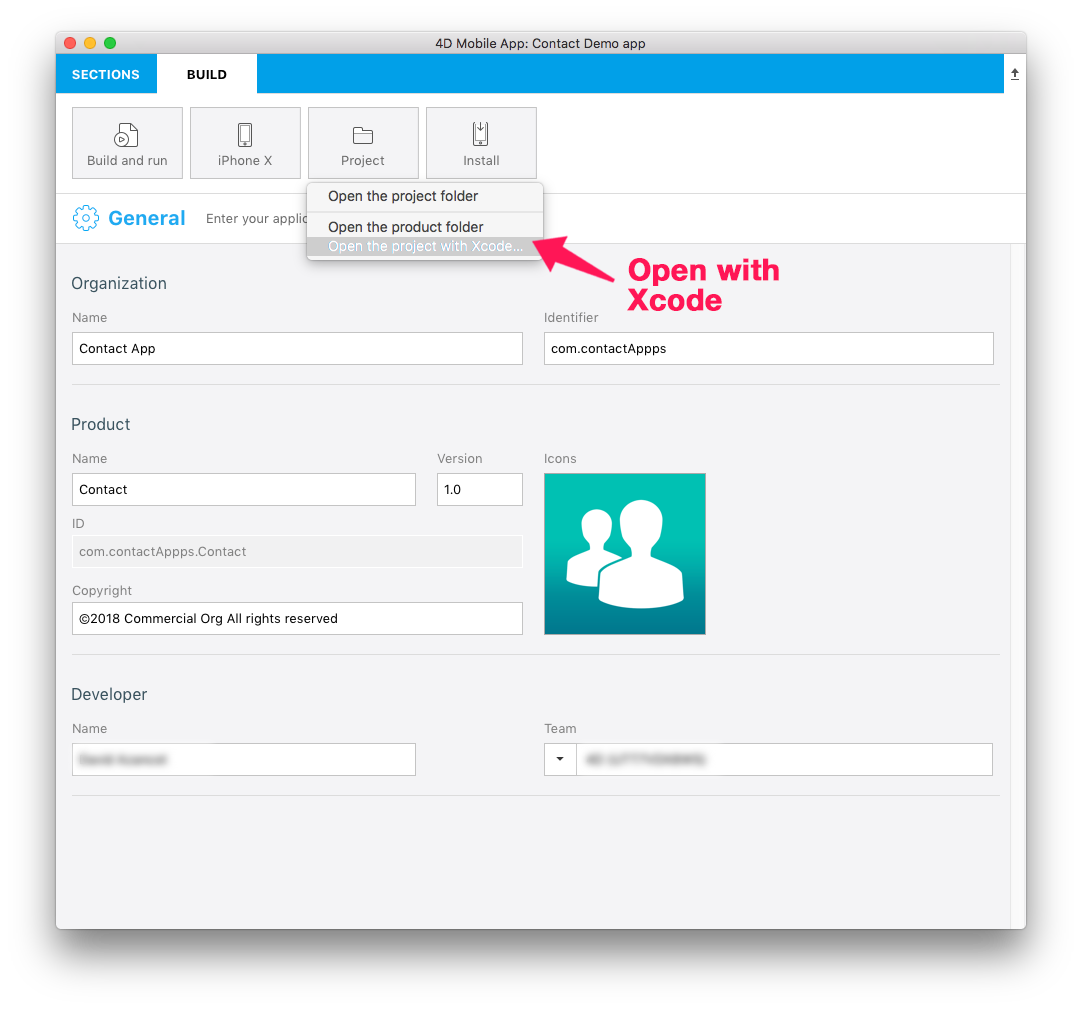
⒌ Archive your project from Xcode
- From Xcode, go to the simulator Menu and select Generic iOS Device
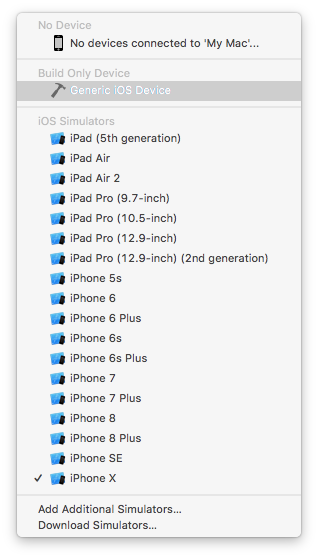
- Then from the menu, click on Product and select Archive
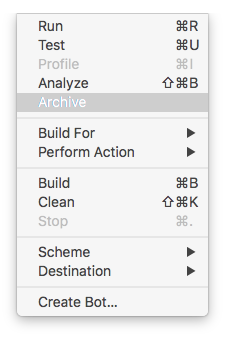
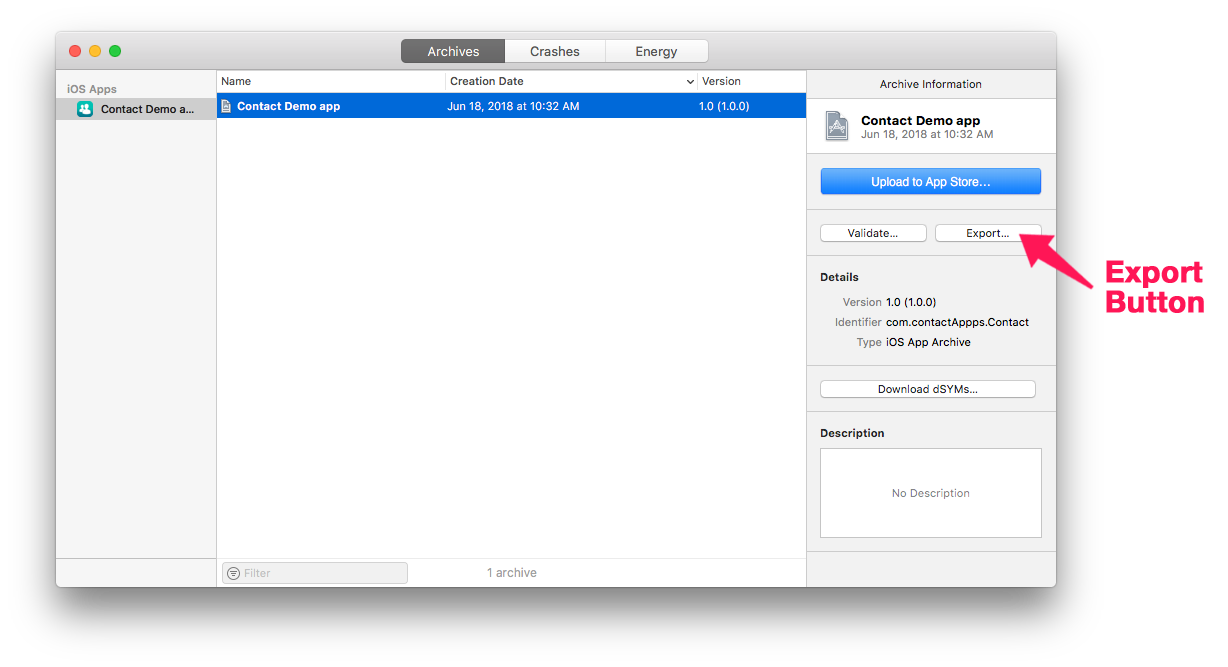
⒍ Export your project
At the end of the archive process, the Organizer window appears with the archive you just created
Click Export.
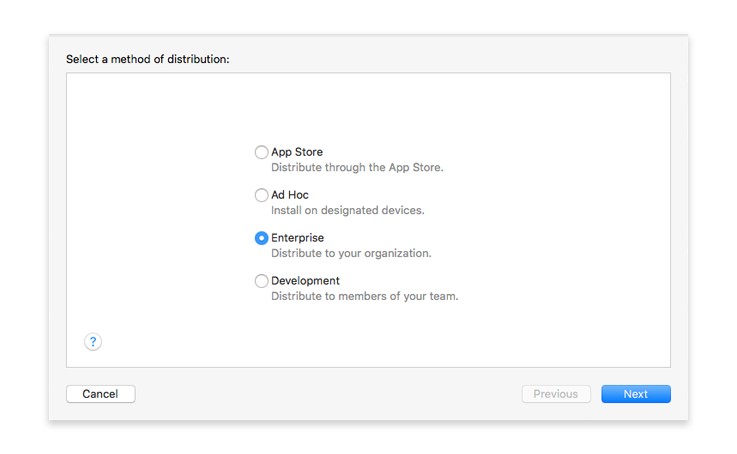
⒎ Select your distribution method
- Select Enterprise and click Next.
⒏ Select your Enterprise distribution options
- You can leave all option boxes checked.
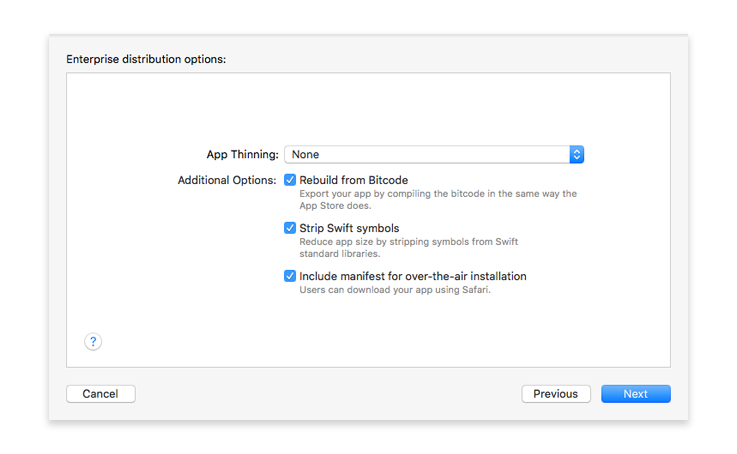
You can choose to let Xcode generate a manifest.plist file for you or generate it manually.
Click Next.
What is a manifest?
The manifest is an XML-based property list and should contain:
- URL : URL pointing to the .ipa file.
- display-image: URL pointing to a 57 x 57 px (72 x 72 px for iPad) PNG icon used during download and installation.
- full-size-image: URL pointing to a 512 x 512 px PNG image representing the iTunes app.
- bundle-identifier: Your app identifier string. You can get it from your app's .plist file.
- bundle-version: Your app's current bundle version string. You can get it from your app's .plist file.
- title: Your app's name.
Here is an example of a manifest.plist file :
<?xml version="1.0" encoding="UTF-8"?>
<!DOCTYPE plist PUBLIC "-//Apple//DTD PLIST 1.0//EN" "http://www.apple.com/DTDs/PropertyList-1.0.dtd">
<plist version="1.0">
<dict>
    <key>items</key>
    <array>
        <dict>
            <key>assets</key>
            <array>
                <dict>
                    <key>kind</key>
                    <string>software-package</string>
                    <key>url</key>
                    <string>https://...Contact.ipa</string>
                </dict>
                <dict>
                    <key>kind</key>
                    <string>display-image</string>
                    <key>url</key>
                    <string>https://...Contact_icon_57.png</string>
                </dict>
                <dict>
                    <key>kind</key>
                    <string>full-size-image</string>
                    <key>url</key>
                    <string>https://...Contact_icon_512.png</string>
                </dict>
            </array>
            <key>metadata</key>
            <dict>
                <key>bundle-identifier</key>
                <string>com.contactApp.ContactDemoapp</string>
                <key>bundle-version</key>
                <string>1.0</string>
                <key>kind</key>
                <string>software</string>
                <key>title</key>
                <string>Contact Demo app</string>
            </dict>
        </dict>
    </array>
</dict>
</plist>
⒐ Distribution manifest information
- We recommand letting Xcode do the job of entering your app URL as well as the icons URLs. You will, of course, have the option to change those URLs later.
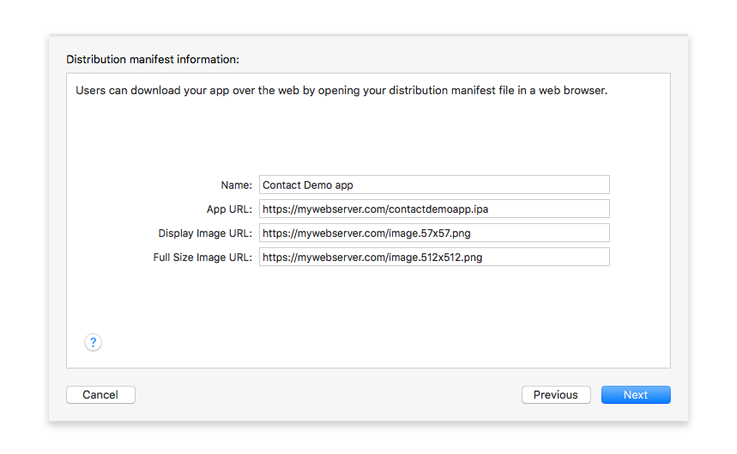
- Click Next.
⒑ Re-sign your application
- Let Xcode manage the Automatically manage signing option.
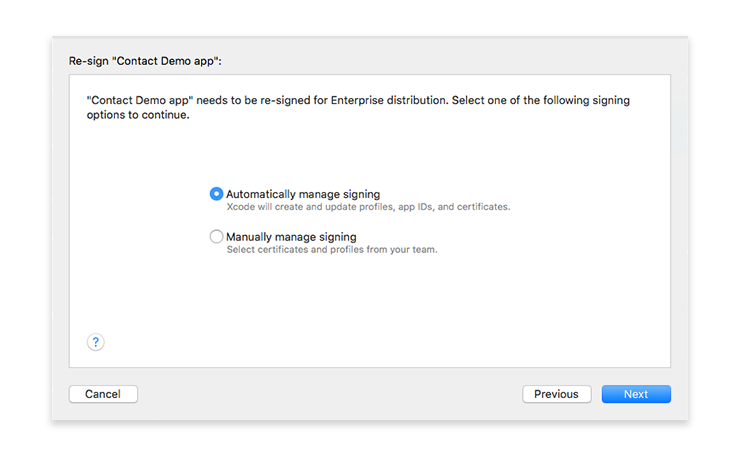
- Click Next.
STEP 11. Review your app.ipa content
- Here you can verify that your application identifier is correct as well as your Team ID.
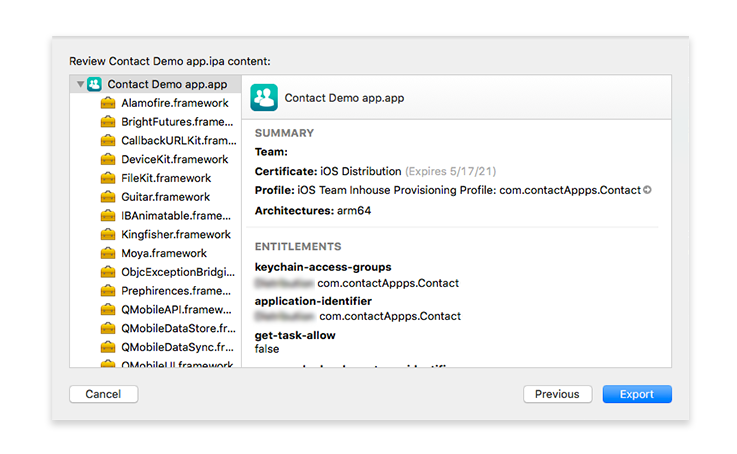
- Click on Export and select where to save your app folder on your computer.