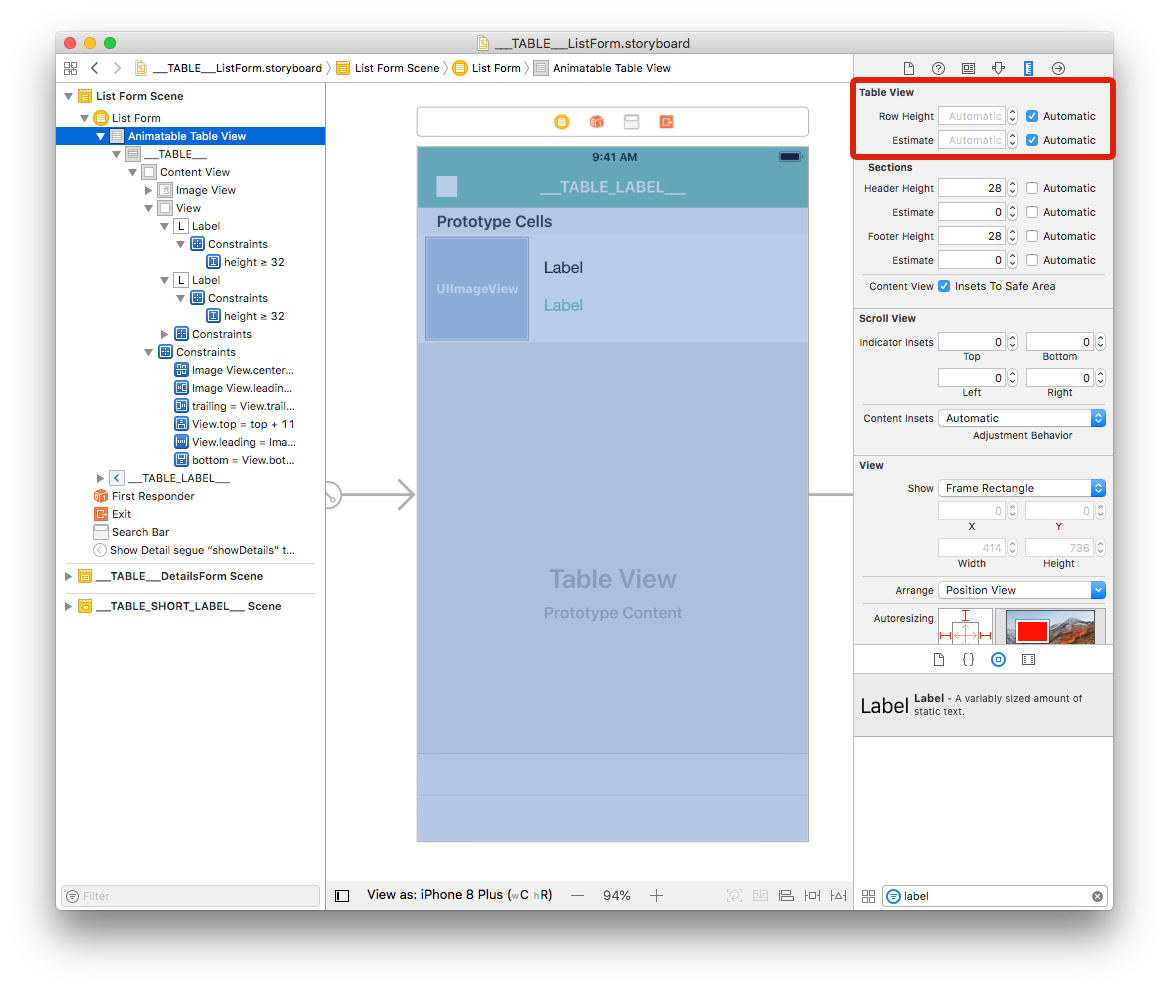
ストーリーボード
iOSアプリのカスタムリスト画面をXcodeで作成しましょう!
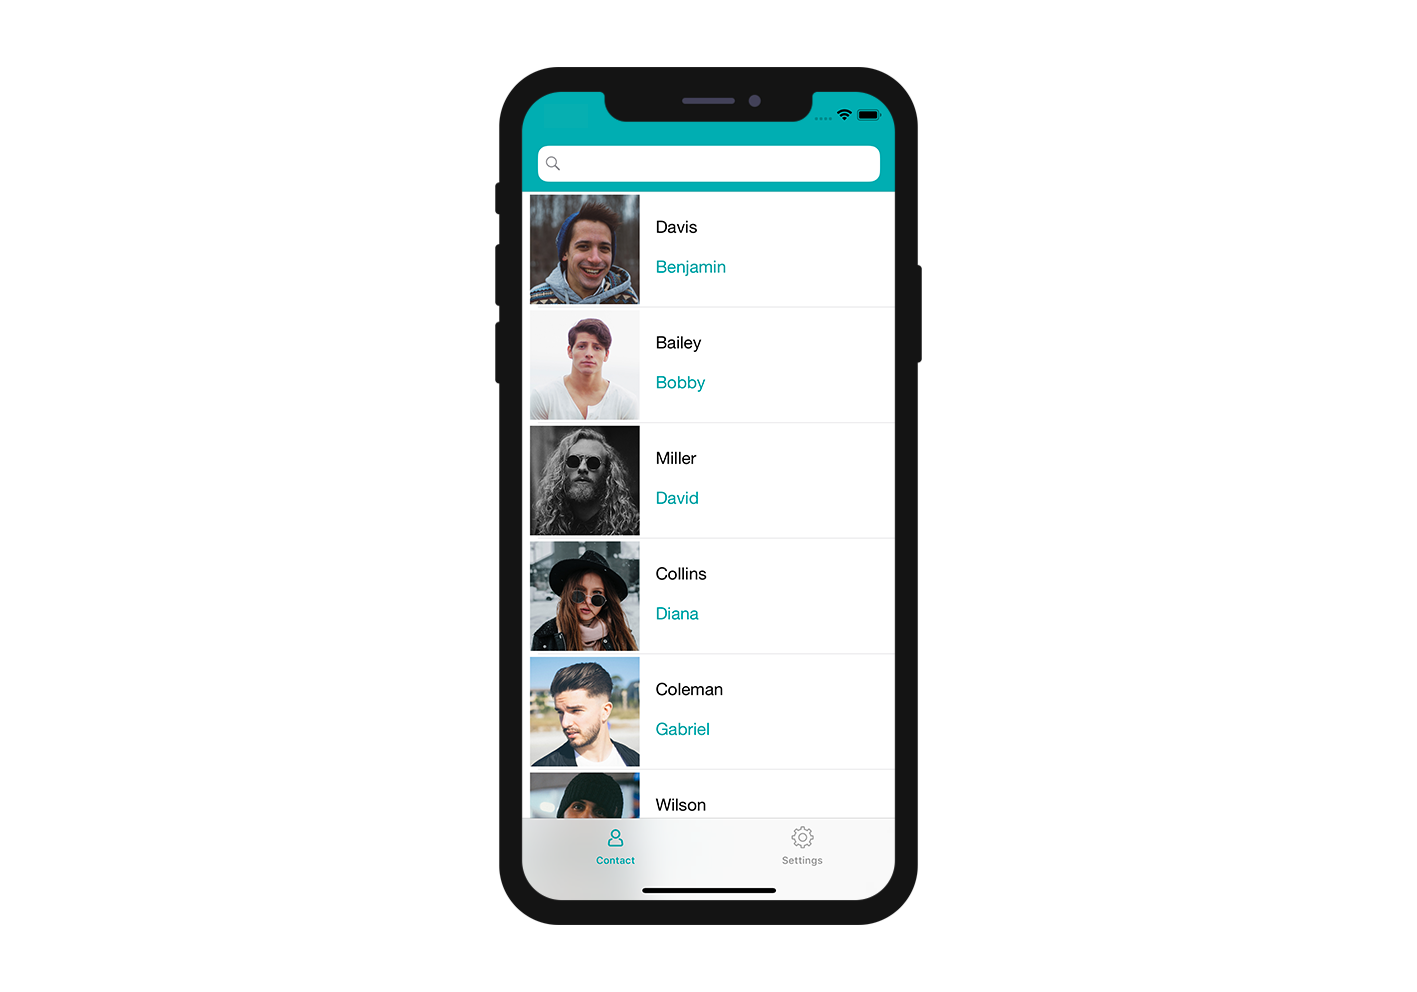
完成イメージ
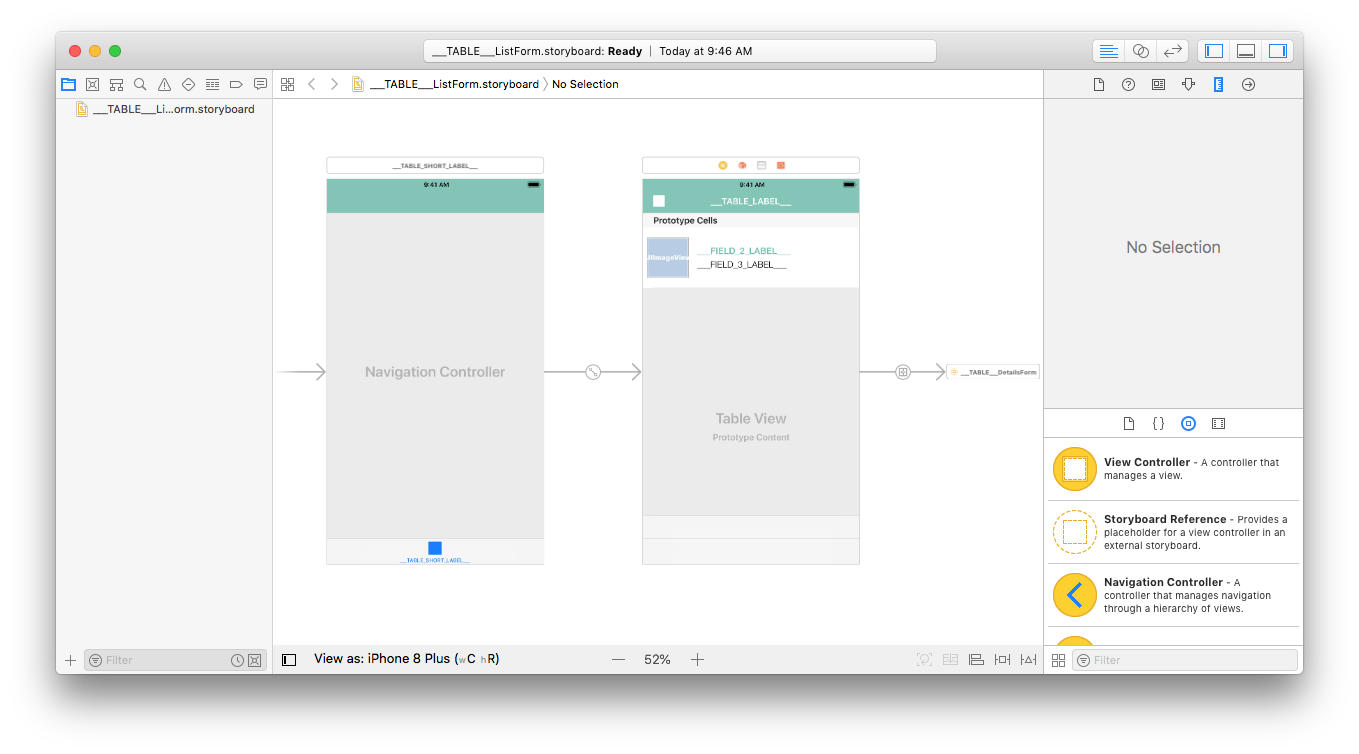
セル内に表示されるフィールドのレイアウトをデザインしましょう。
- アイコン
- タイトル要素(title)
- サブタイトル
ストーリーボードをXcodeで開く
storyboardファイル(拡張子は非表示かもしれません)をXcodeで開きます。
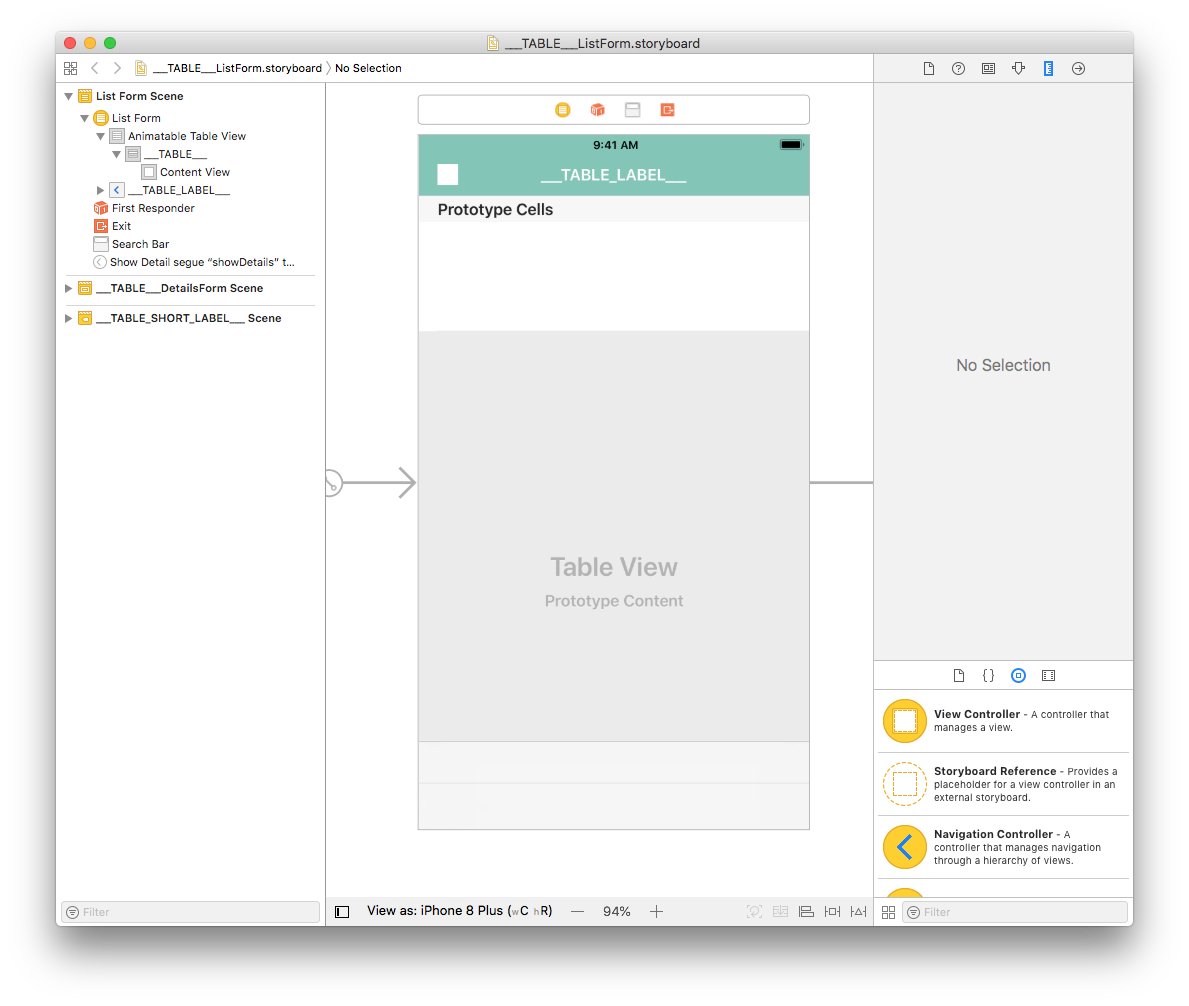
ほとんど白紙の状態です。早速,中身を追加しましょう!
Image Viewを追加する
From the Object library, drag and drop an Image View into a cell. オブジェクトライブラリは,ツールバー上部にある丸の中に四角が収まったアイコンをクリックすると表示されます。ツールバーが表示されていない場合,command+option+Tで表示を切り替えてください。command+shift+Lで直接ライブラリを表示することもできます。
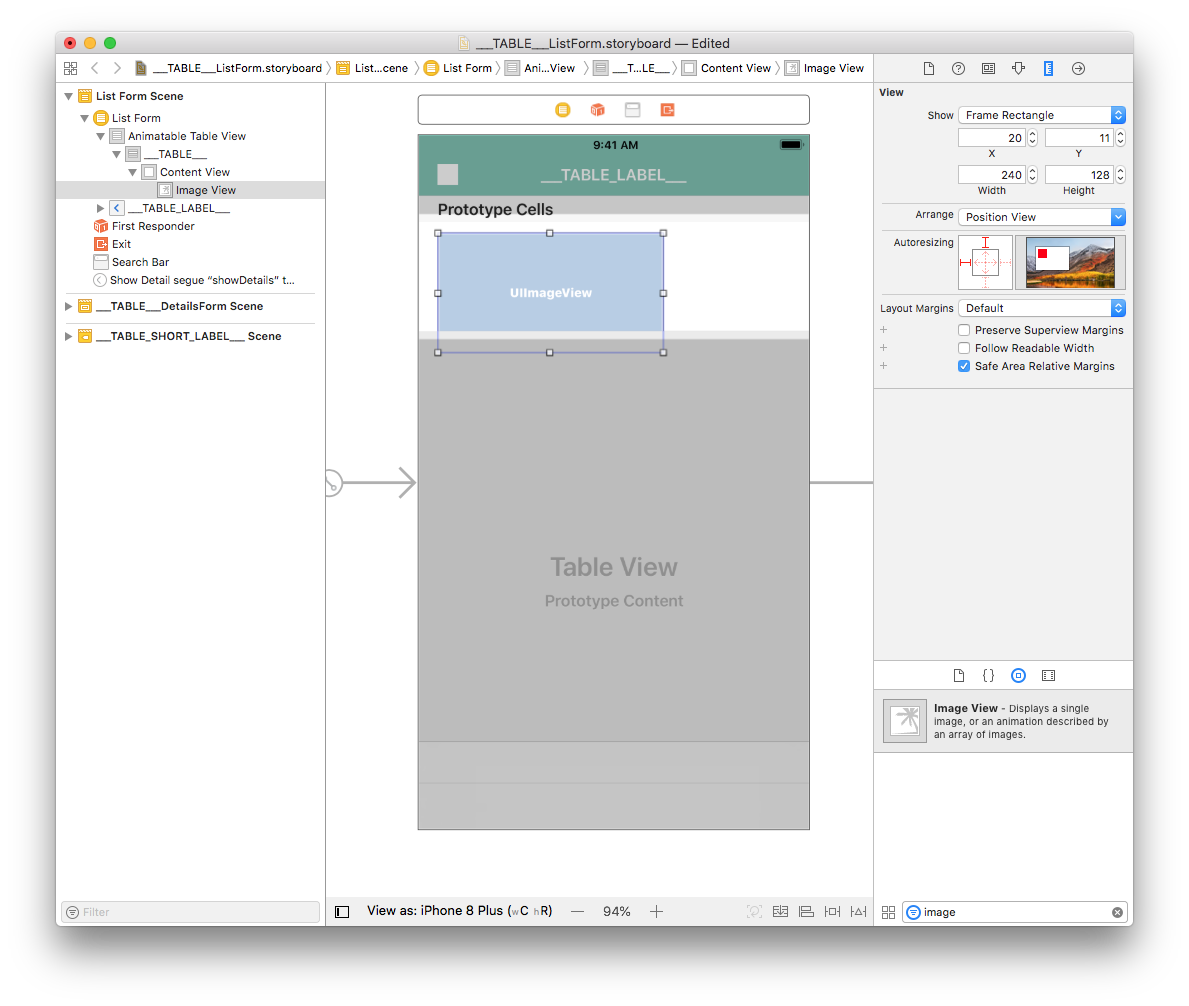
From the Size inspector panel (on the right side of the Interface Builder window), set the Image View Width value to 110 and the Height value to 110. また,X座標を8に,Y座標を3に設定します。
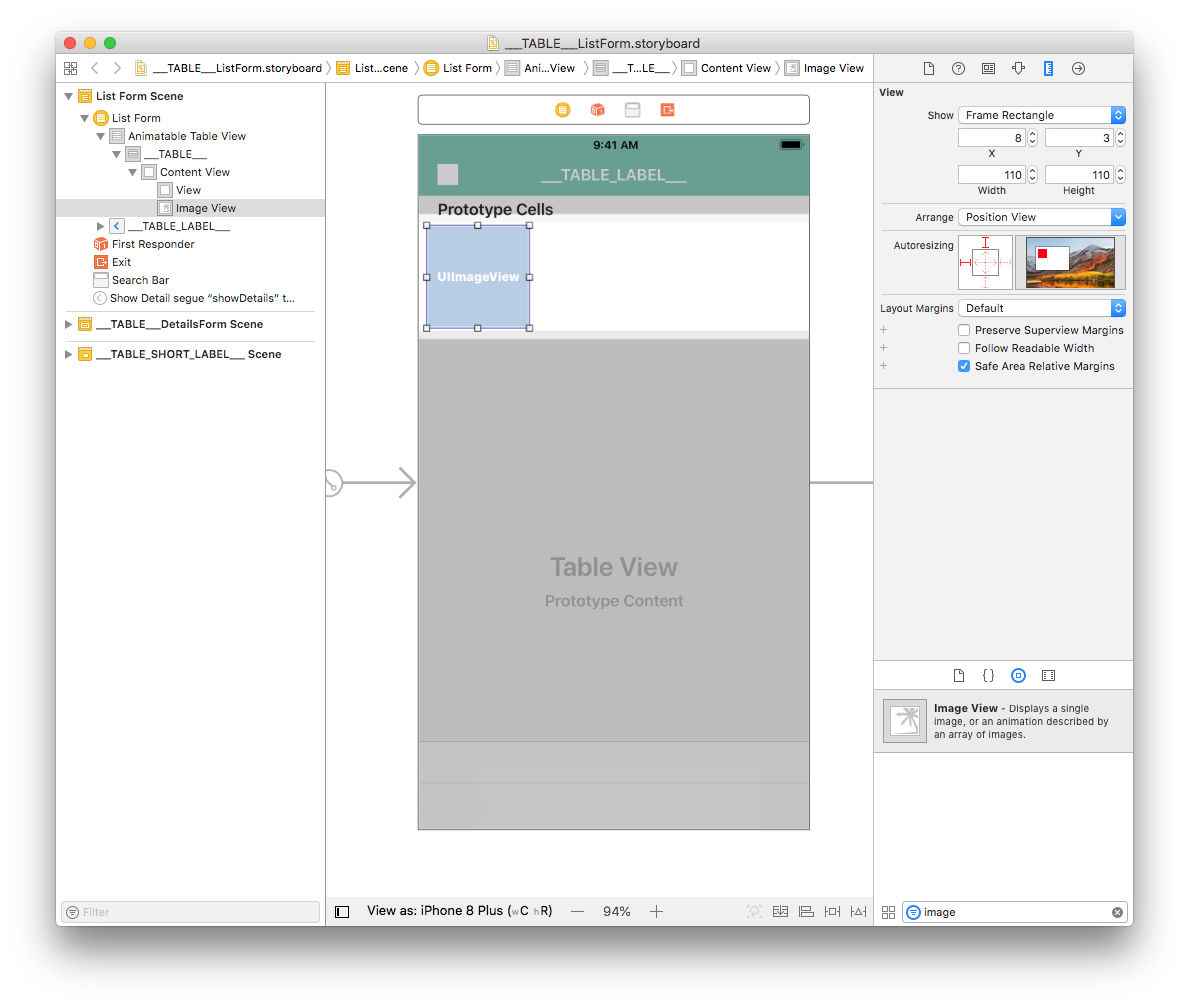
Next, add a constraint (Leading: 8) by clicking on the Add New Constraints button (at the bottom of the Interface Builder window). WidthおよびHeightのチェックボックスをクリックし,幅と高さに固定値の制約を追加します。
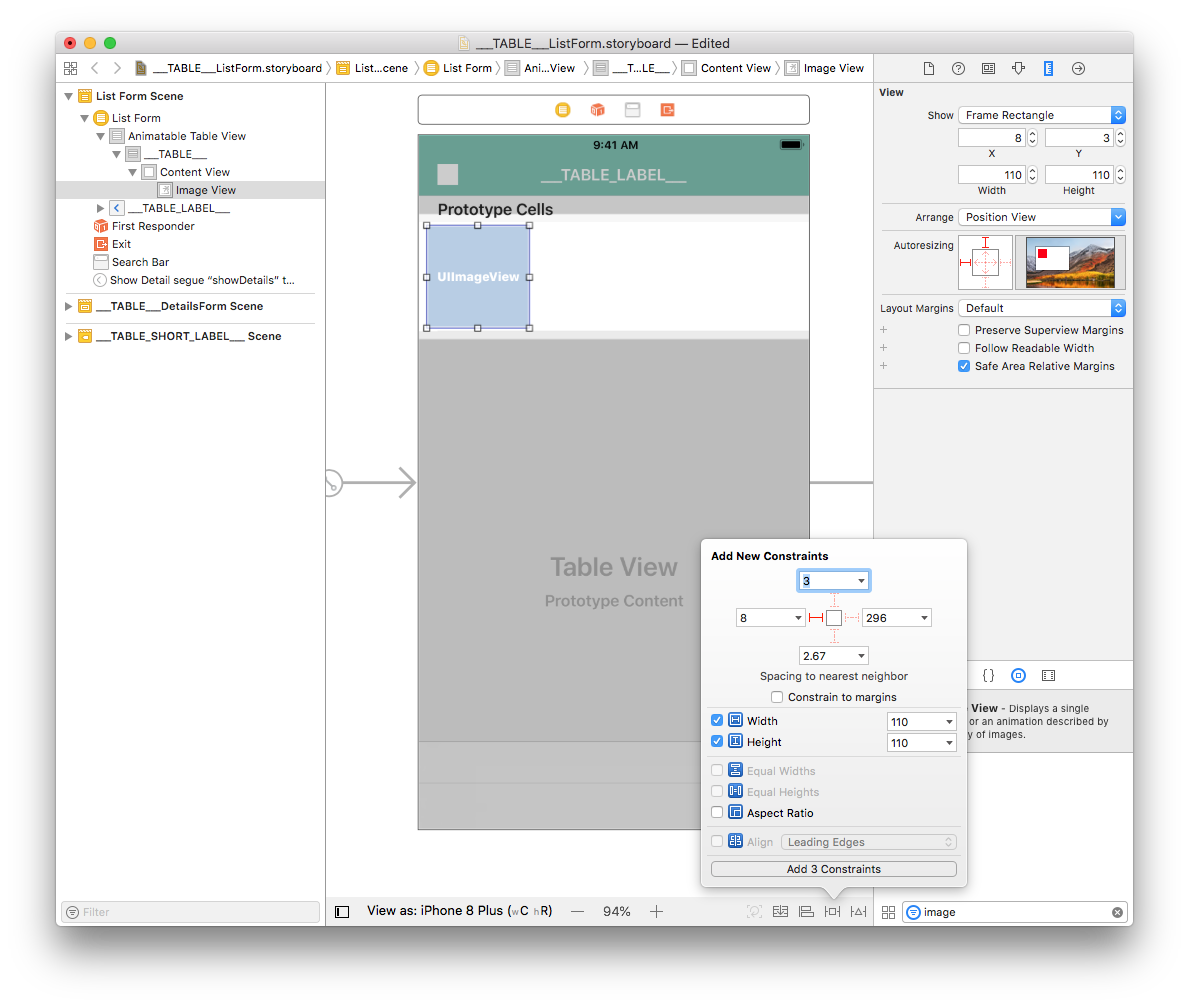
Finally, click on the Align button (at the bottom of the Interface Builder window) and check the "Vertically in Container" checkbox.
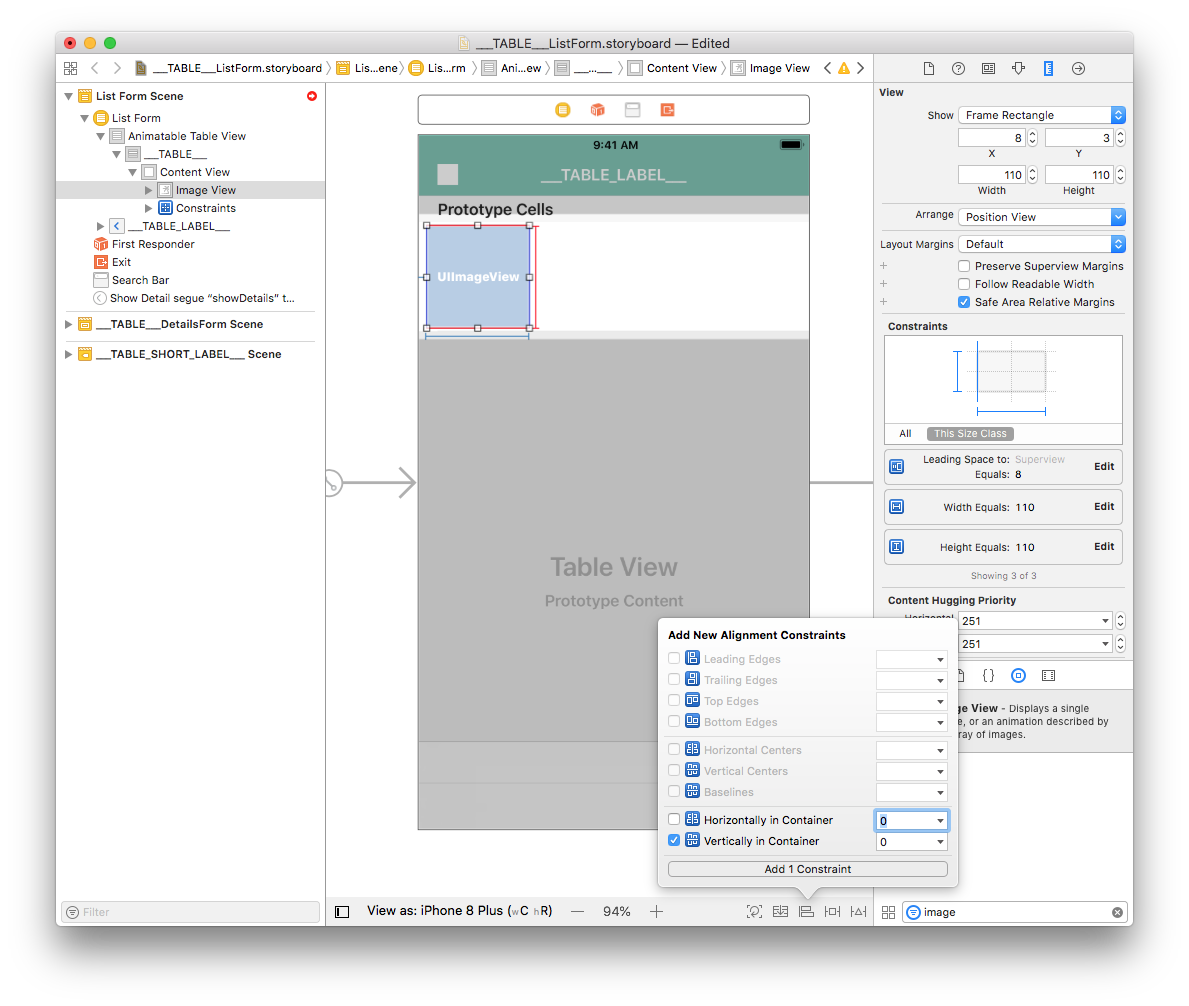
Image Viewのレイアウトがバッチリ決まりました!
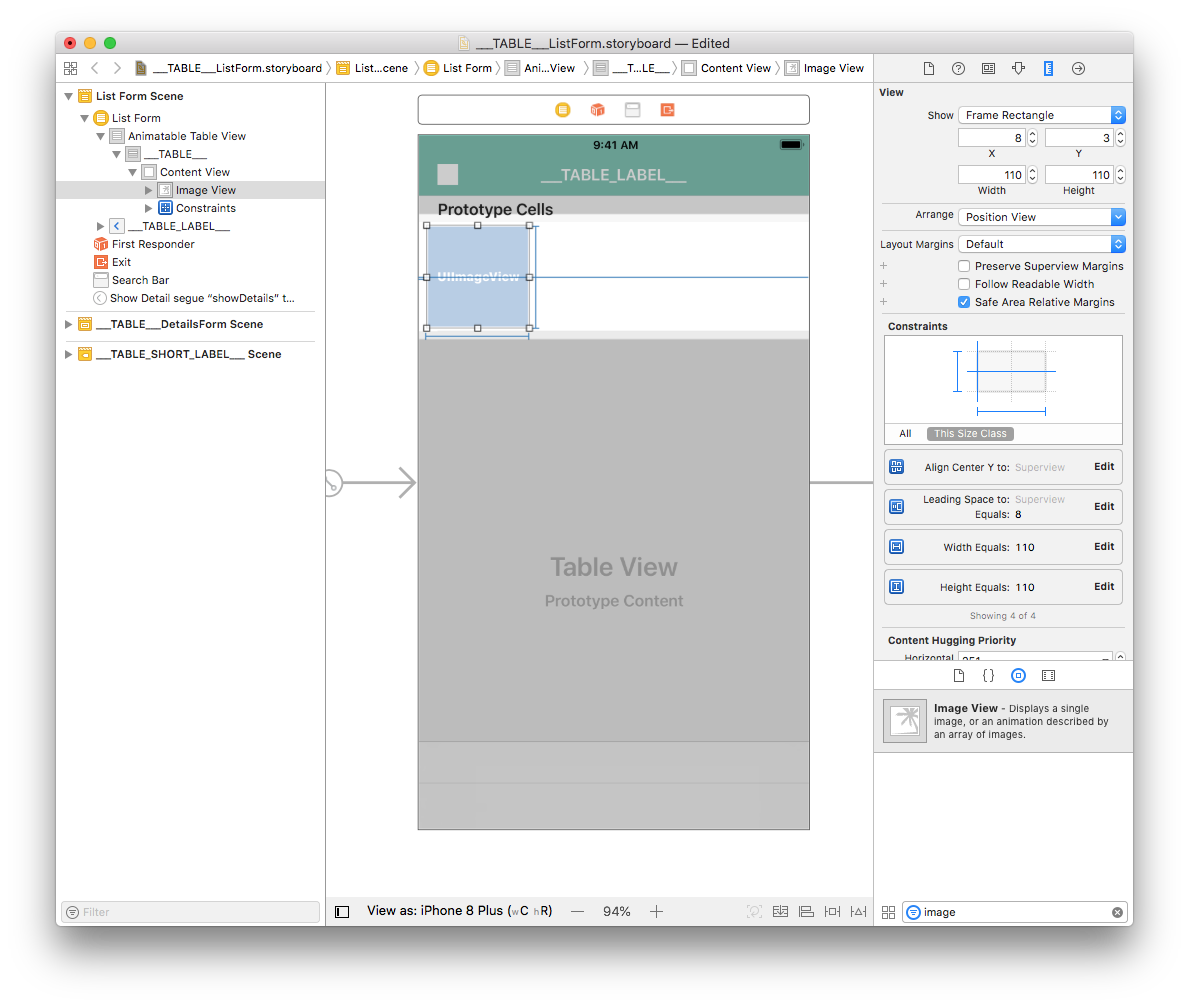
セル内に表示されるラベルのほうに目を向けましょう。
タイトルおよびサブタイトルのラベル
Let's begin by adding a View. Search for "View" in the Object library and drag it into the cell container.
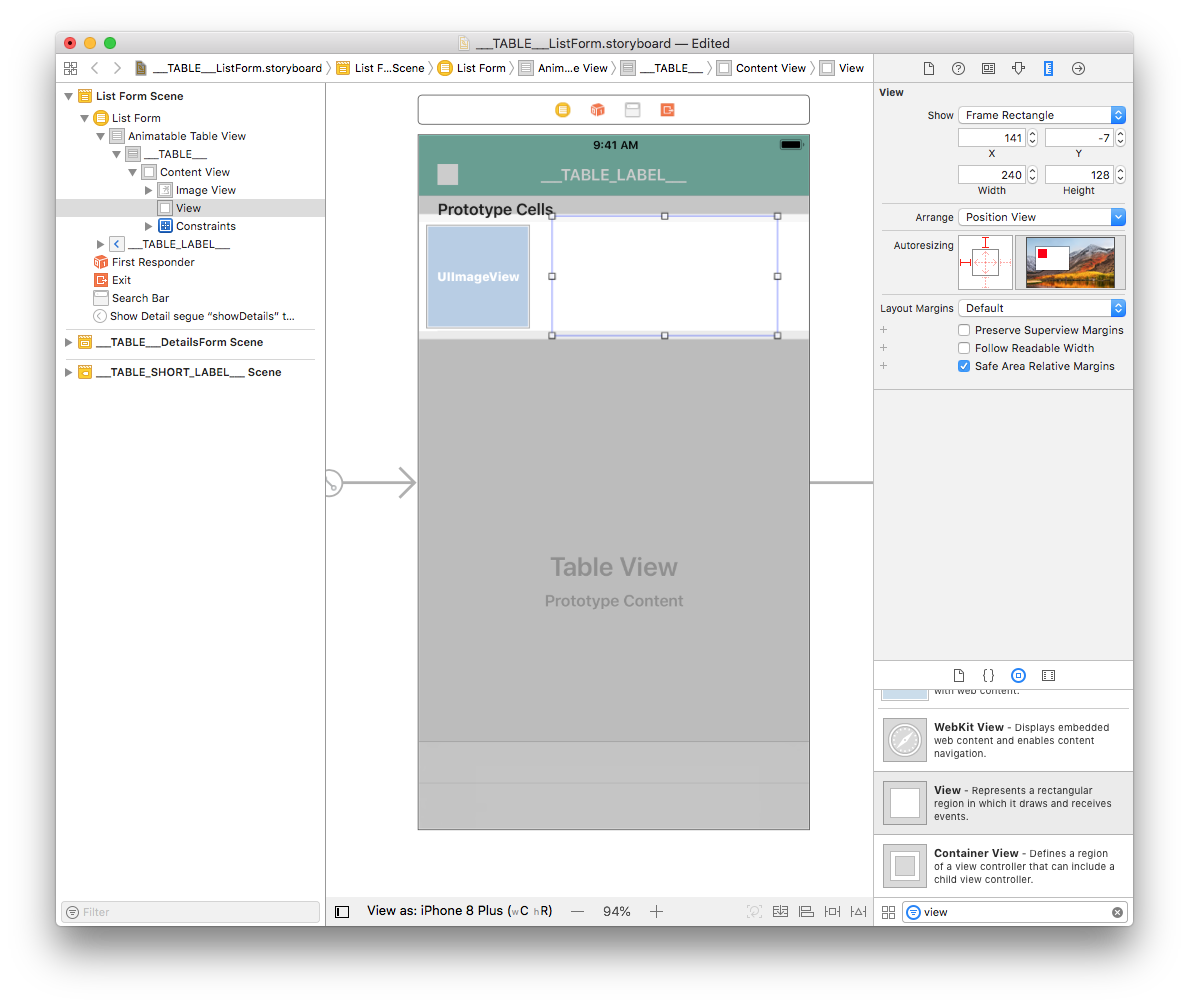
From the Size inspector panel (on the right side of the Interface Builder window), set the View Width value to 277 and the Height value to 94. また,X座標を126に,Y座標を10に設定します。
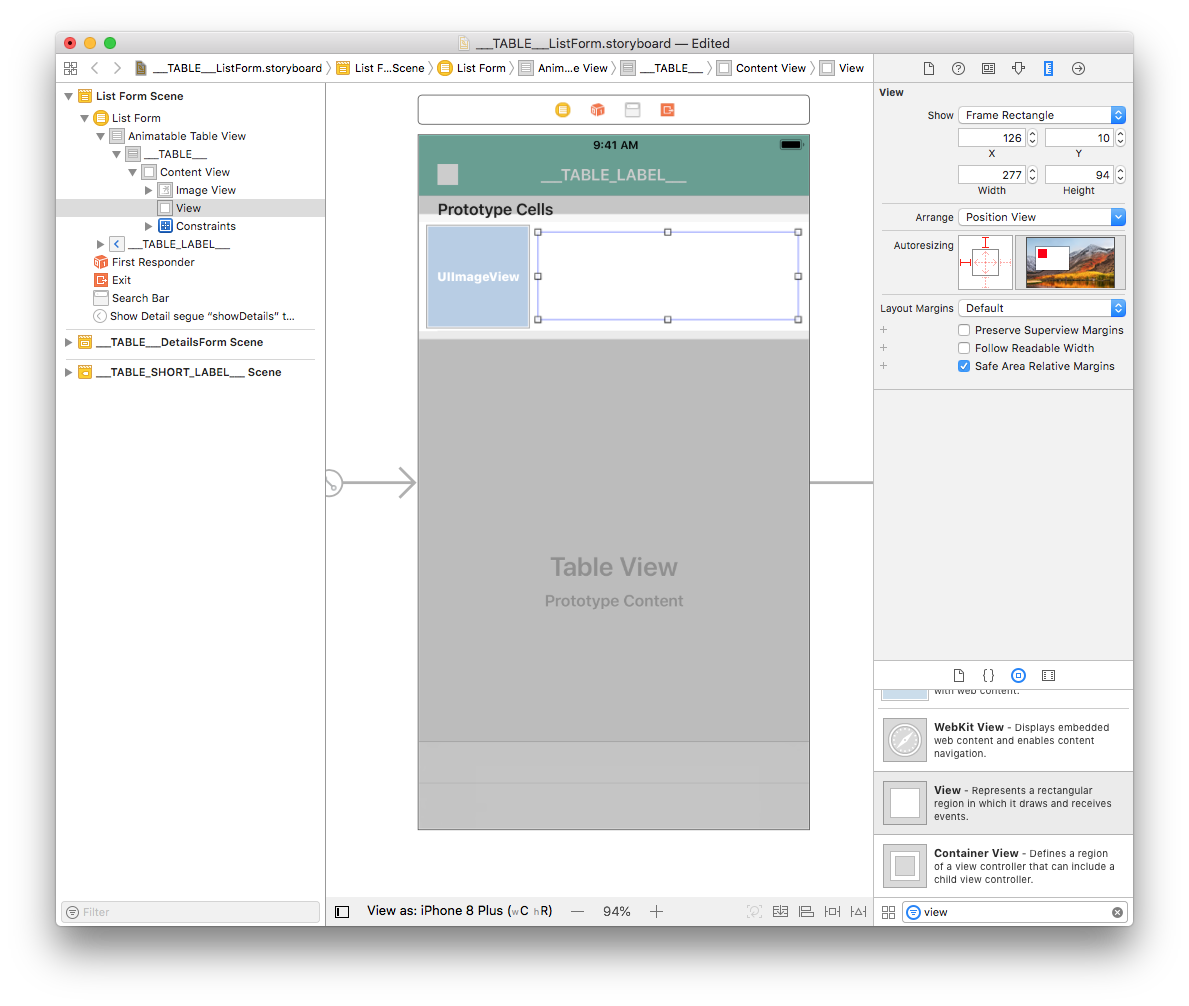
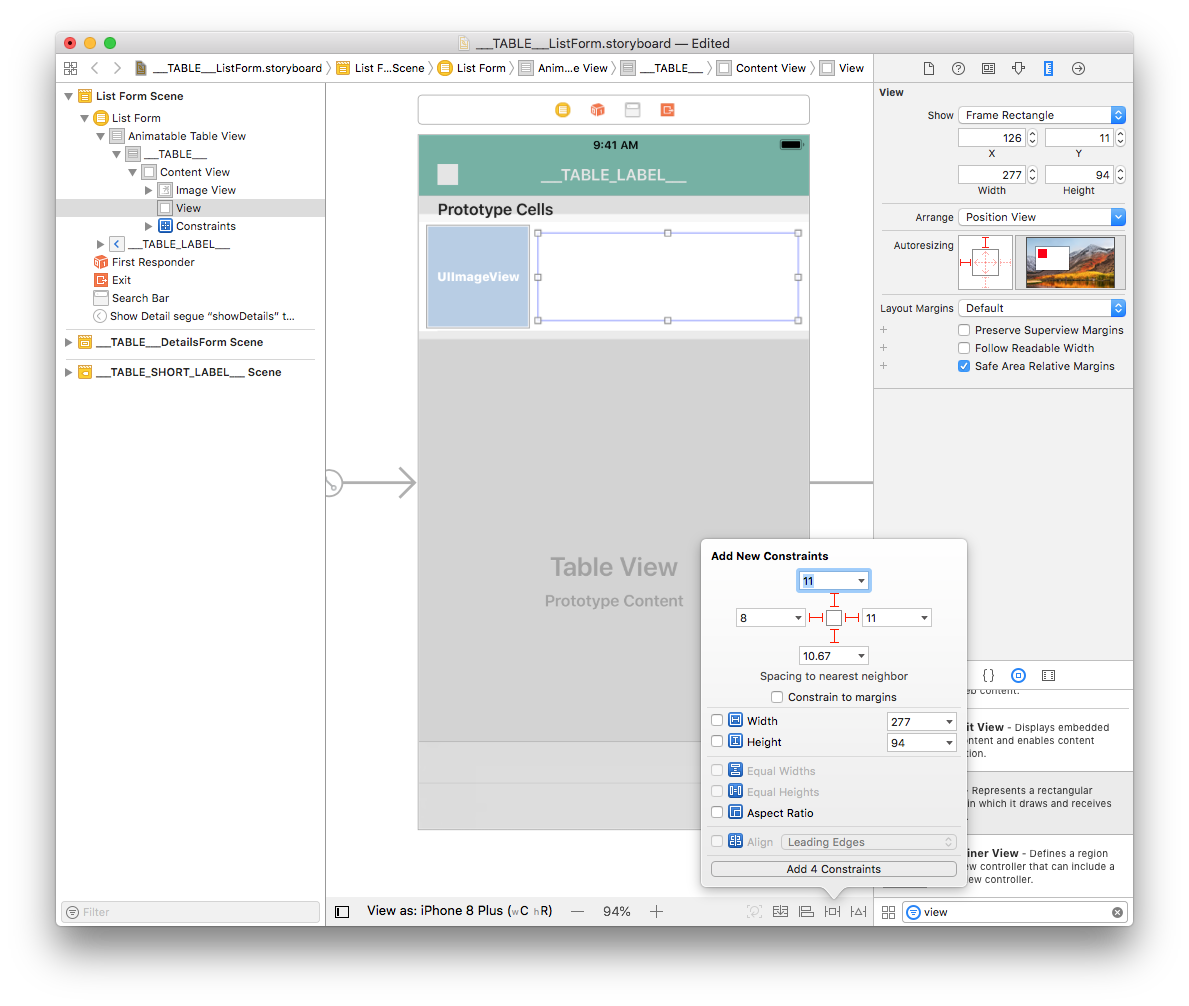
For the Image View, add four constraints by clicking on the Add New Constraints button (Trailing: 11, Leading: 8, Top: 11, and Bottom: 10.67) for the view to be well positioned, as shown:
Viewの上にObject LibraryからLabelをドラッグ&ドロップします。
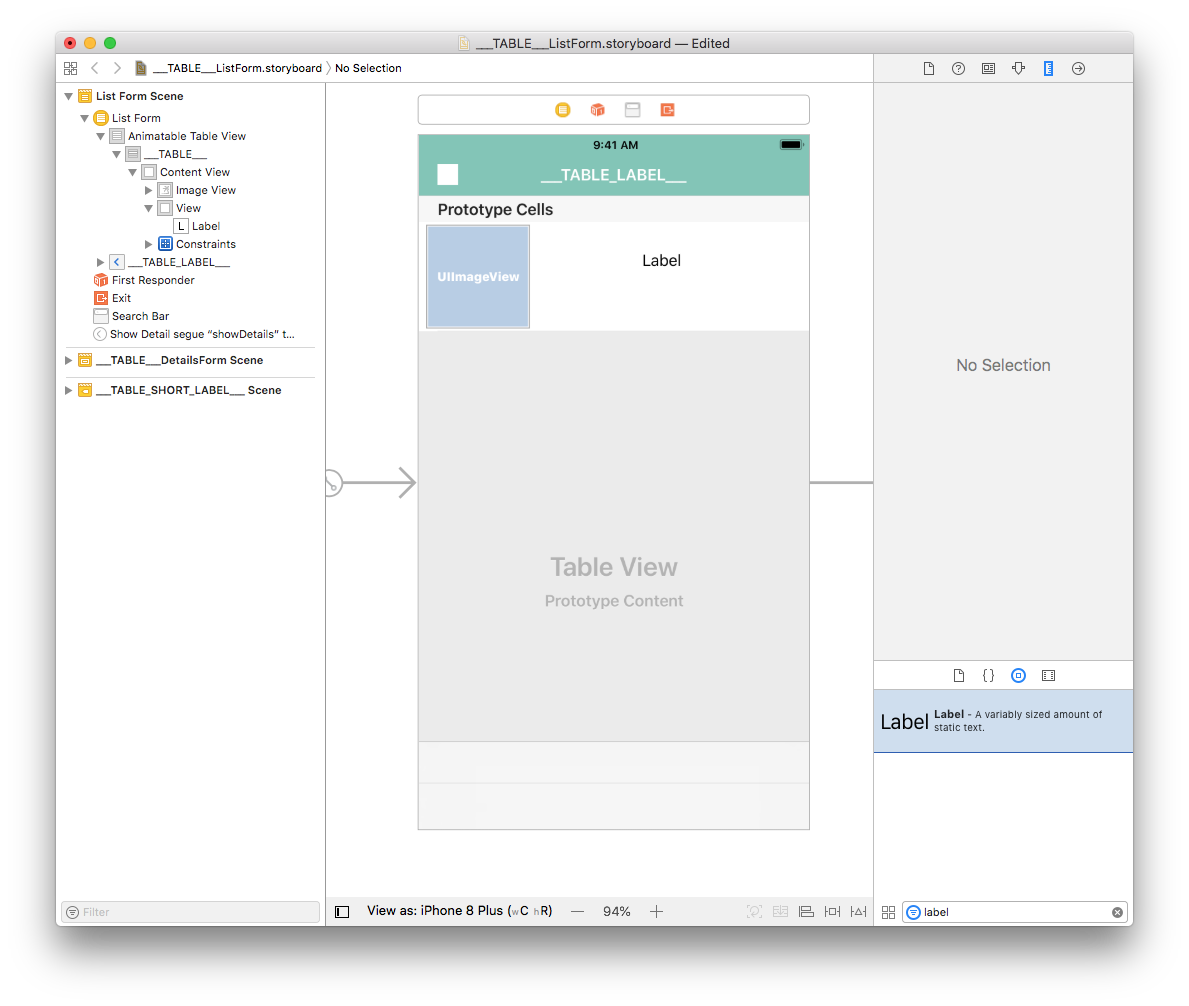
From the Size inspector panel, set the Label View Width value to 269 and the Height value to 32. また,X座標を8に,Y座標も8に設定します。
Duplicate the label and in the Size inspector panel, set the X value to 8 and the Y value to 48.
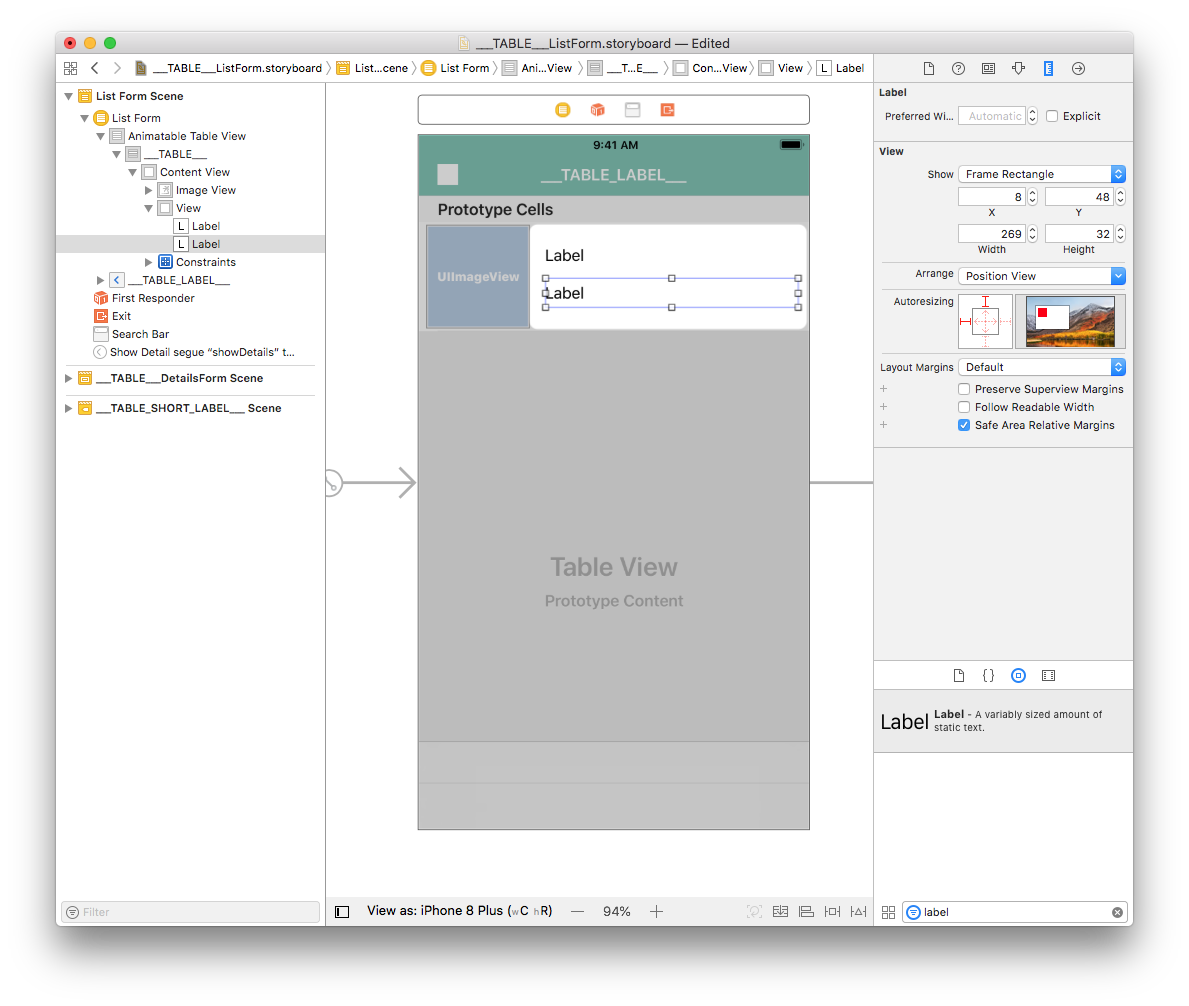
Select both labels add four constraints by clicking on the Add New Constraints button (Trailing: 0, Leading: 8, Top: 8, and Bottom: Multiple) as shown:
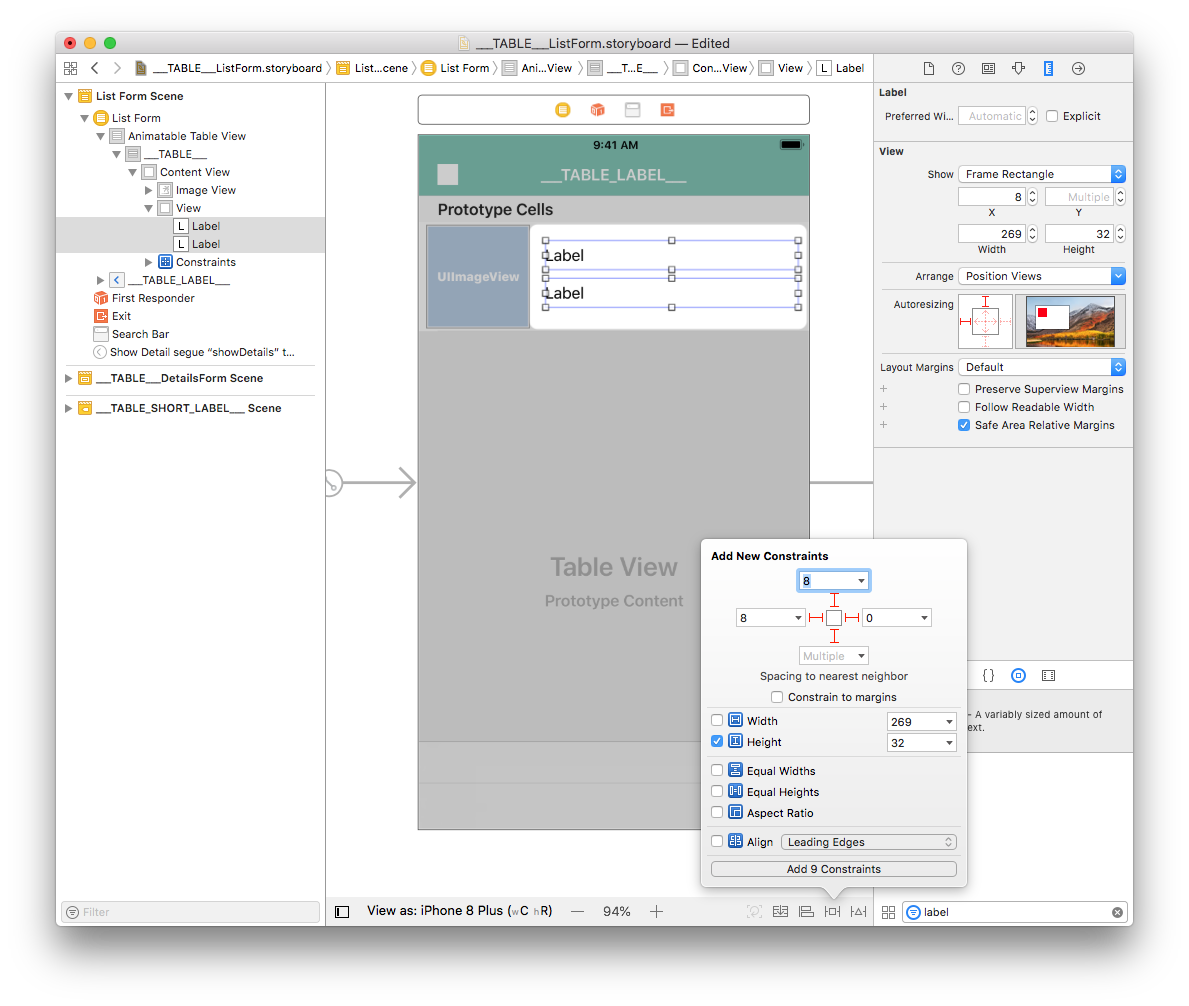
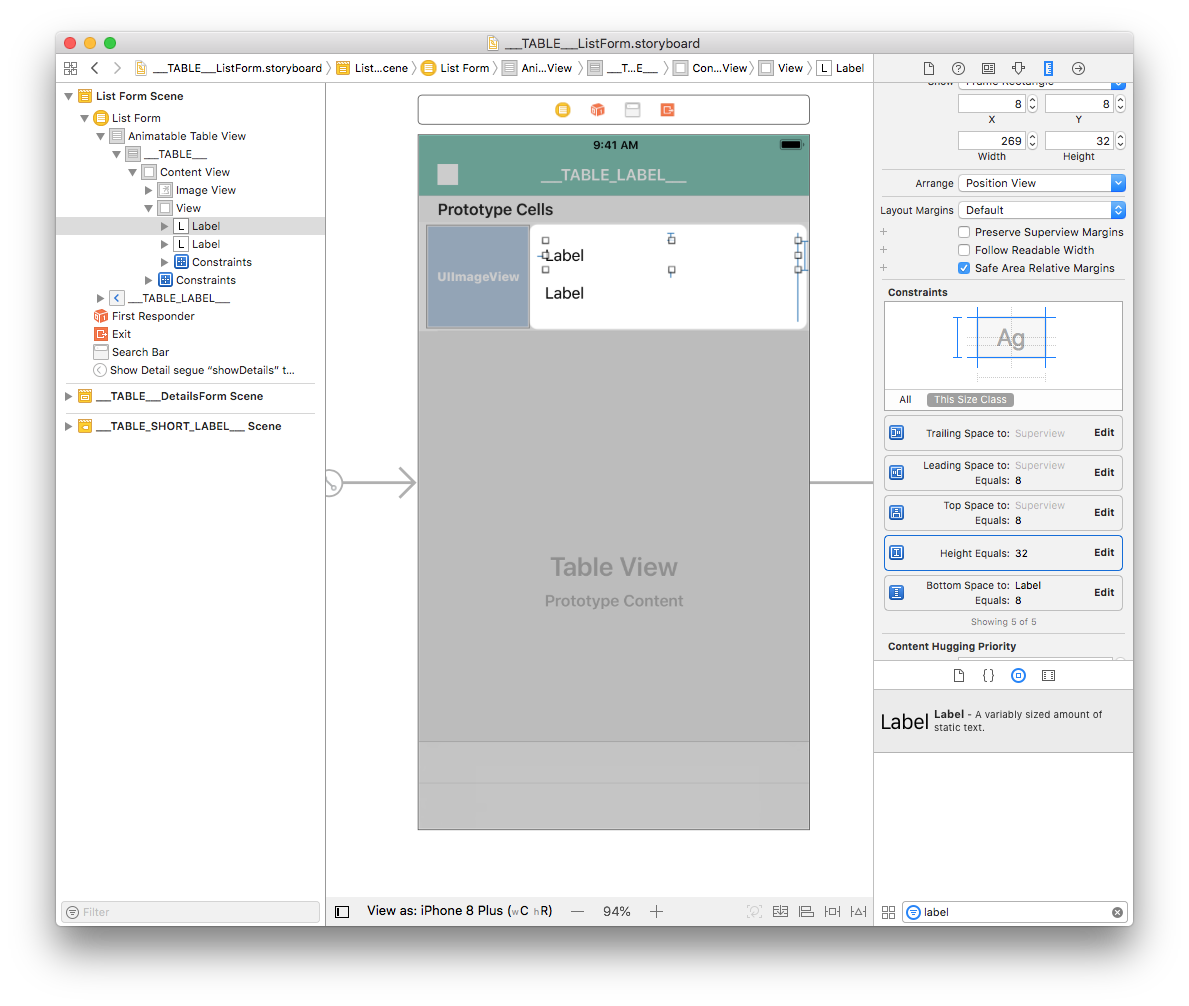
With a label selected, double-click on the Height constraint to edit it.
Change the relation from Equal to Greater Than or Equal so it can have a variable height (to handle multiline labels).
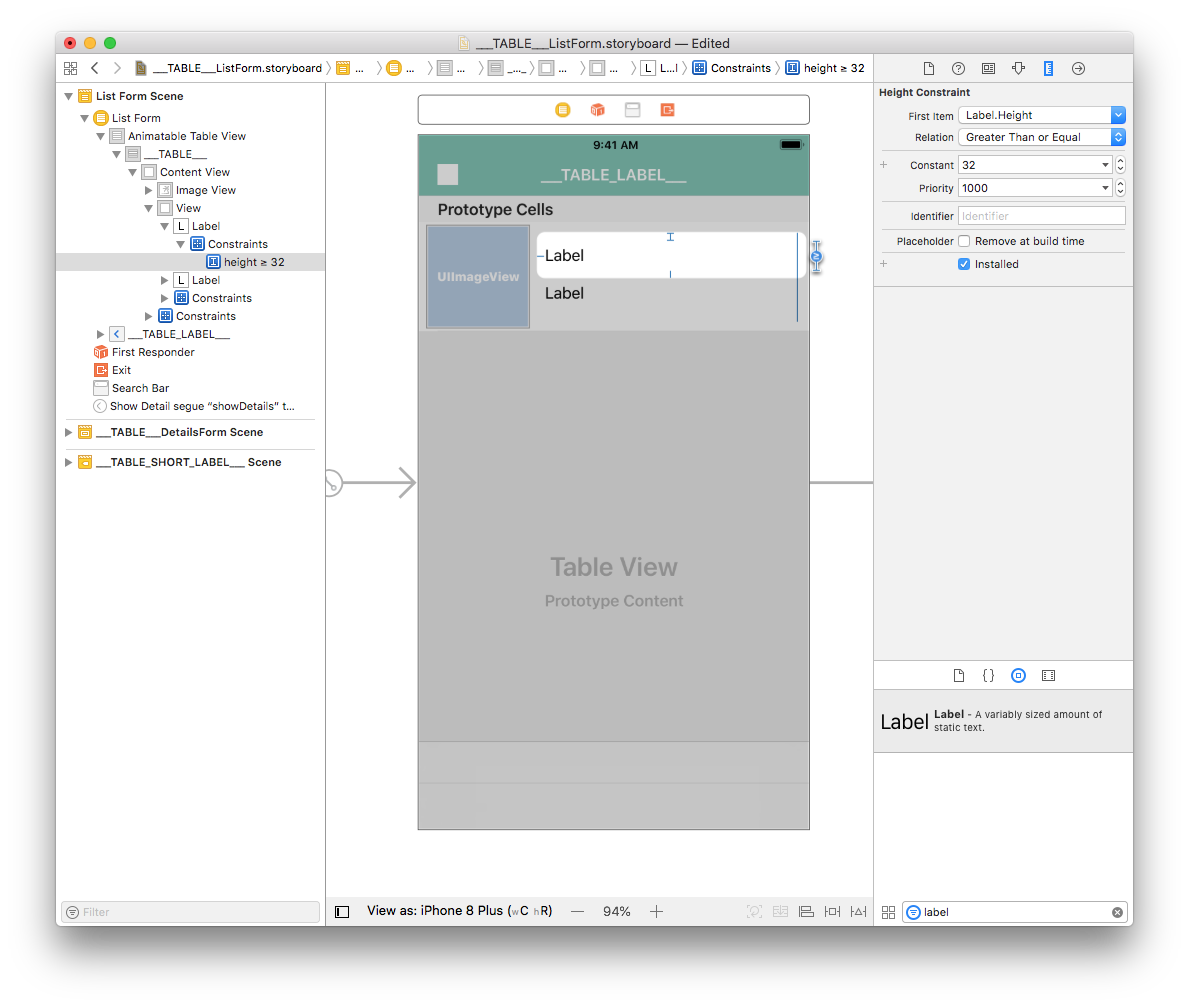
他方のラベルに対しても同じことをします。
ラベルのカスタマイズ
ラベルのフォントカラーは, Attribute inspector(ウィンドウ右側パネルのルーラーアイコンをクリック)でカスタマイズすることができます。 Let's make the second label Dark Grey Color :
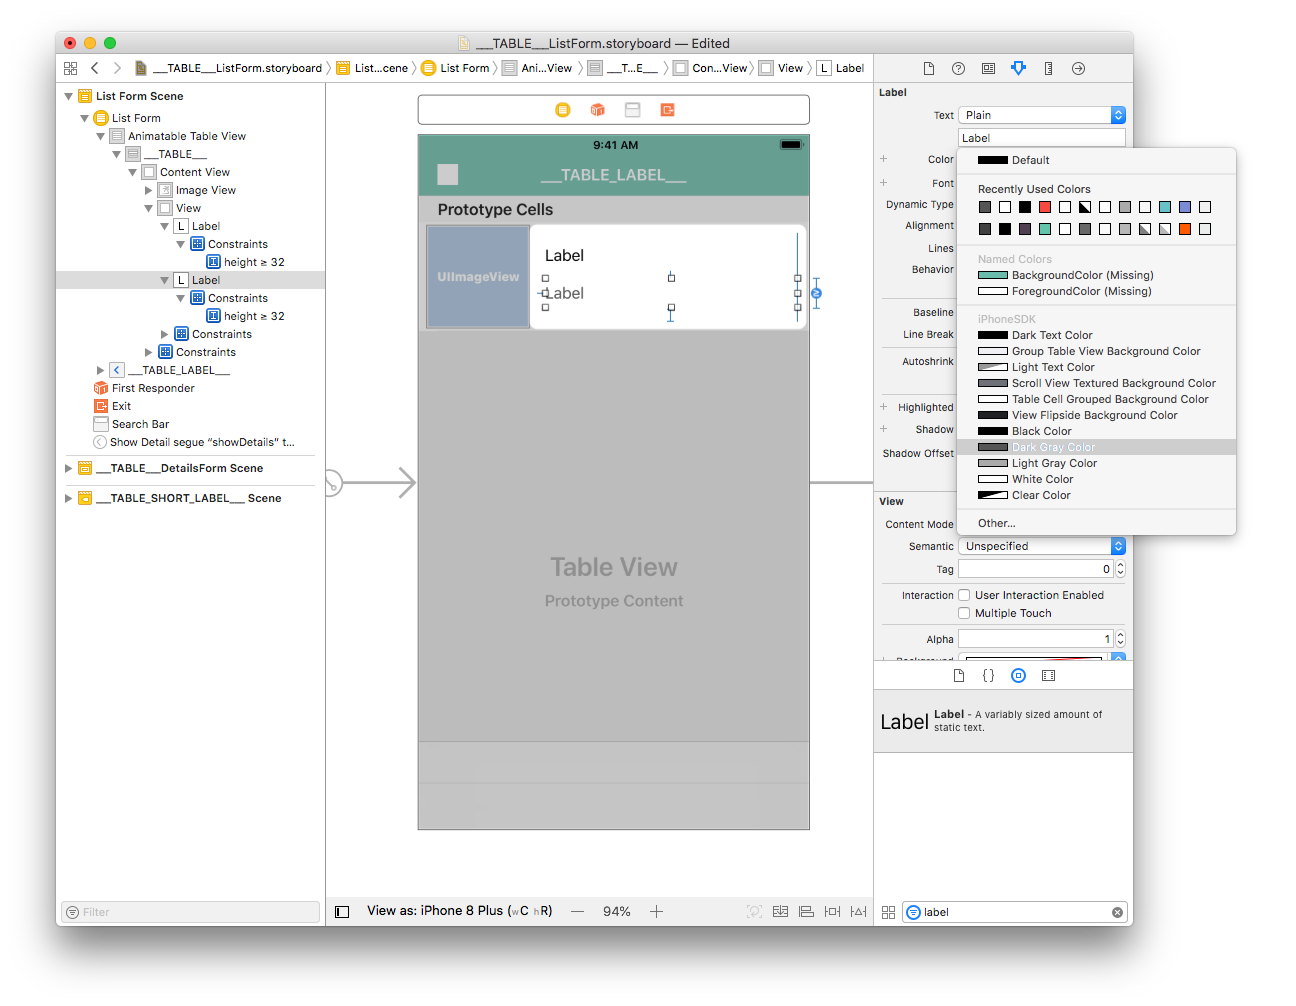
表示される色見本の中からBackground Colorを選択すれば,アプリの支配的なカラーに設定することができます。
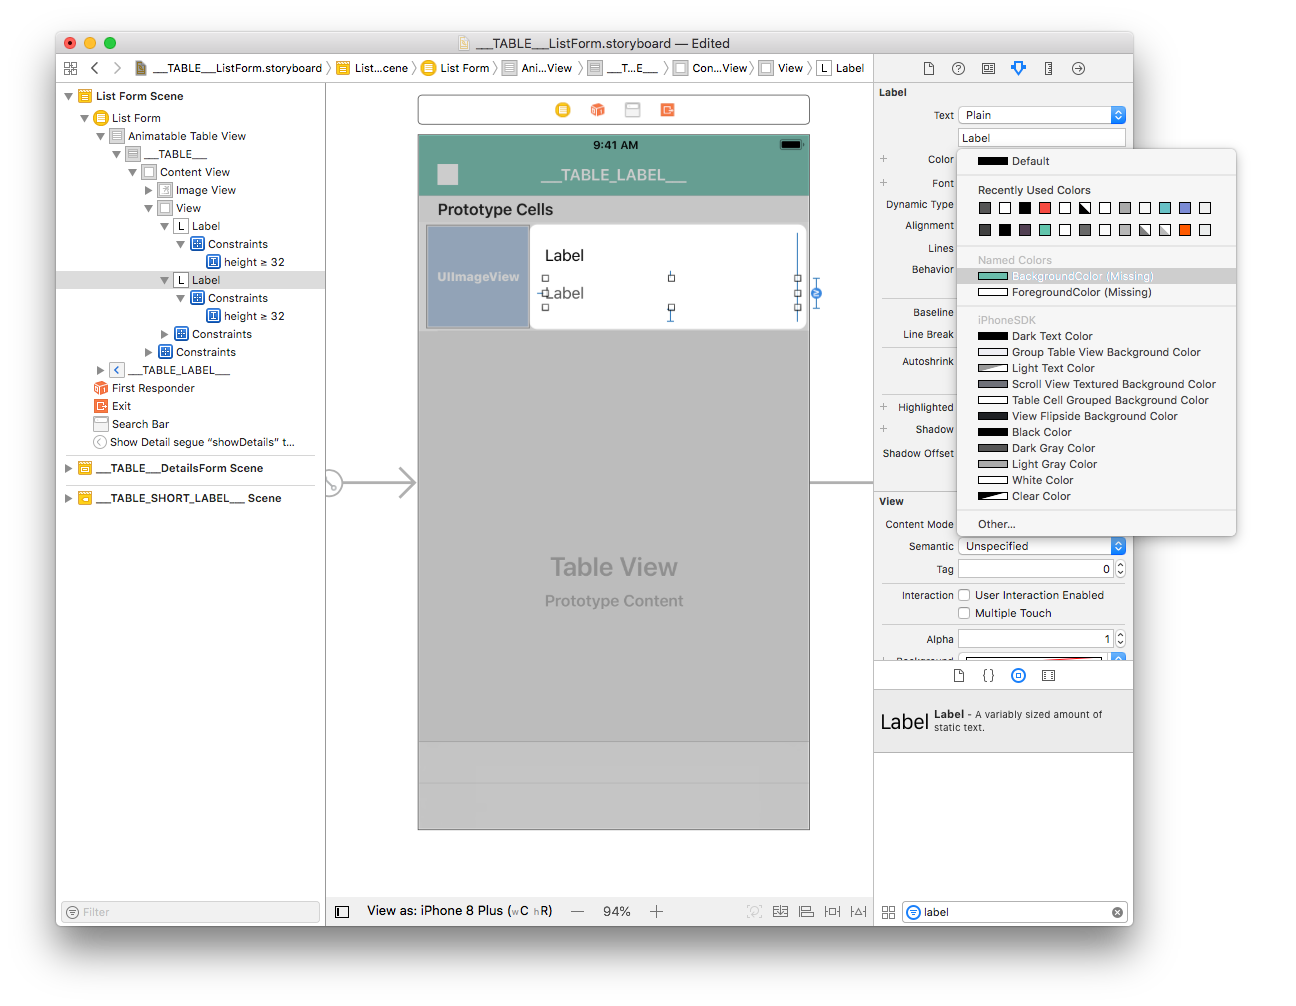
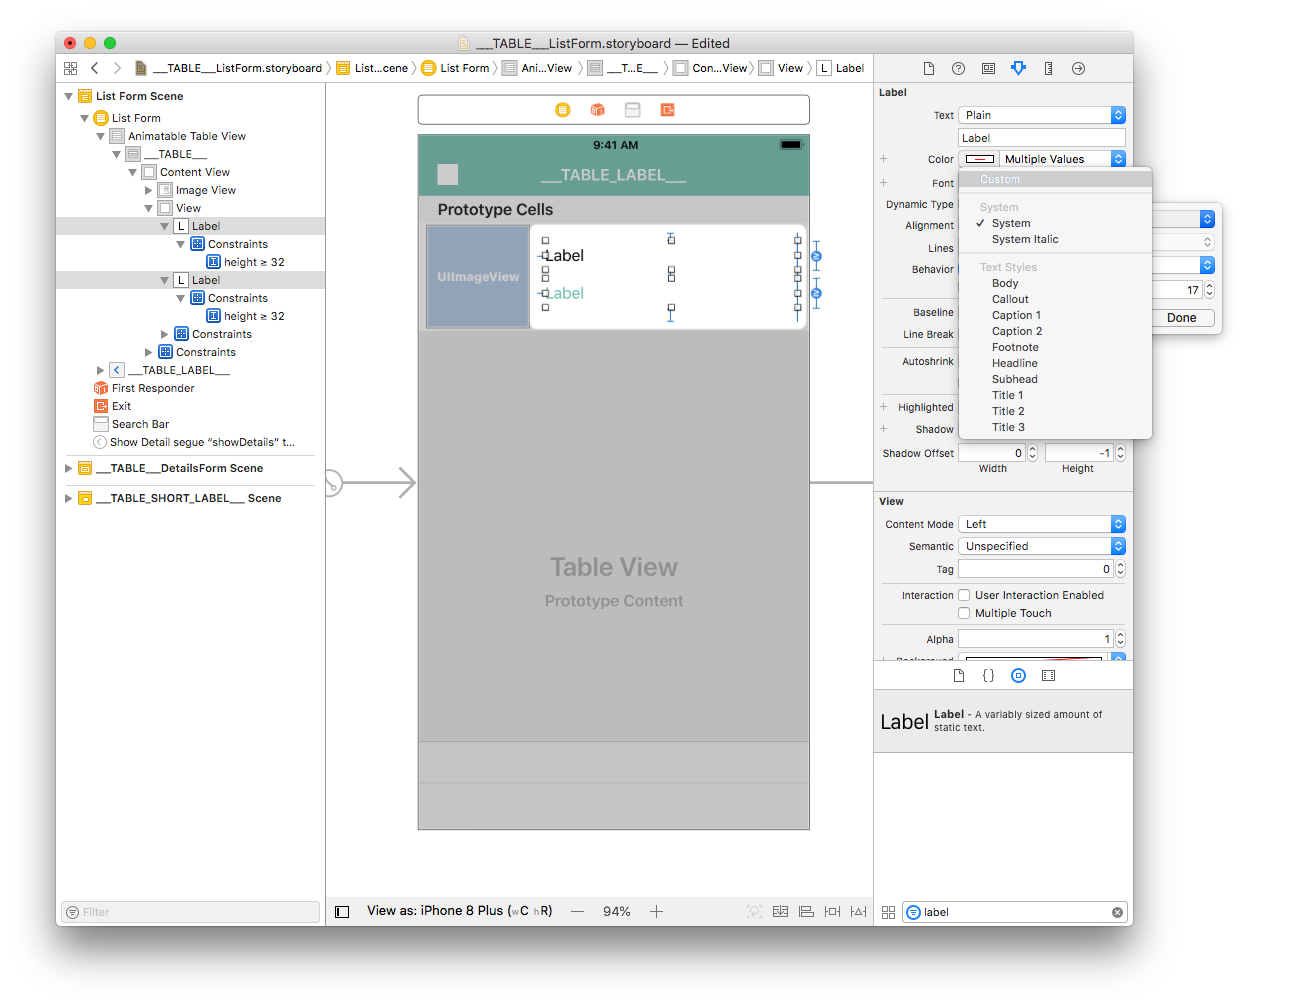
同じ要領で,フォントもカスタマイズすることができます。 Select both labels and select Font > Custom > Helvetica Neue:
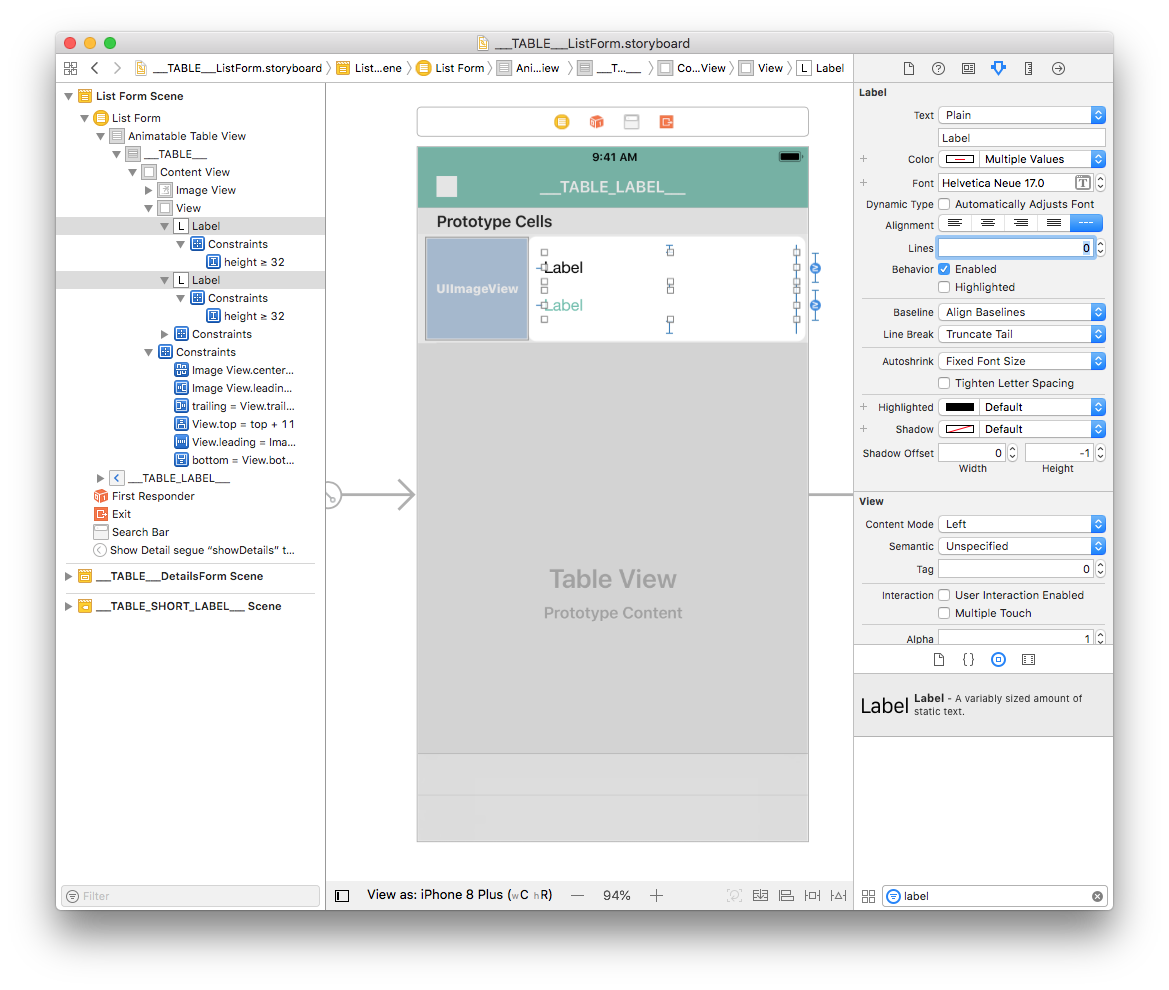
To complete the customizations, select both labels and enter 0 for Lines in the inspector window. これでラベルに表示できる行数が無制限となります。
注記
The provided storyboard is optimized to have a variable cell height depending on the contents of each cell.
セルにデータが表示されるようにする
Image View
Select your Image View and go to Identity inspector > User Defined Runtime Attributes. Click the + button to add a row.
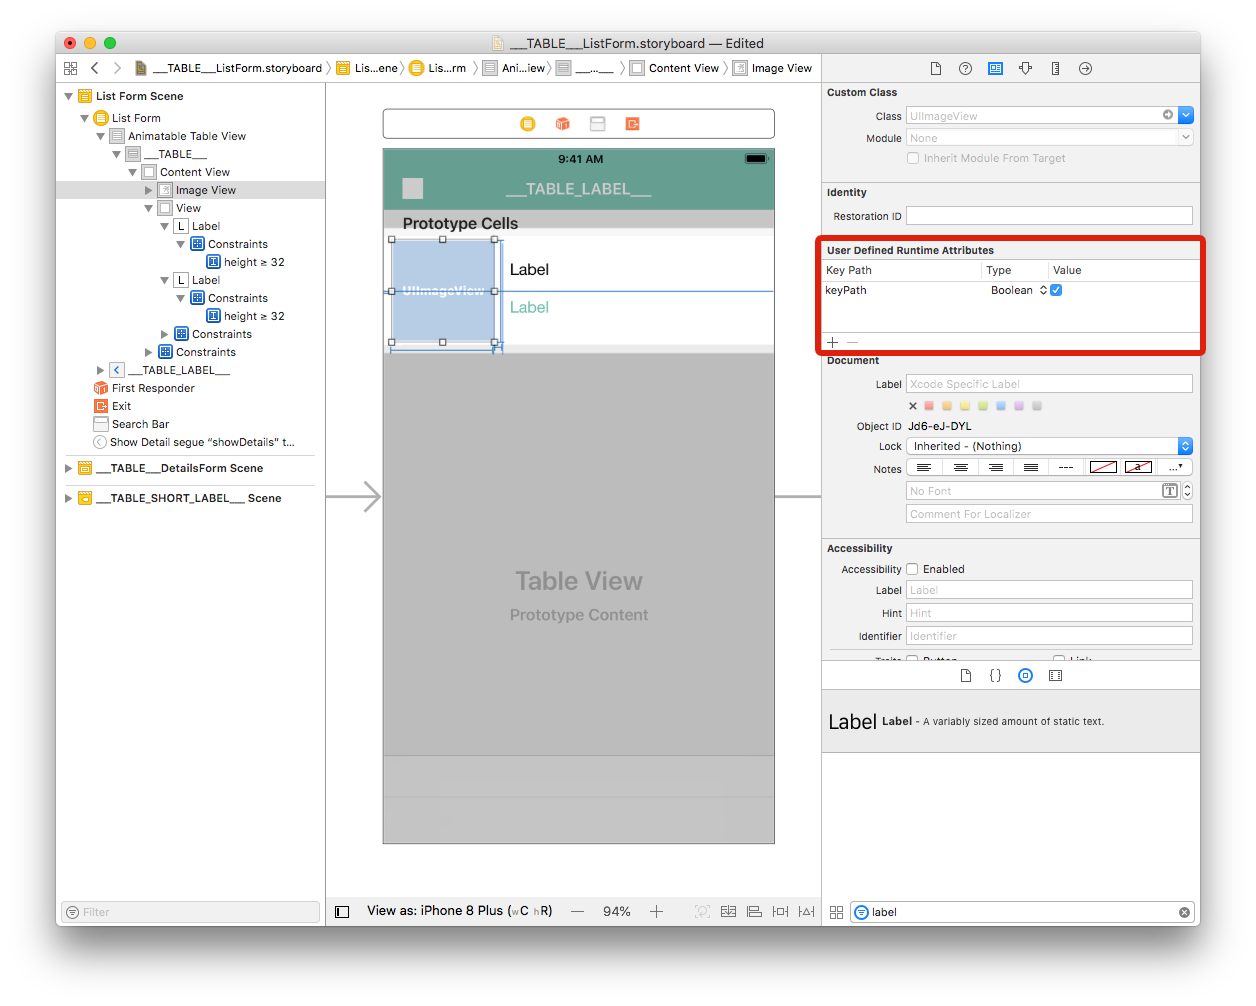
Key Path: Begin with bindTo to activate binding on the component. Enter
bindTo.record.___FIELD_1___Type: Always
StringValue: The attribute name. Enter
___FIELD_1_BINDING_TYPE___
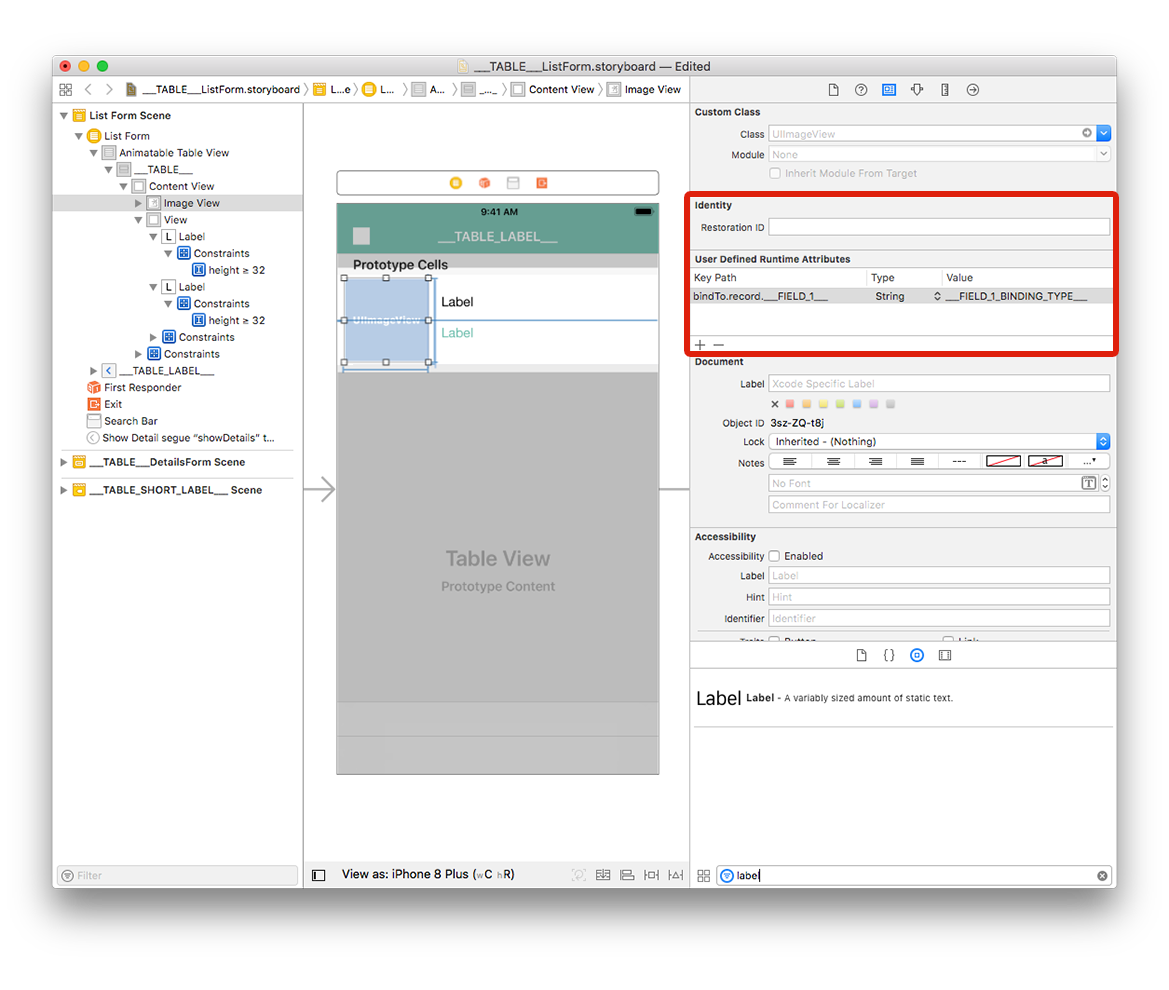
ラベル
Select the first label and add a row in the Defined Runtime Attributes:
Key Path:
bindTo.record.___FIELD_2___Type:
StringValue:
___FIELD_2_BINDING_TYPE___
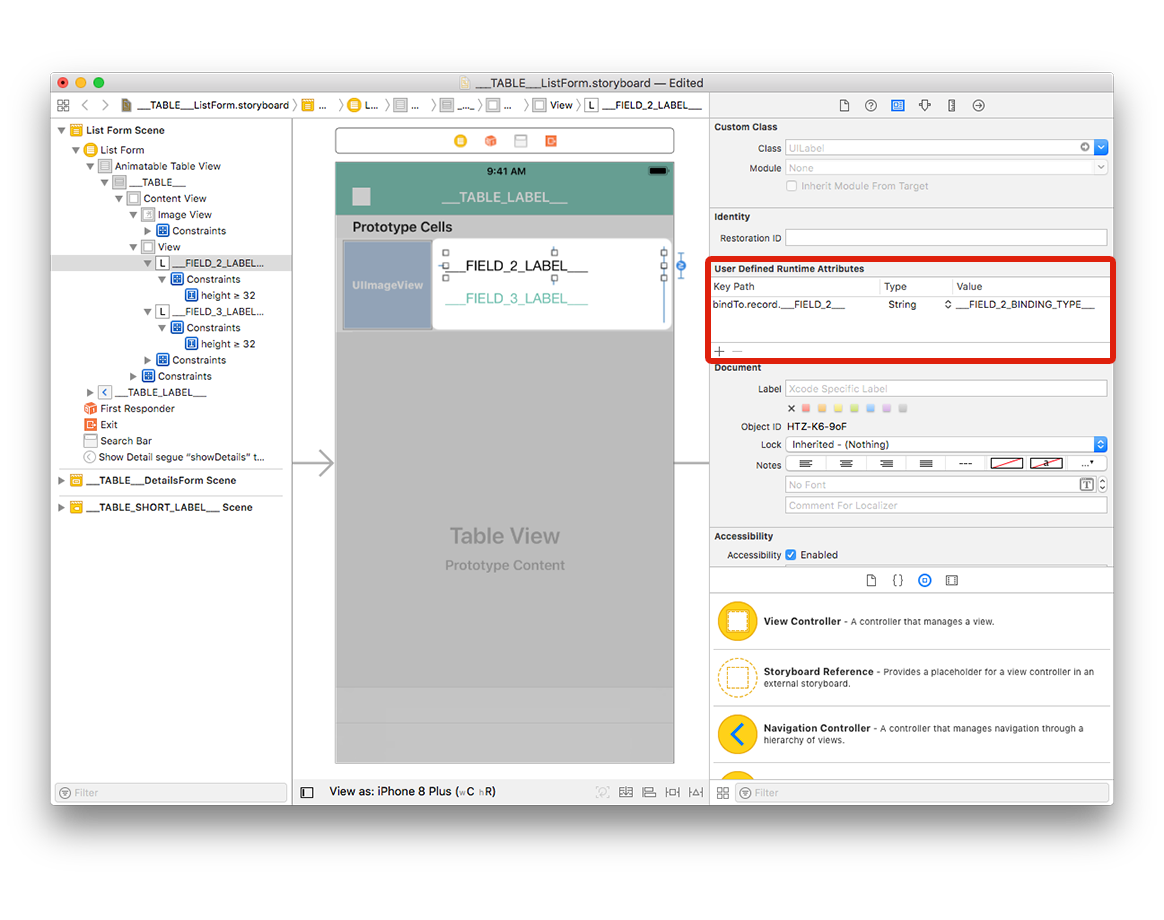
Select the second label and add a row in the Defined Runtime Attributes:
Key Path:
bindTo.record.___FIELD_3___Type:
StringValue:
___FIELD_3_BINDING_TYPE___
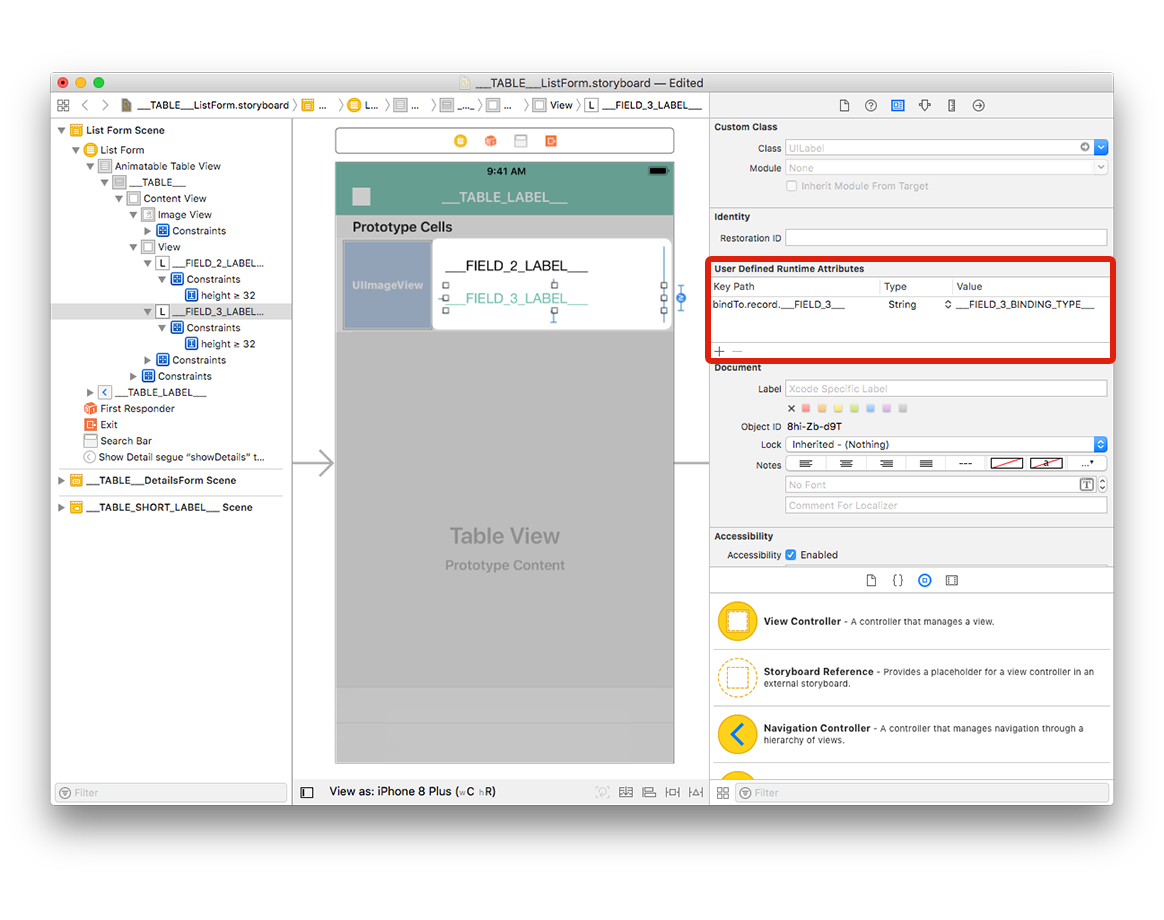
You can change the storyboard display labels to have better visibility:
- Double-click the first label to edit it and enter
___FIELD_2_LABEL___ - Double-click the second label to edit it and enter
___FIELD_3_LABEL___
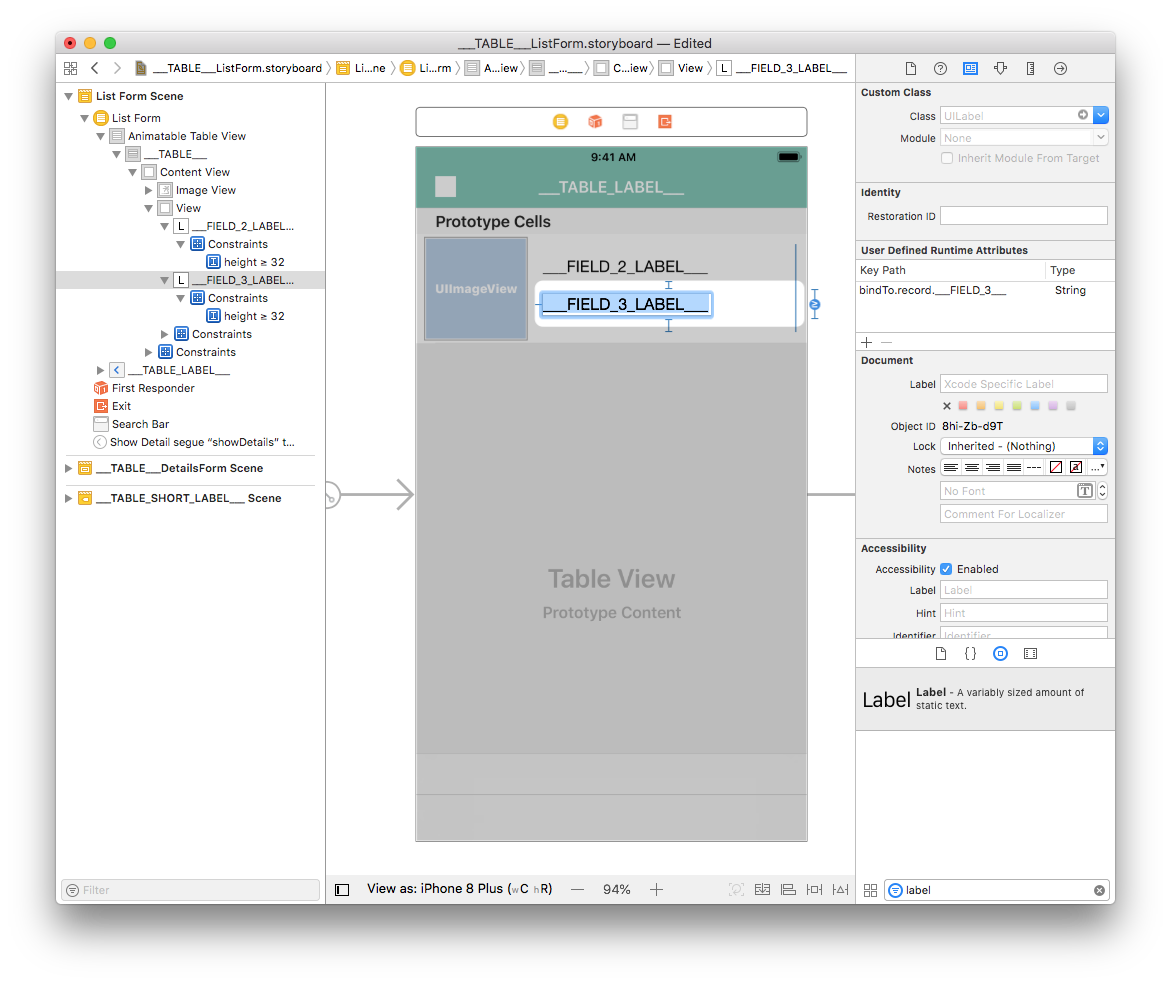
Go to your project editor, select your list form template from the Forms section, then select Build and Run.
Here is the simulator result :
さらにカスタマイズする
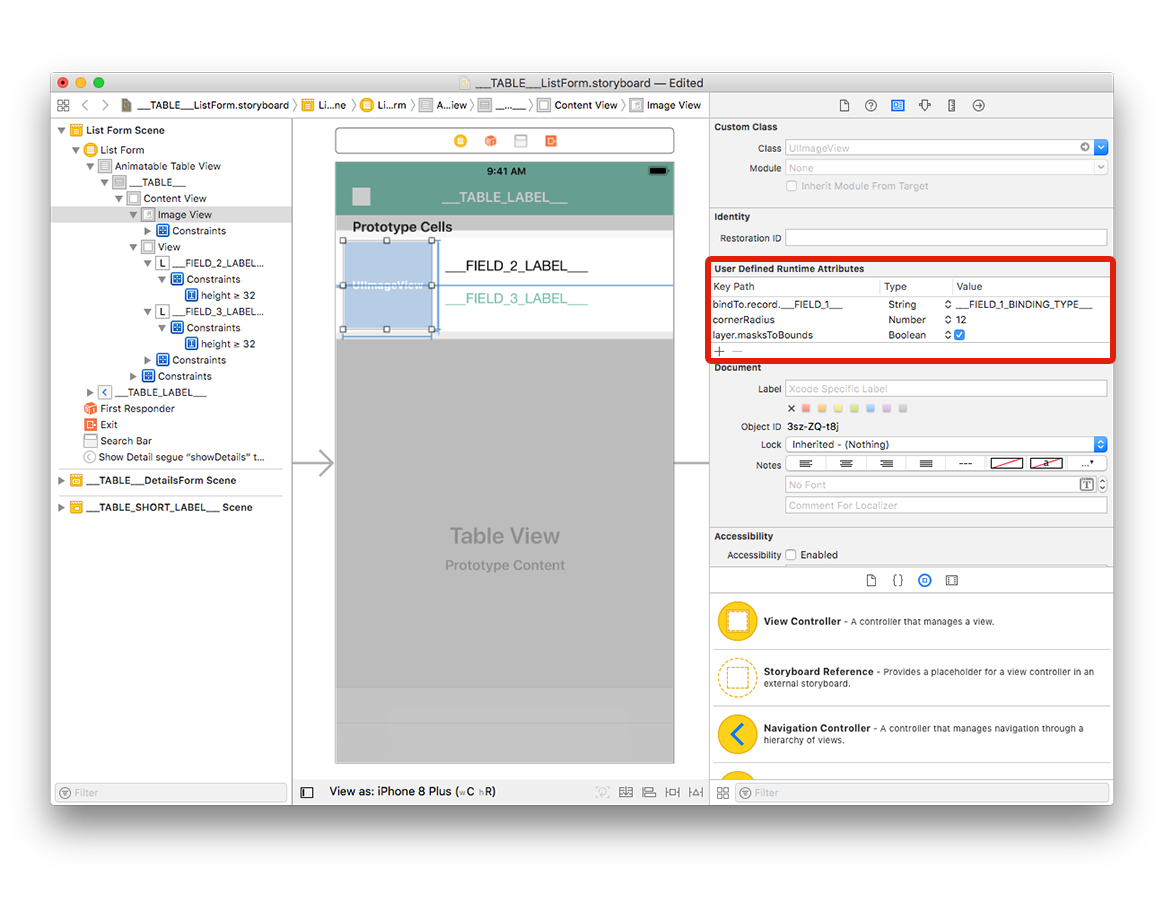
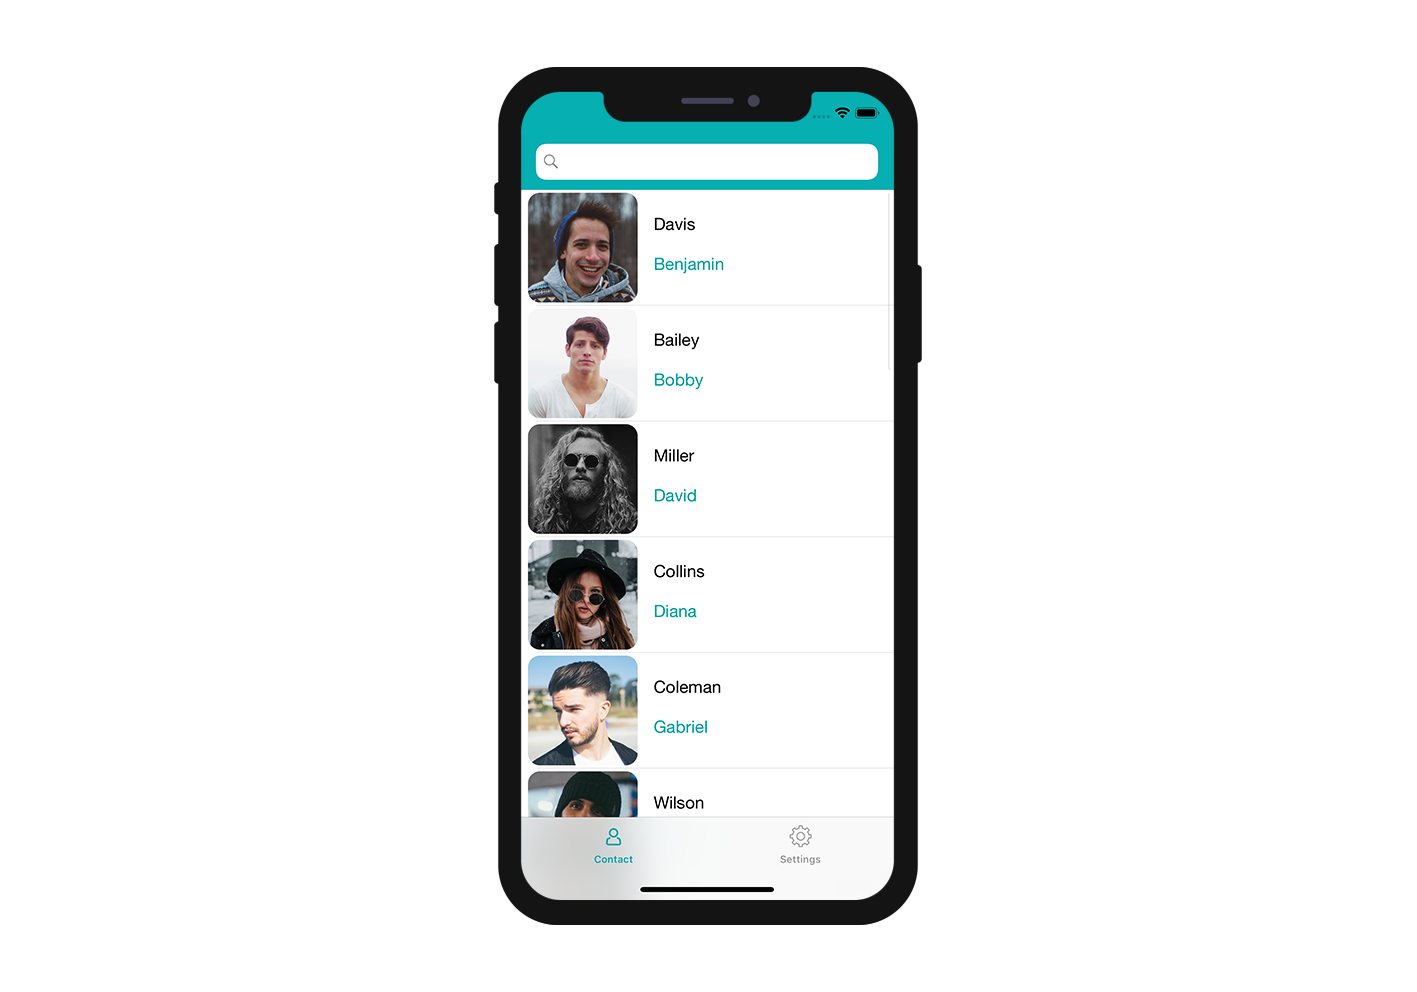
The last step is adding a corner radius to the Image View to have a better design.
Image Viewを選択し,User Defined Runtime Attributesにユーザー定義属性を入力します。
Key Path:
cornerRadiusType:
NumberValue:
12
その他
Key Path:
layer.masksToBoundsType:
BooleanValue: Check the box
これでカスタムテンプレートがプロジェクトエディターで使用できるようになりました!
これからどうする?
In this tutorial, we've covered the basics for creating list form templates. You are now able to create simple templates on your own using the Starter Project ressources. しかし,知るべきことは,これだけではありません! In the next tutorial, you’ll learn how to build detail form templates! Click on Final Project below to download the completed template list folder.
